Removing a Volume from a VM
When a volume is no longer needed, you can remove it from the VM to free up resources.
Keep in mind that removing a volume will delete all data on that volume, so make sure to back up any important data before removing a volume.
WARNING: If you did not unmount the volume and update the fstab file before removing the volume, the VM may not boot up properly after the volume is removed.
To remove a volume from a VM you will first need to make sure the volume is unmounted and is no longer being used by the VM.
The following commands can be used to unmount the volume and remove it from the fstab file:
# Unmount the volume
sudo umount /data
# Remove the volume from /etc/fstab by removing the line that mounts the volume
sudo nano /etc/fstab # Remove the line that references the volume
After the volume has been unmounted, you can remove it from the VM:
Navigate to "Virtual Machines" in the left-hand menu and click
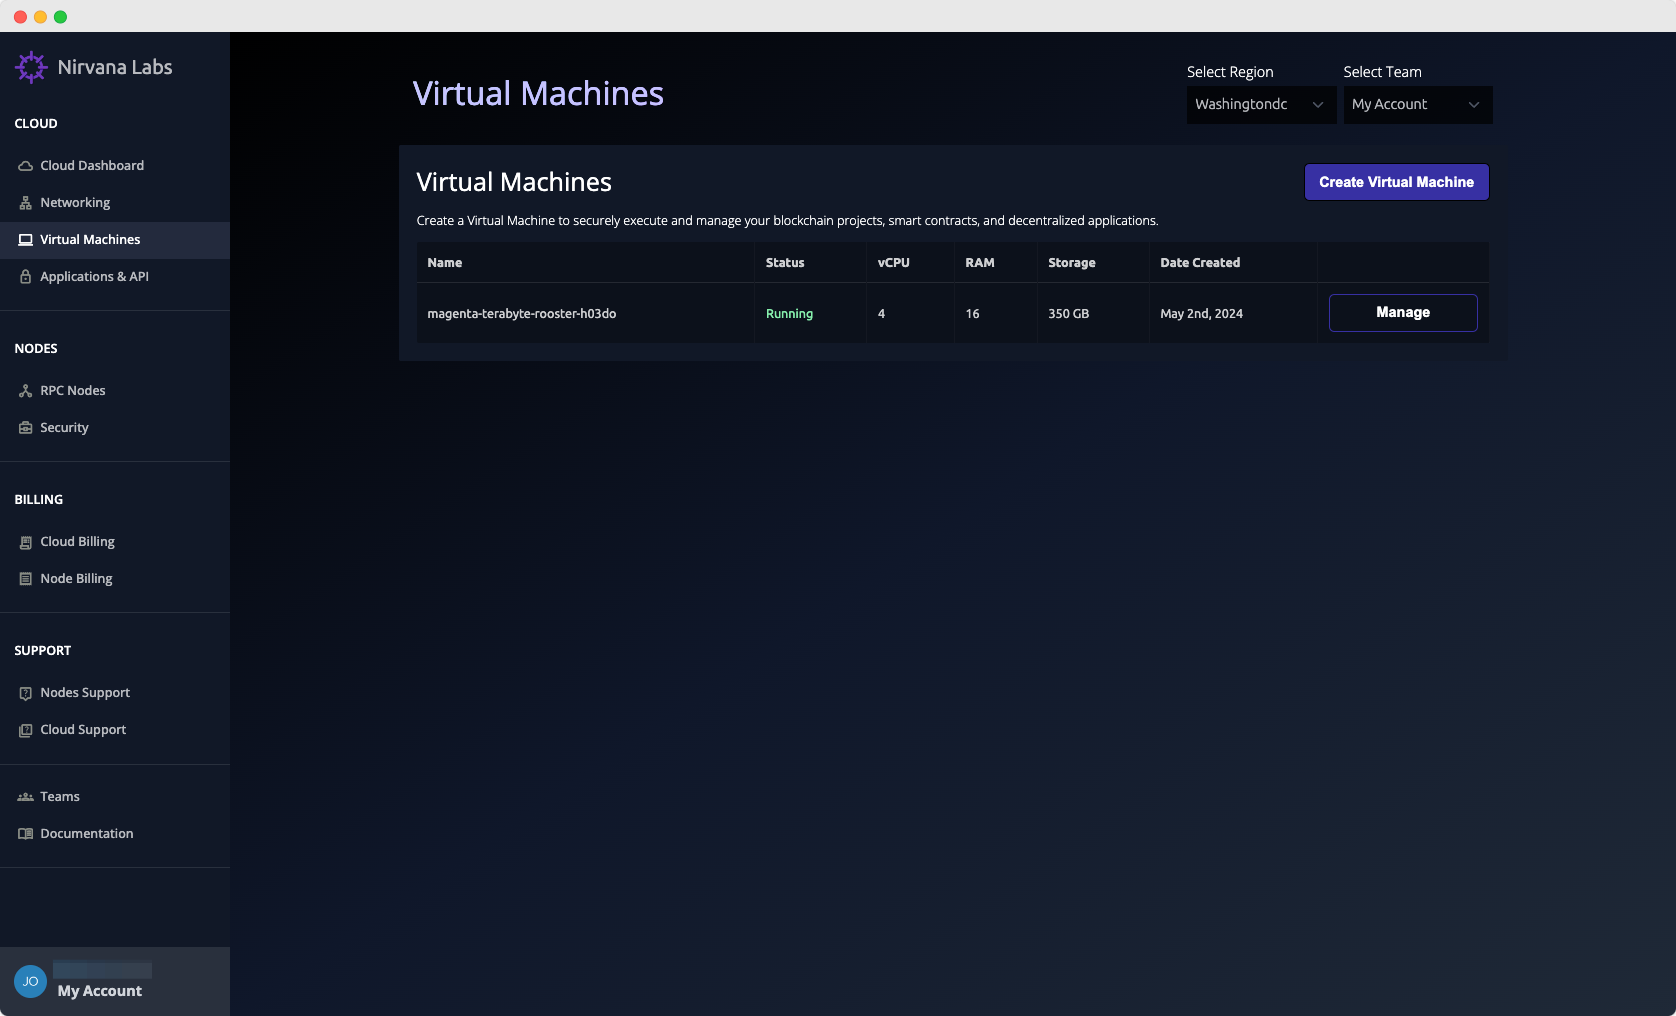
Find the VM you want to add a volume to and click "Manage".
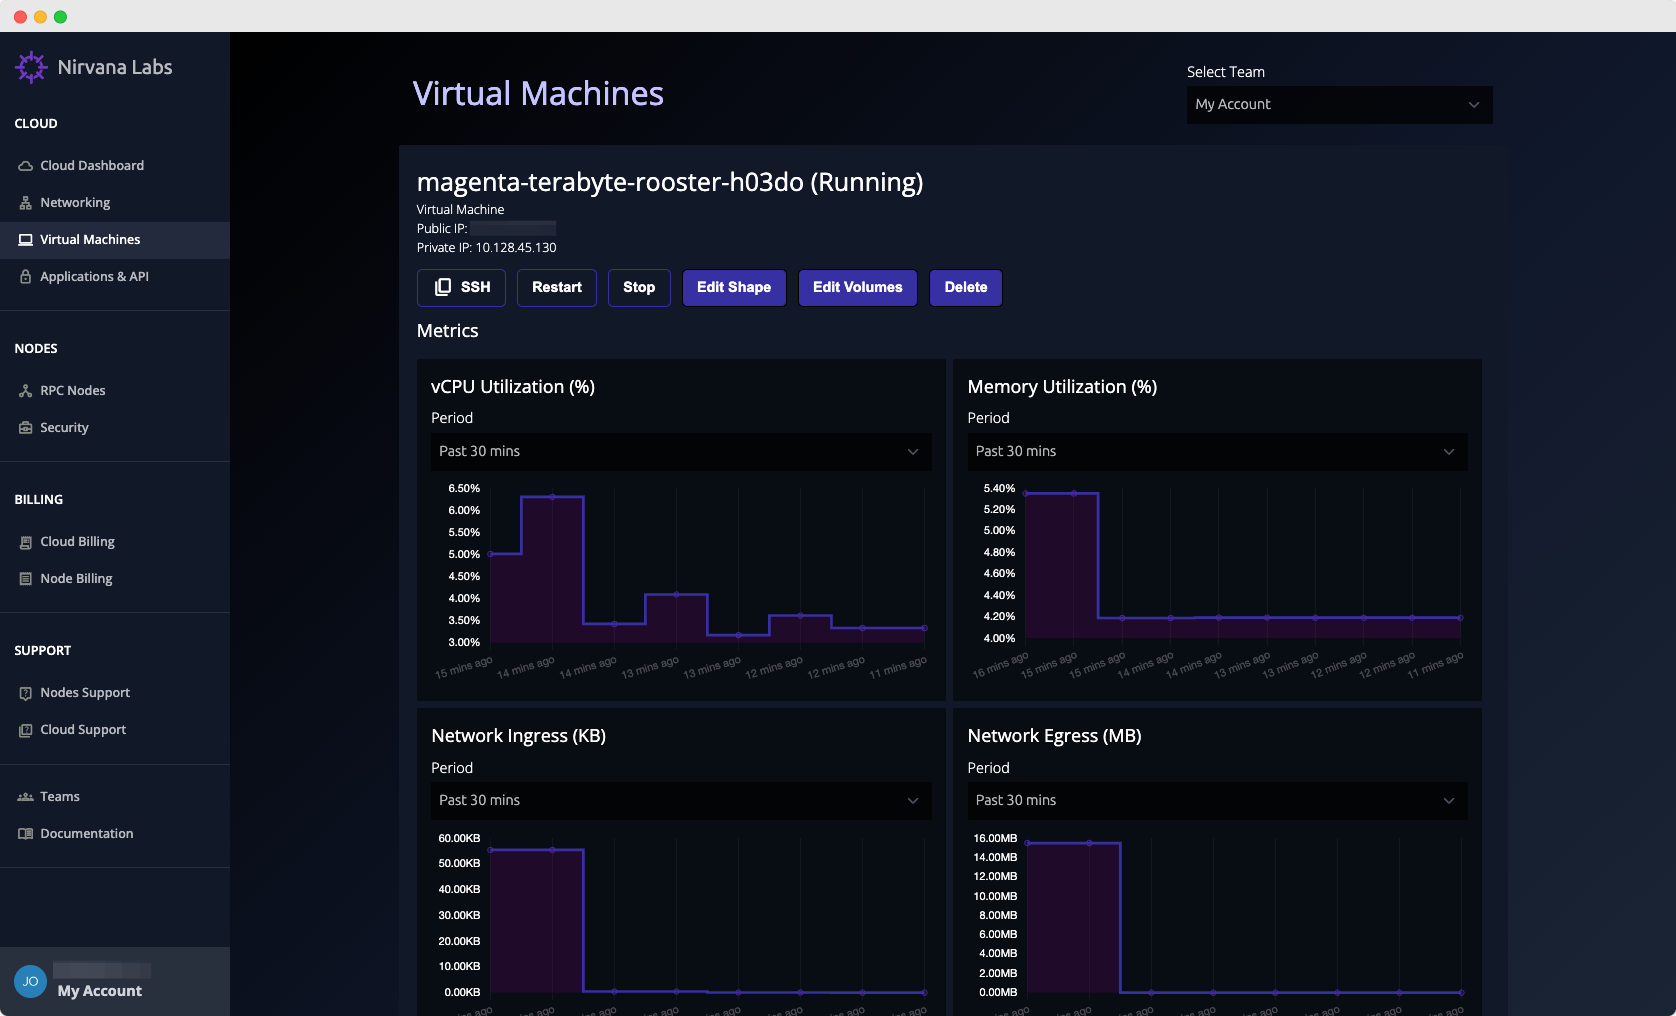
Click on the "Edit Volumes" button.
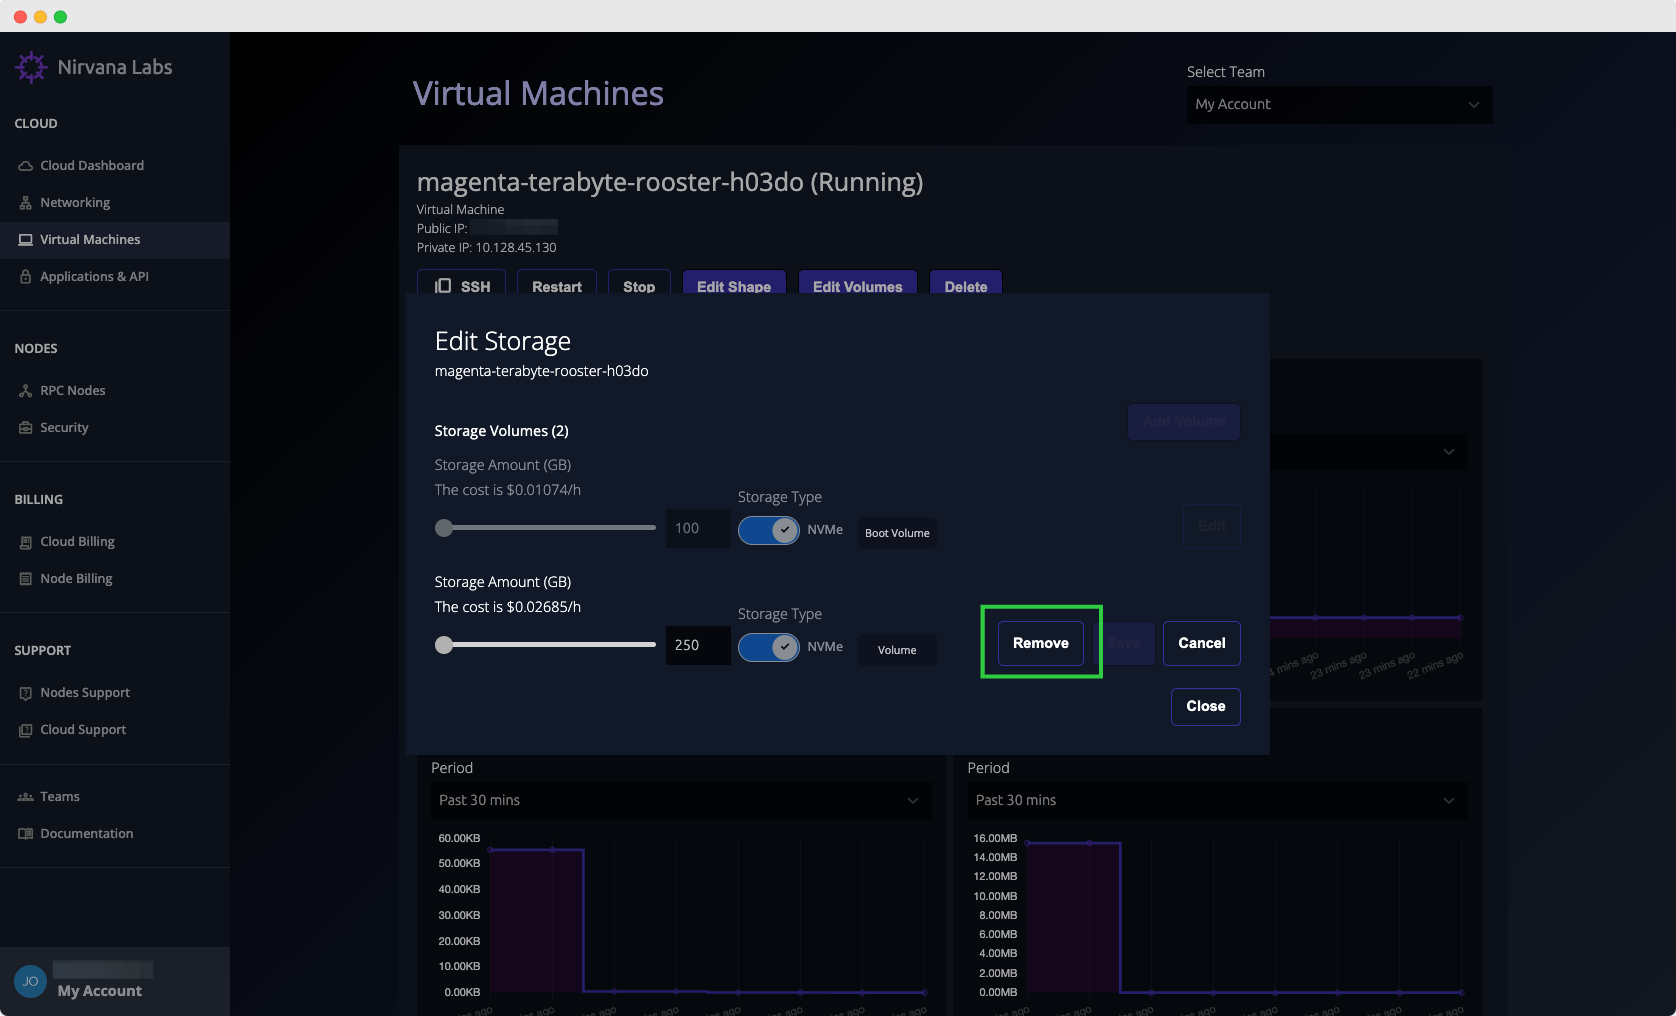
Click on the "Edit" button next to the volume you want to remove. Next click "Remove".
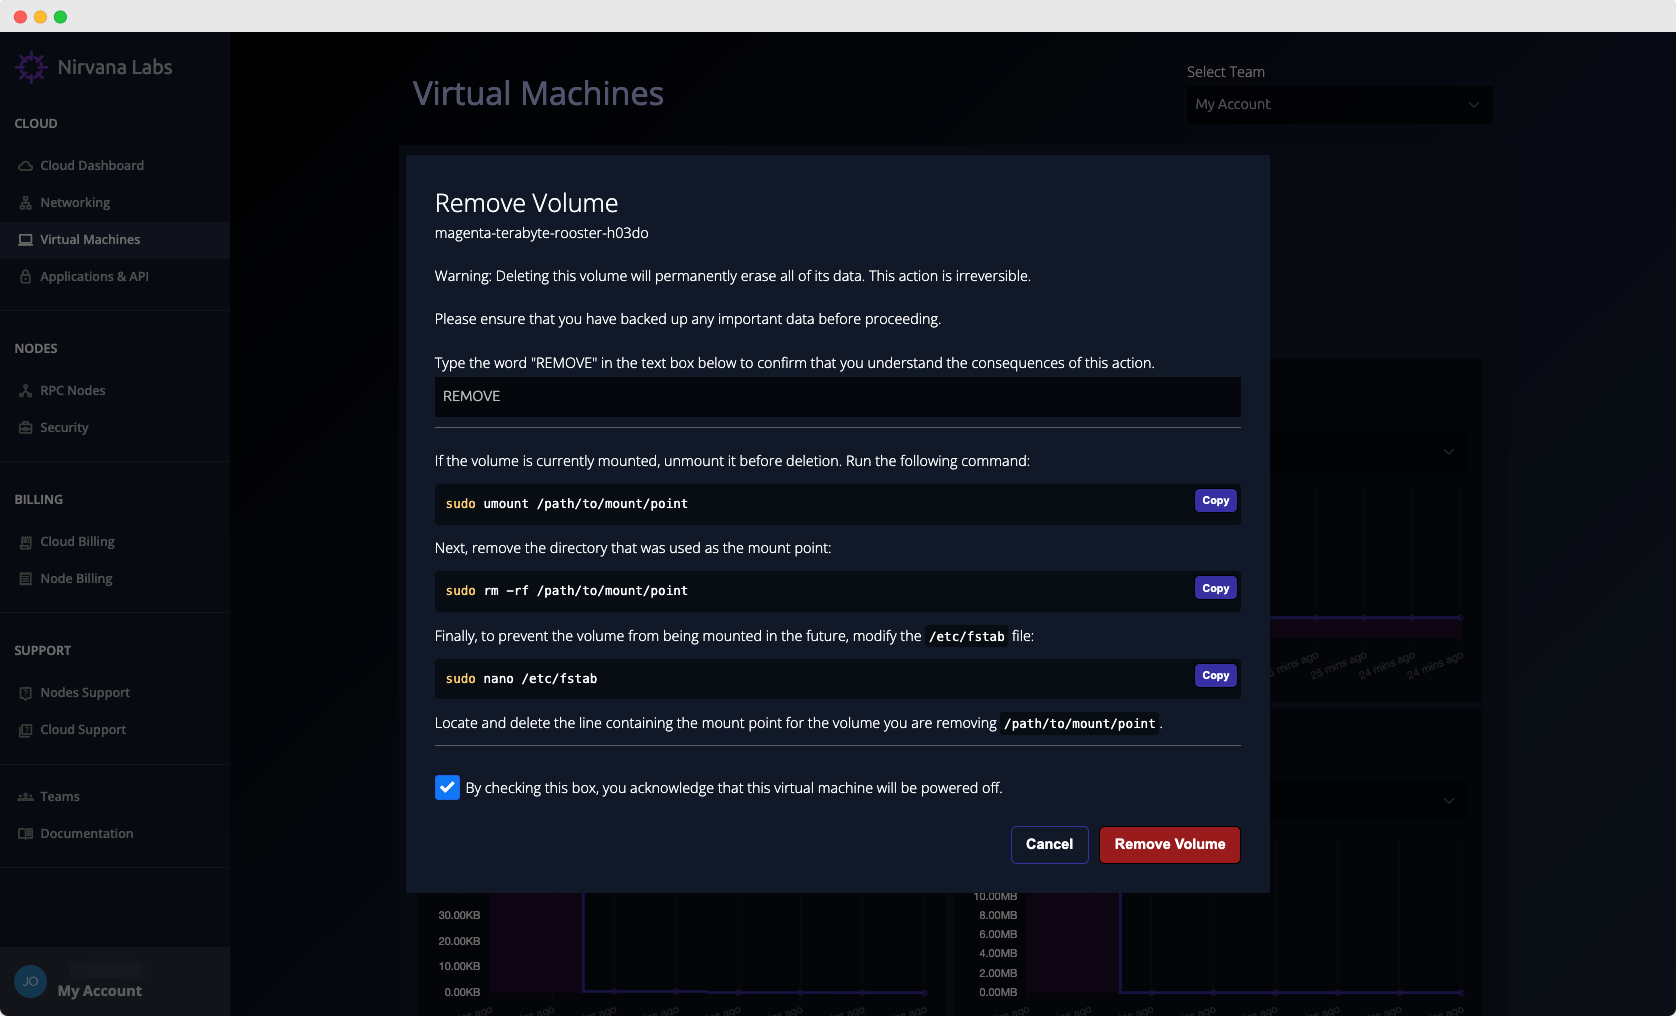
As previously mentioned, to remove a volume from a VM you will first need to make sure the volume is unmounted and is no longer being used by the VM.
We have provided some commands that need to run on the VM before removal.
After you have run the commands on your VM, type the word "REMOVE" in the text box.
Your VM will be stopped while the volume is being removed, and will be started again once the volume has been removed.
Check the box that ensures that you have read that your VM will be powered off and click "Remove Volume".
Once the volume is removed, you will be notified and will be taken back to the VM detail page.
Updated 4 months ago