Getting Started
In this step-by-step guide, you’ll learn how to set up Nirvana Connect to create a secure, private connection between your Nirvana VPC and your AWS (or any other cloud provider) environment.
Whether you’re logging in for the first time or configuring a production-grade private link, this guide will walk you through the entire process, from signing in, creating your first VPC, and provisioning a connection, to completing the setup on AWS.
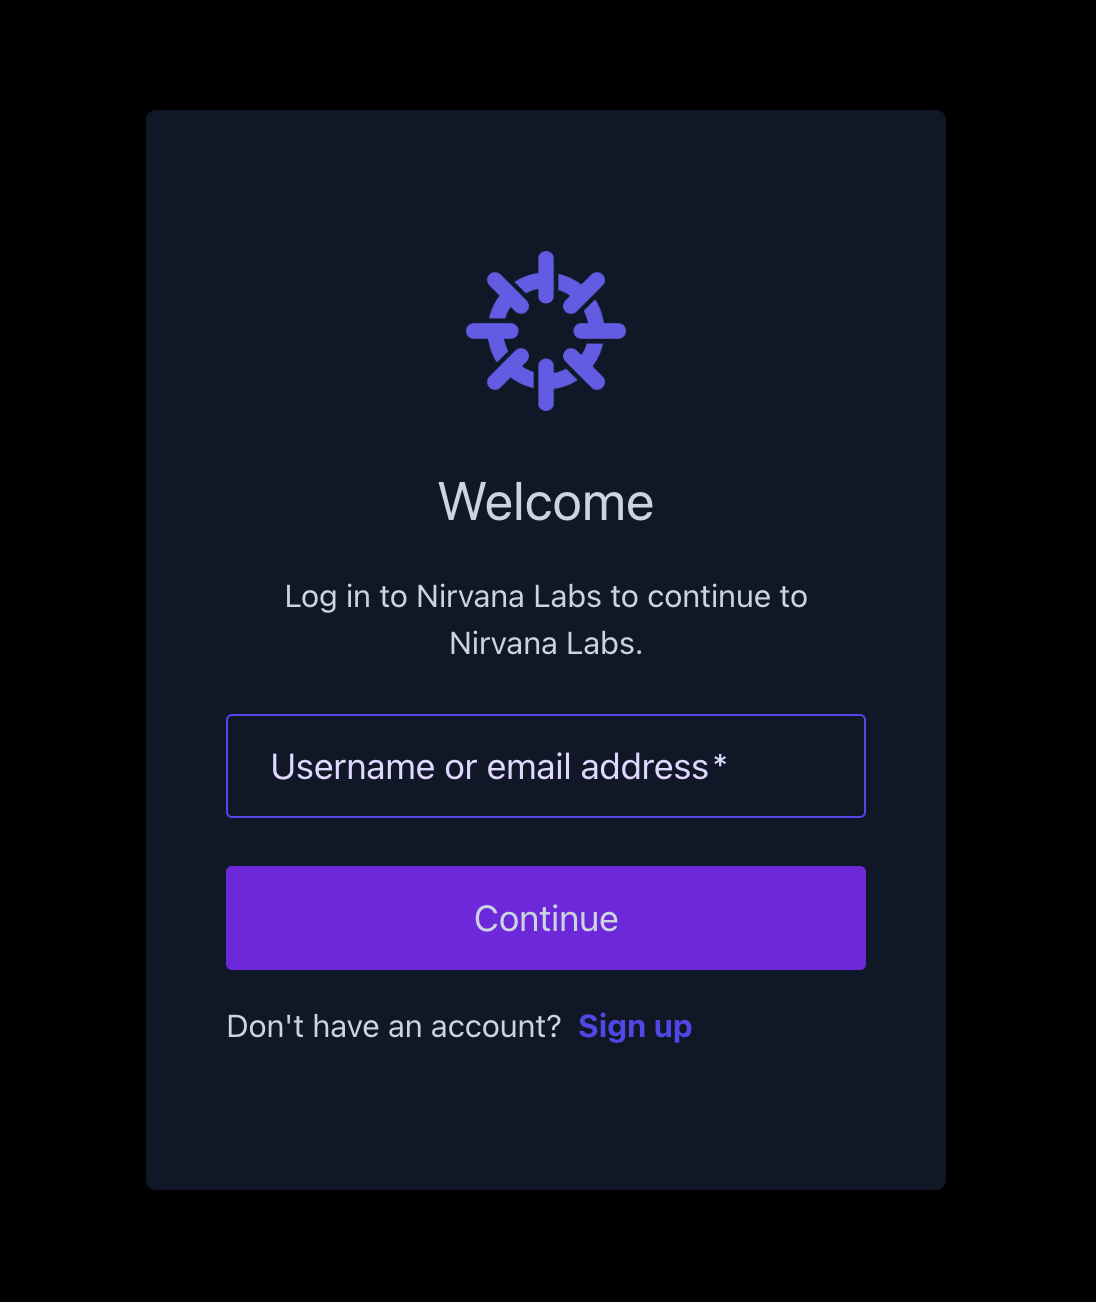
Step 0: Log in or Sign Up
Section titled “Step 0: Log in or Sign Up”- Visit dashboard.nirvanalabs.io
- Log in with your credentials or click Sign up to create a new account
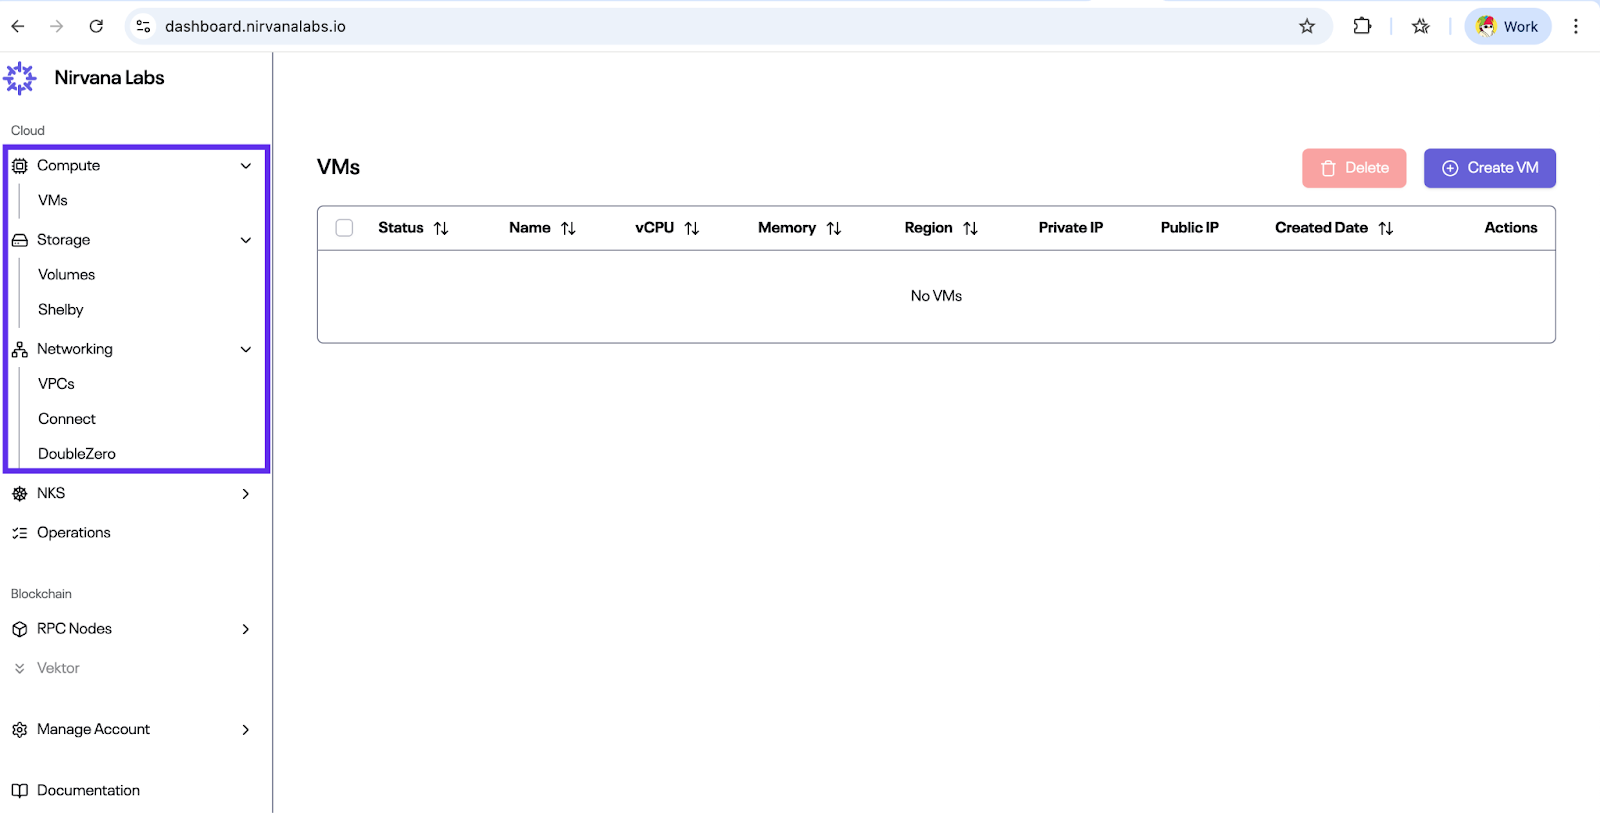
- Once logged in, click Cloud Dashboard in the sidebar to access the main control panel
You will now see the Compute, Storage, and Networking menus in the navigation panel.
Step 1: Create (or Verify) Your VPC
Section titled “Step 1: Create (or Verify) Your VPC”- Navigate to Networking → VPCs
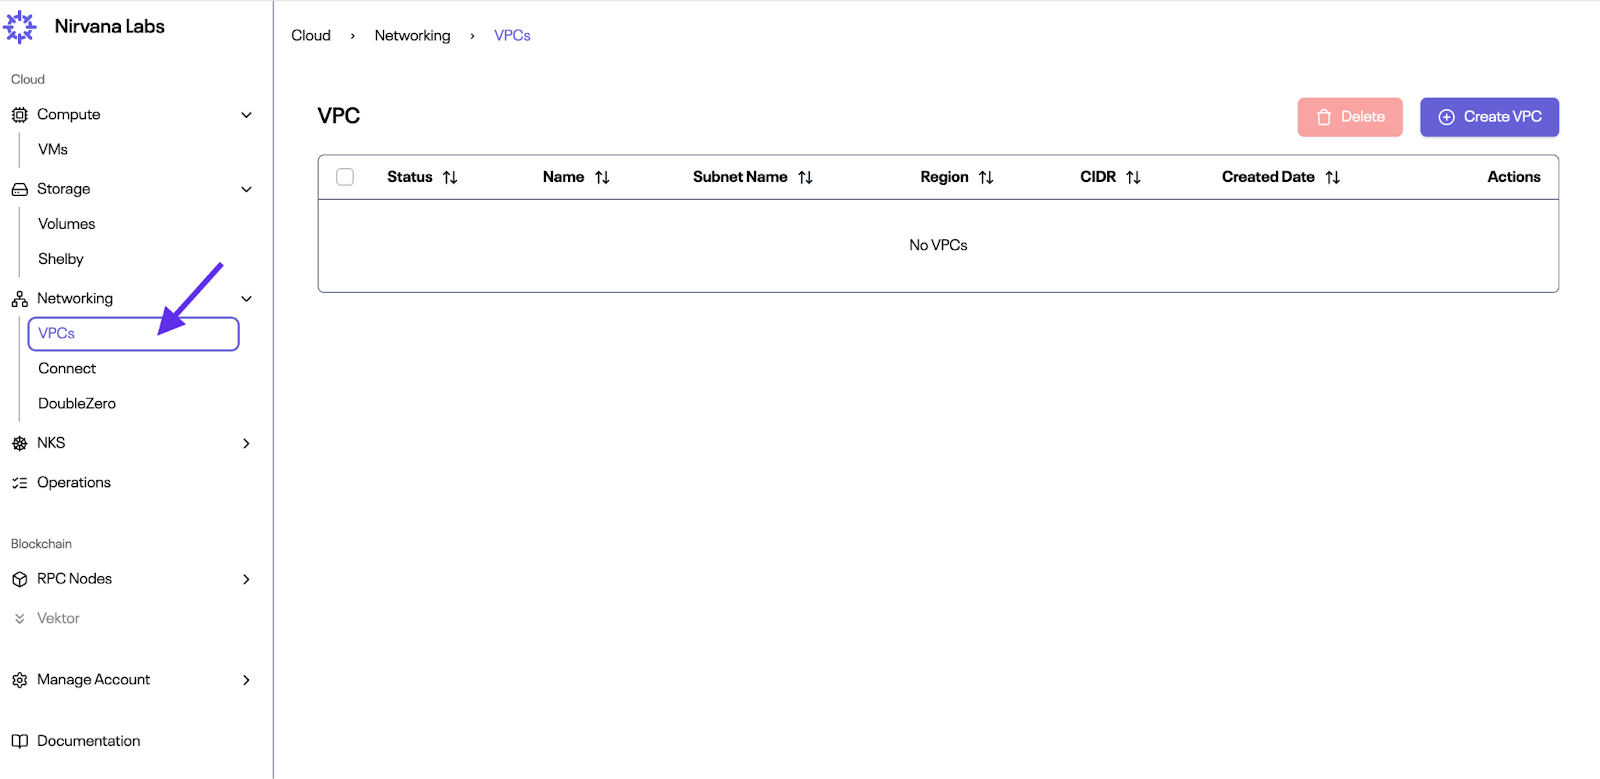
- If this is your first time, the table will be empty. Click Create VPC

- Fill in:
- Name
- Subnet Name
- Region
- (Optional) Tags
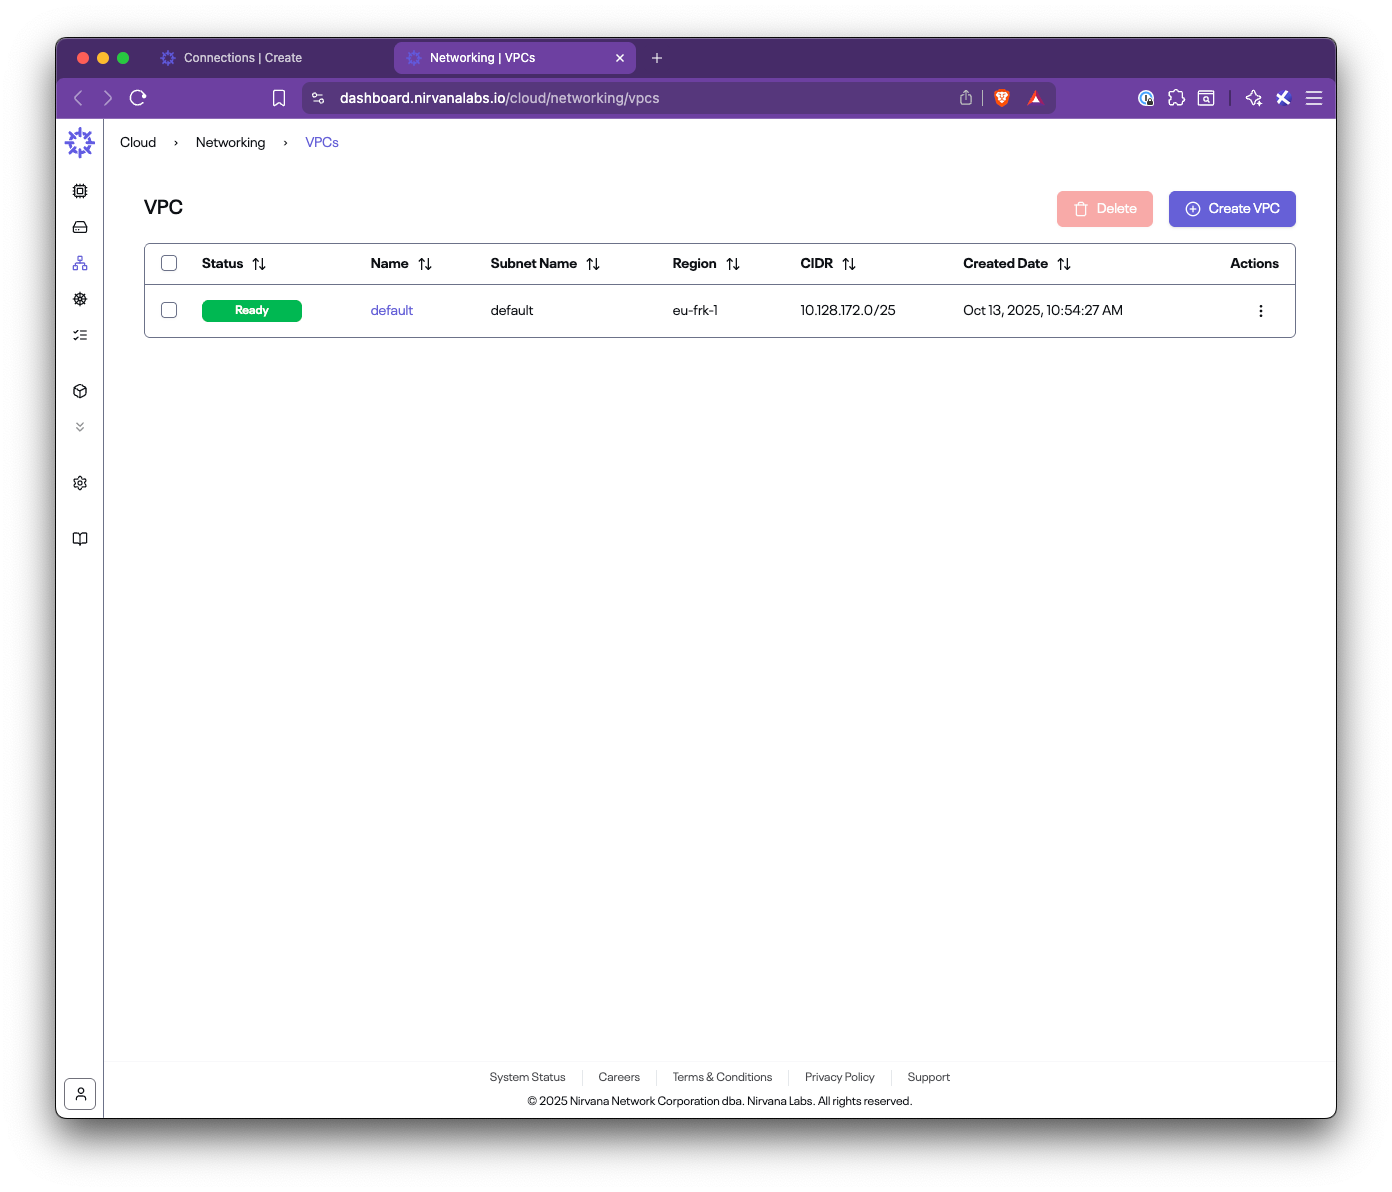
- Click Create. Once created, the VPC will appear with Status: Ready
Step 2: Create a Connection
Section titled “Step 2: Create a Connection”- Navigate to Networking → Connect → Connections
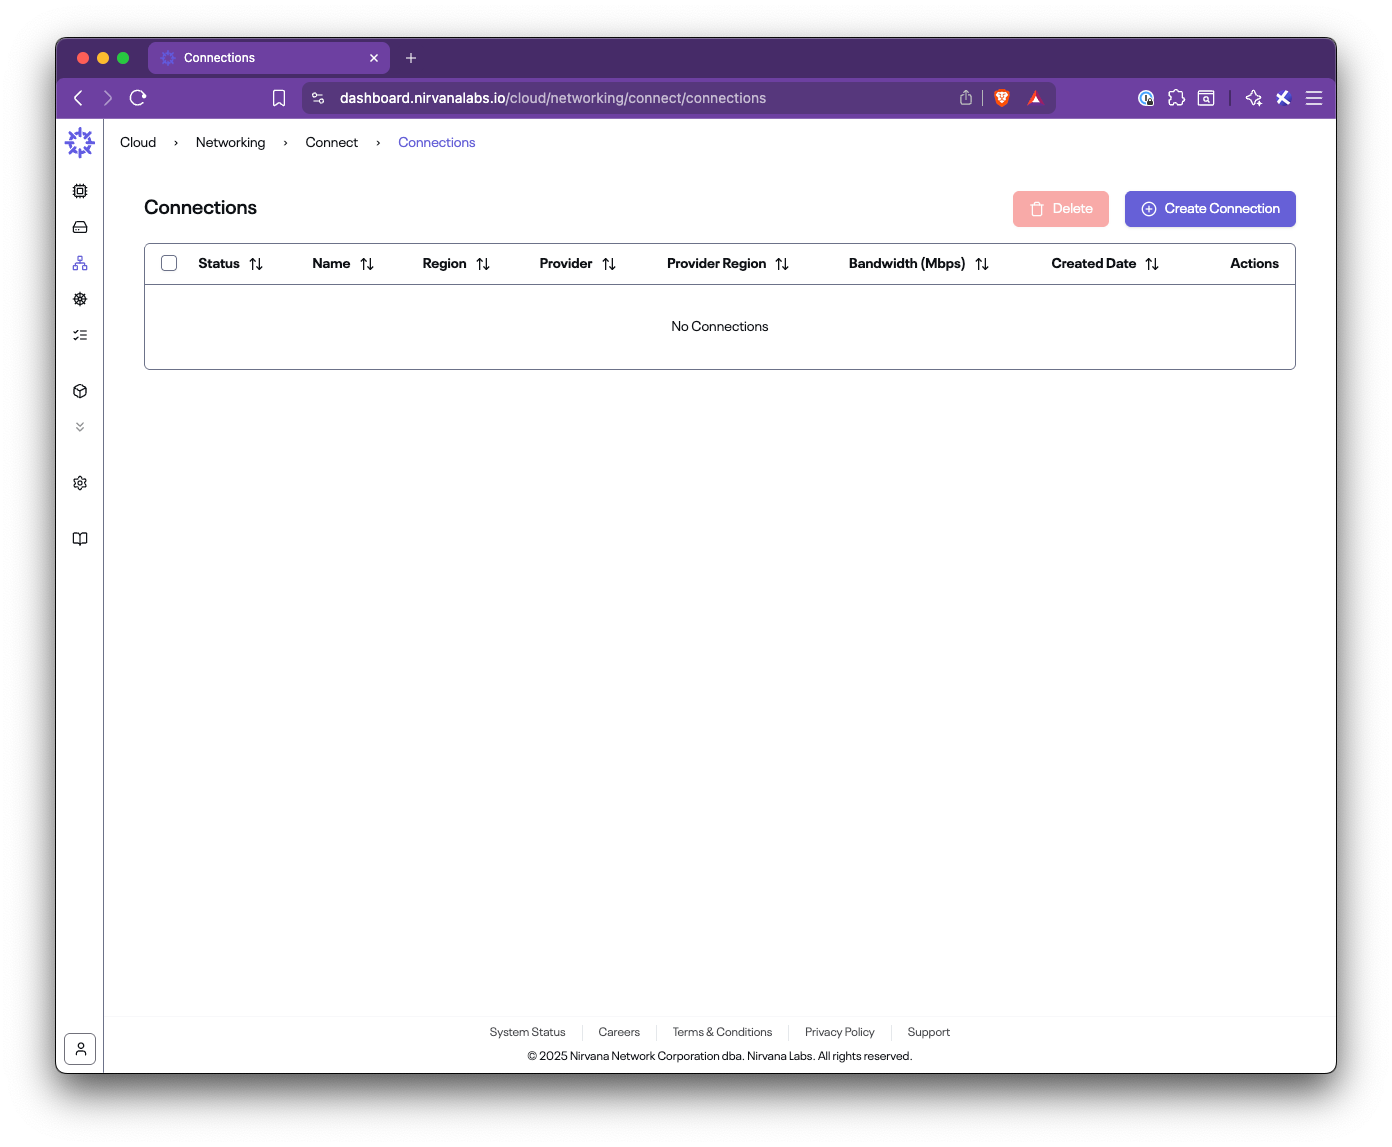
- If this is your first time, the table will be empty. Click Create Connection
- Fill out the form:
- Name: A descriptive connection name (e.g.,
aws-connection) - Region: The Nirvana region where your VPC is located (e.g.,
eu-frk-1) - Bandwidth: Choose the capacity (e.g., 50, 100, 500 Mbps)
- CIDRs: Select your Nirvana VPC CIDR
- Provider Name: AWS
- Provider CIDRs: Enter the AWS VPC CIDR or prefixes behind your TGW/VGW
- AWS Account ID: Your 12-digit AWS account ID
- AWS Region: The AWS region to connect to (e.g.,
eu-central-1) - Tags: Optional metadata
- Name: A descriptive connection name (e.g.,
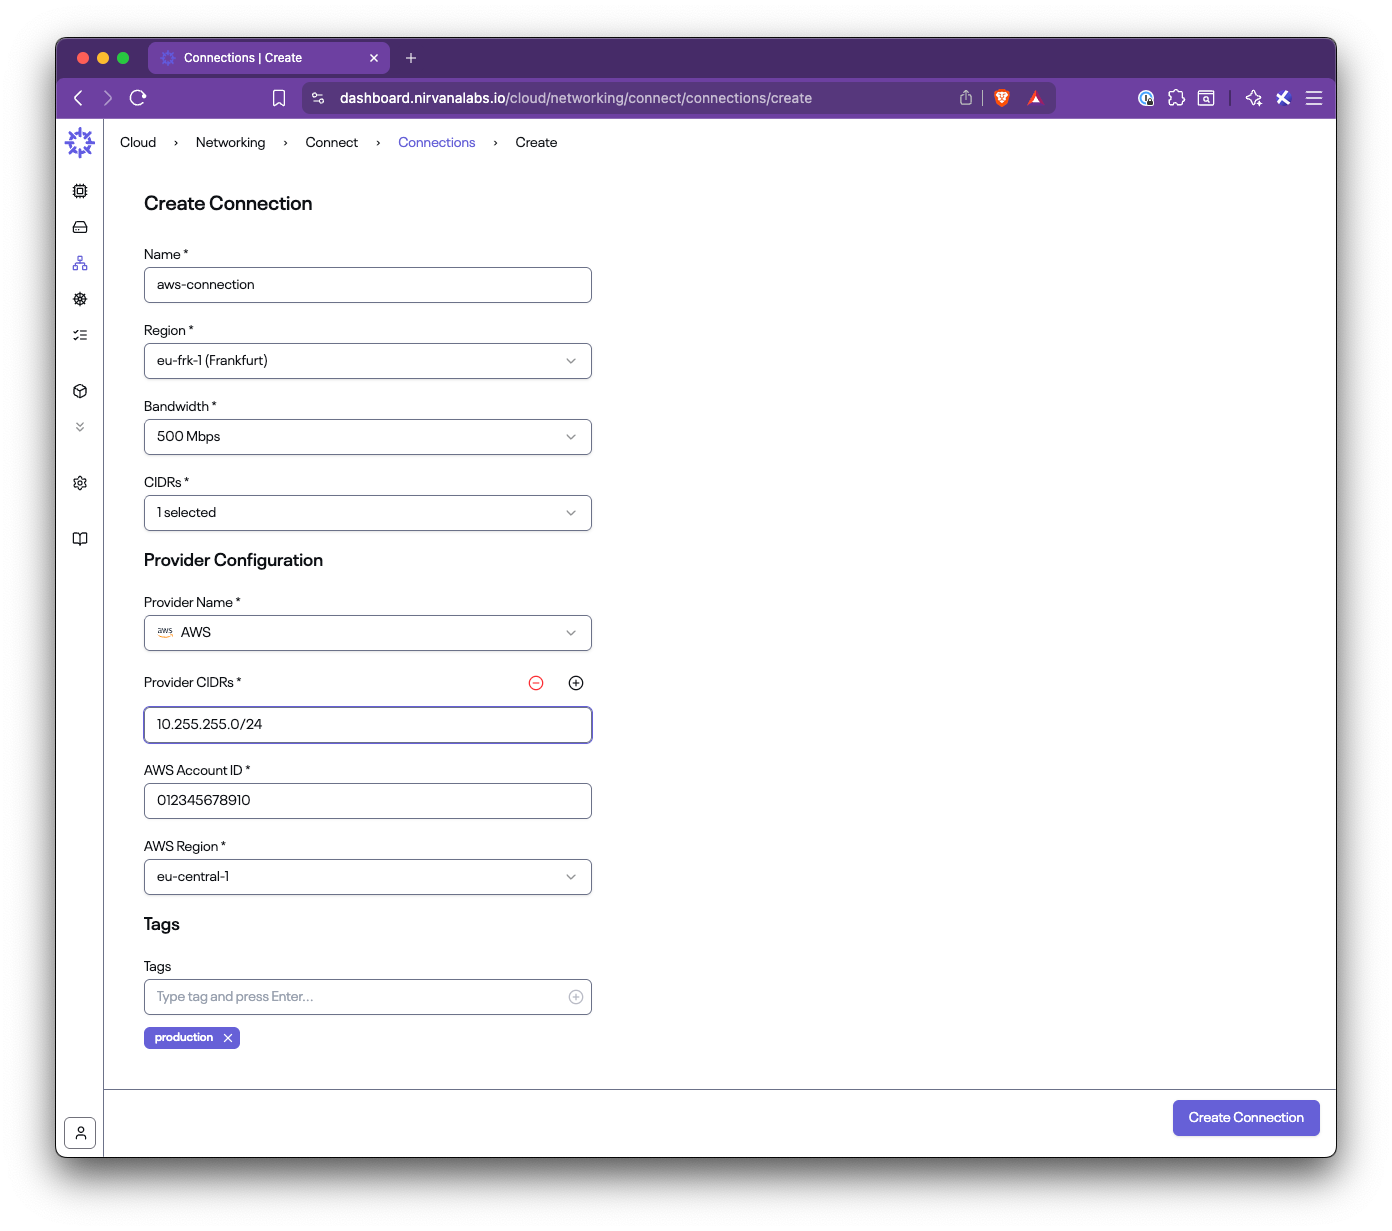
- Click Create Connection
Step 3: Check Connection Status and Parameters
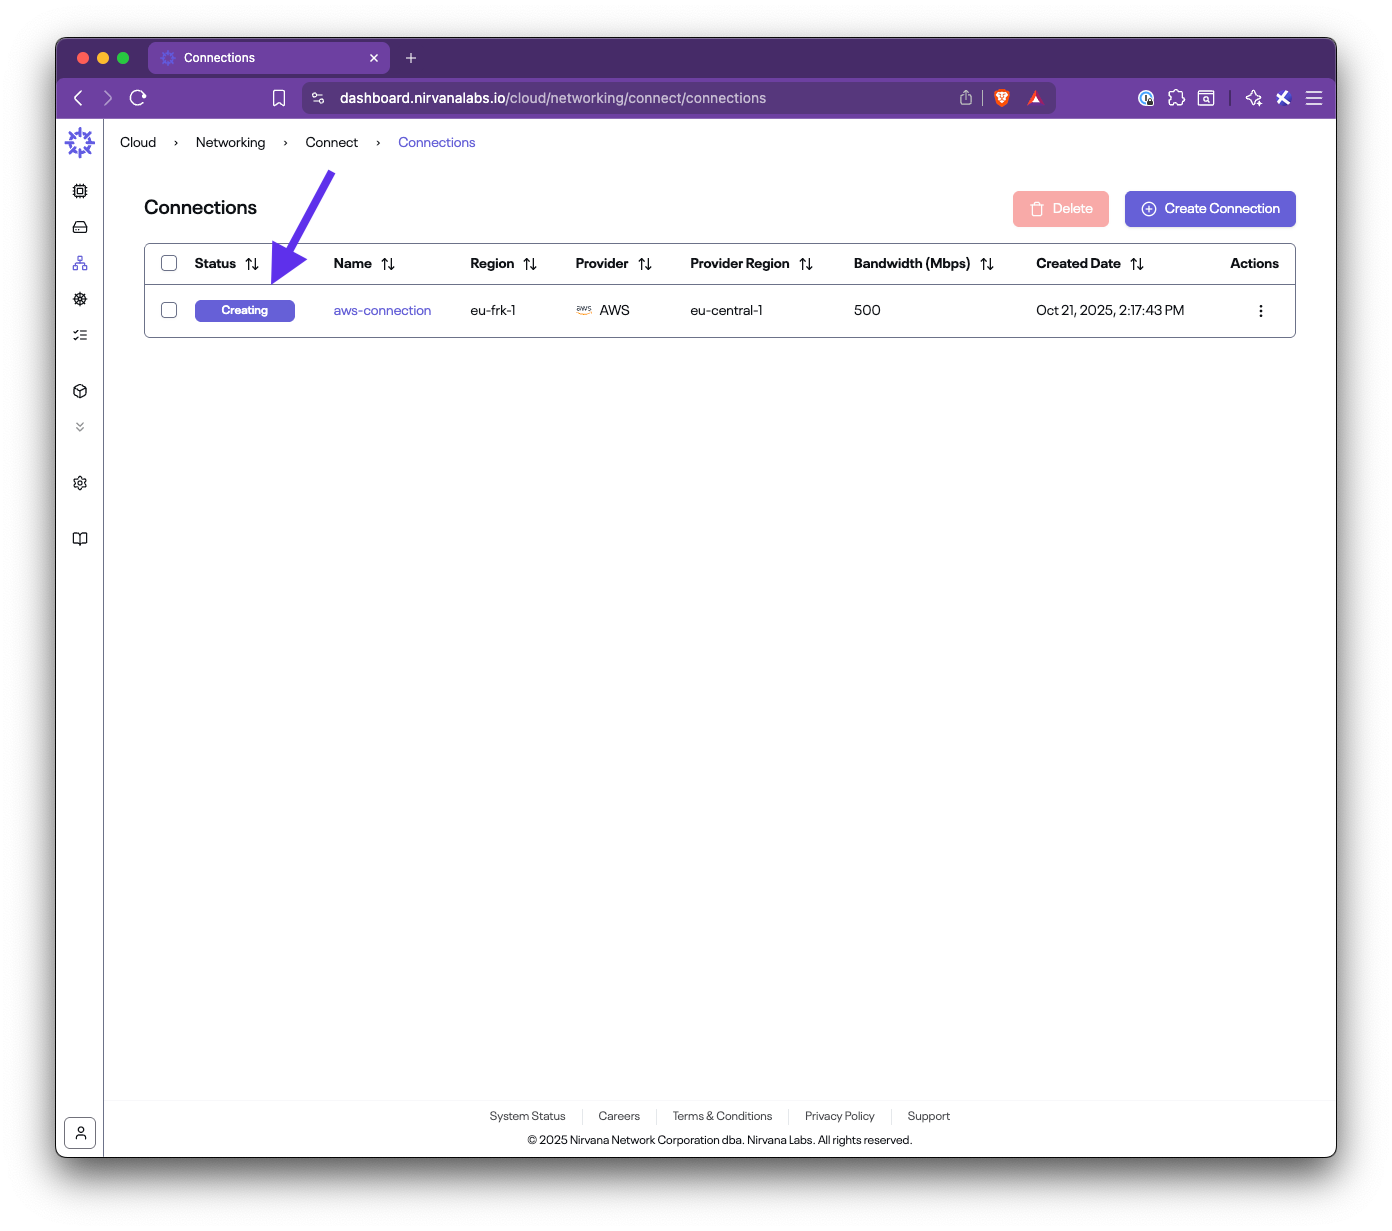
Section titled “Step 3: Check Connection Status and Parameters”- After creating the connection, you will see it listed with Status: Creating
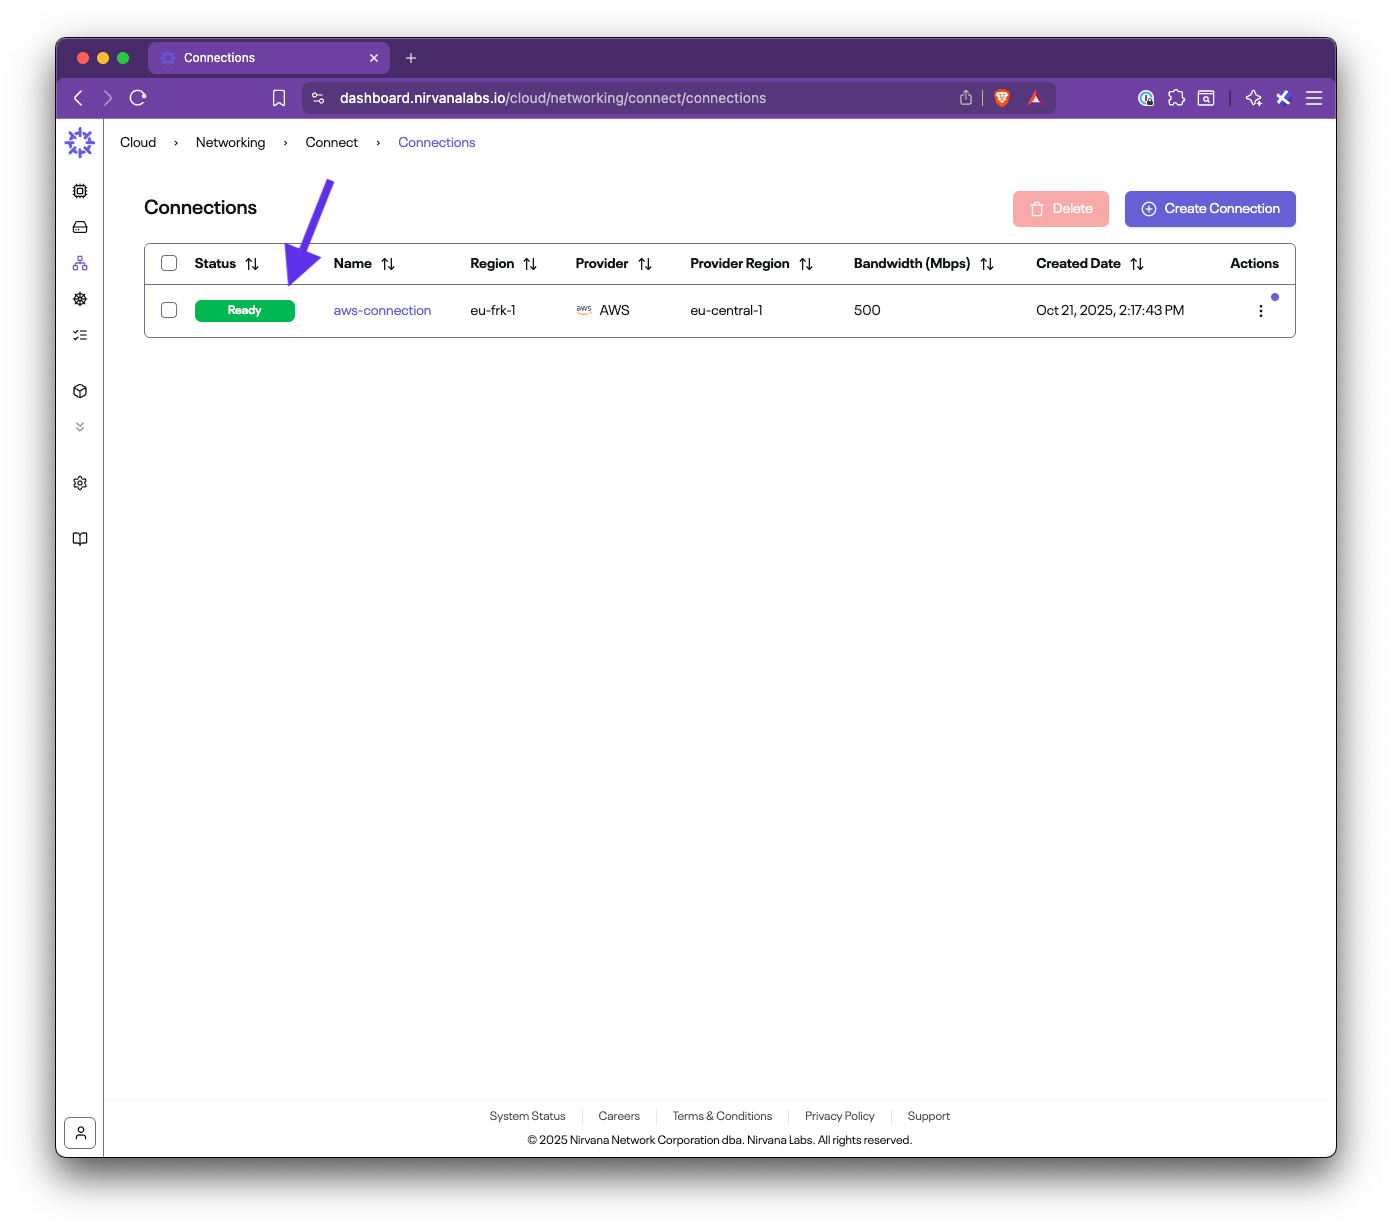
- Once provisioning is complete, the status will change to Ready
- View connection details:
- Router IPs (Nirvana and AWS sides)
- ASNs for BGP configuration
- CIDRs
- Bandwidth (50 Mbps / 200 Mbps / 500 Mbps / 1 Gbps / 2 Gbps)
- Provider details
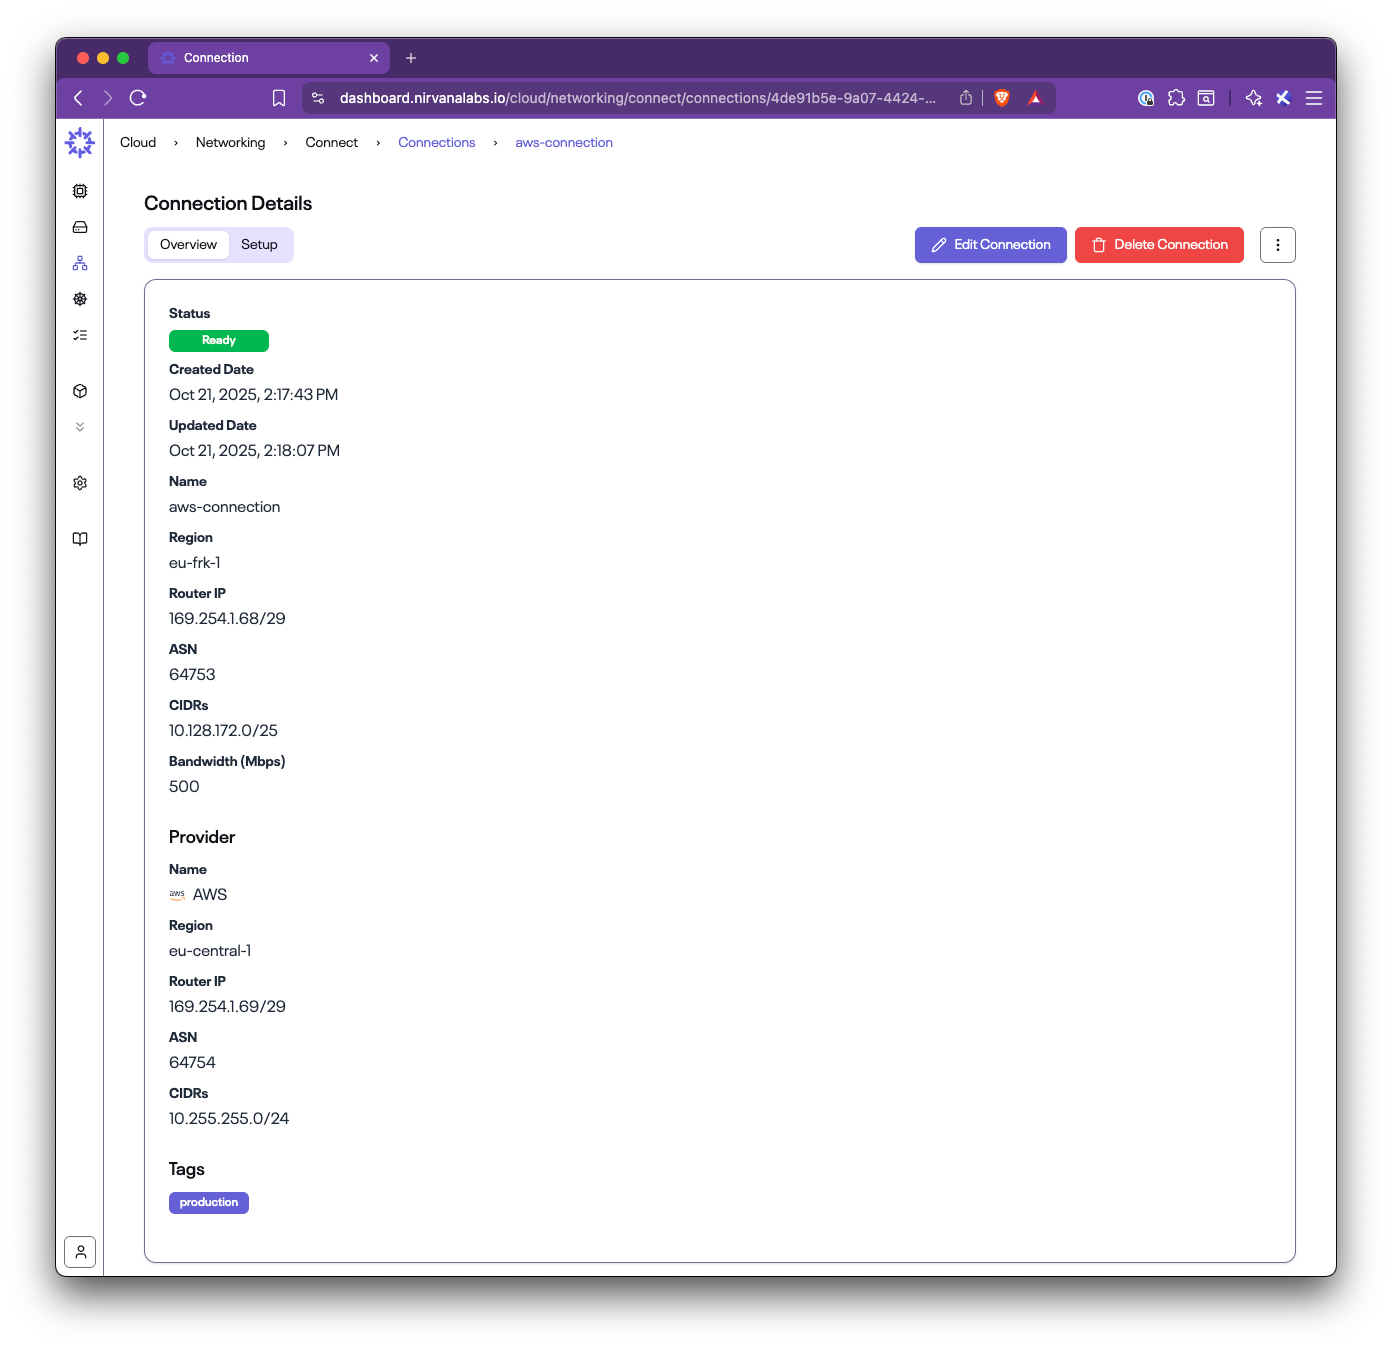
You will use these values when configuring AWS.
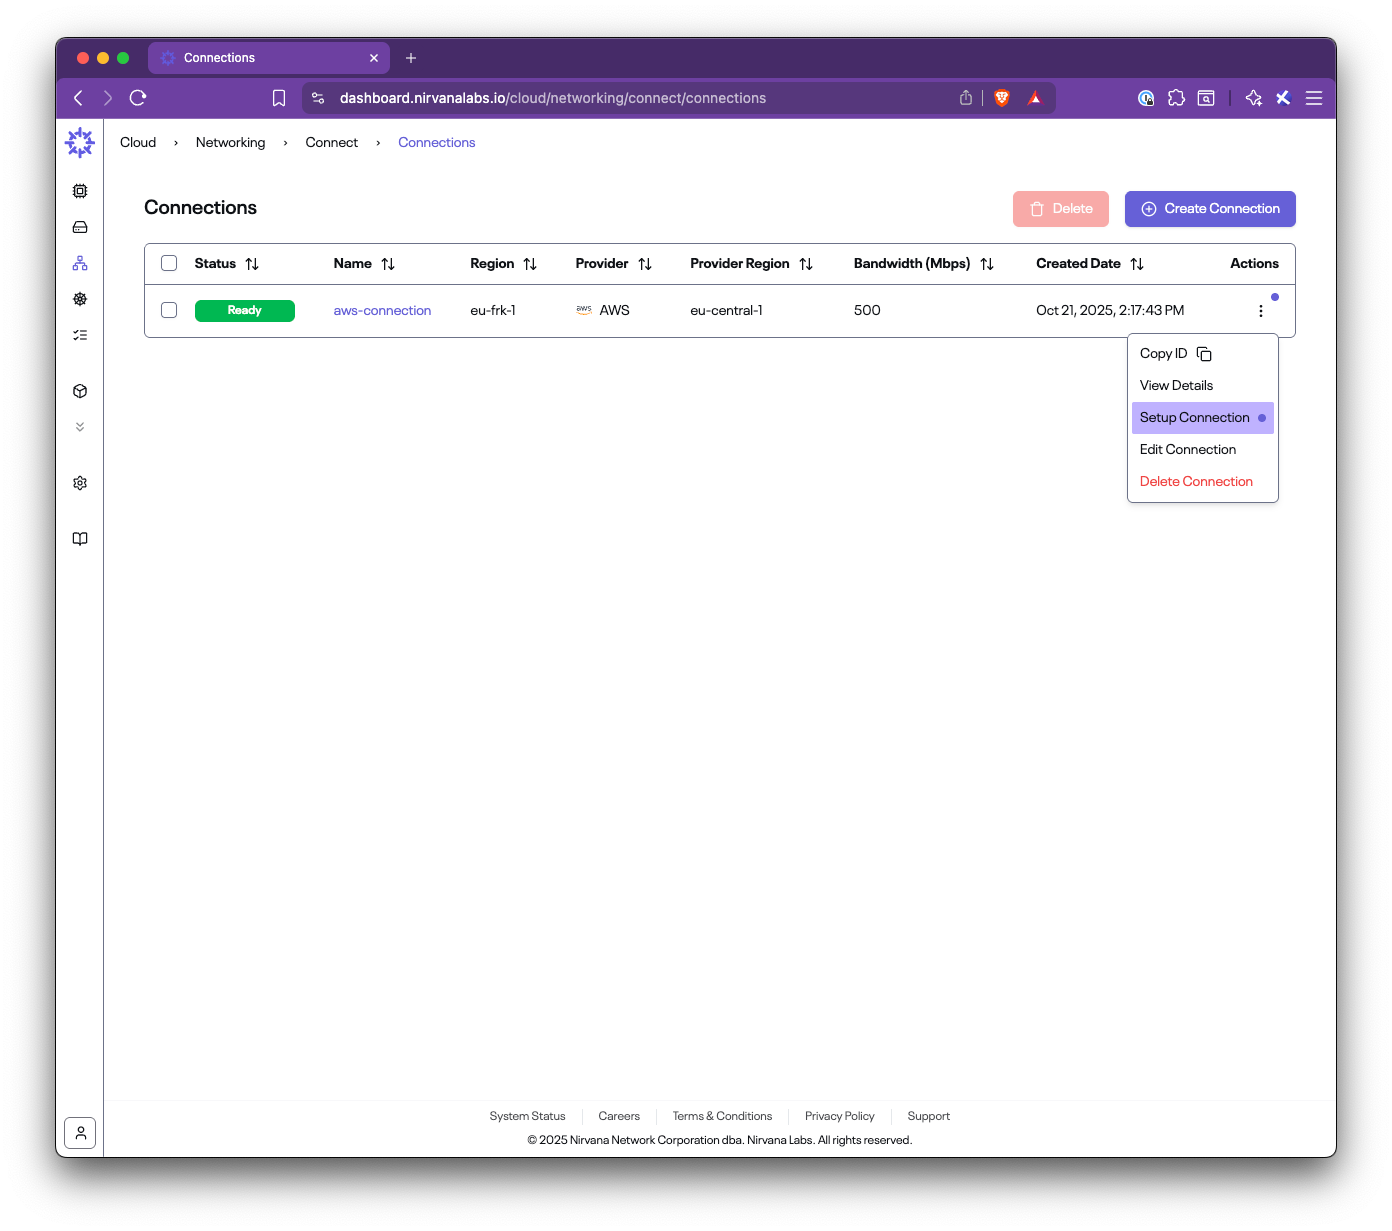
Step 4: Run the Setup on AWS
Section titled “Step 4: Run the Setup on AWS”From the connection list, open the menu under Actions and select Setup Connection (or open the Setup tab in the details view).
Follow the guided steps:
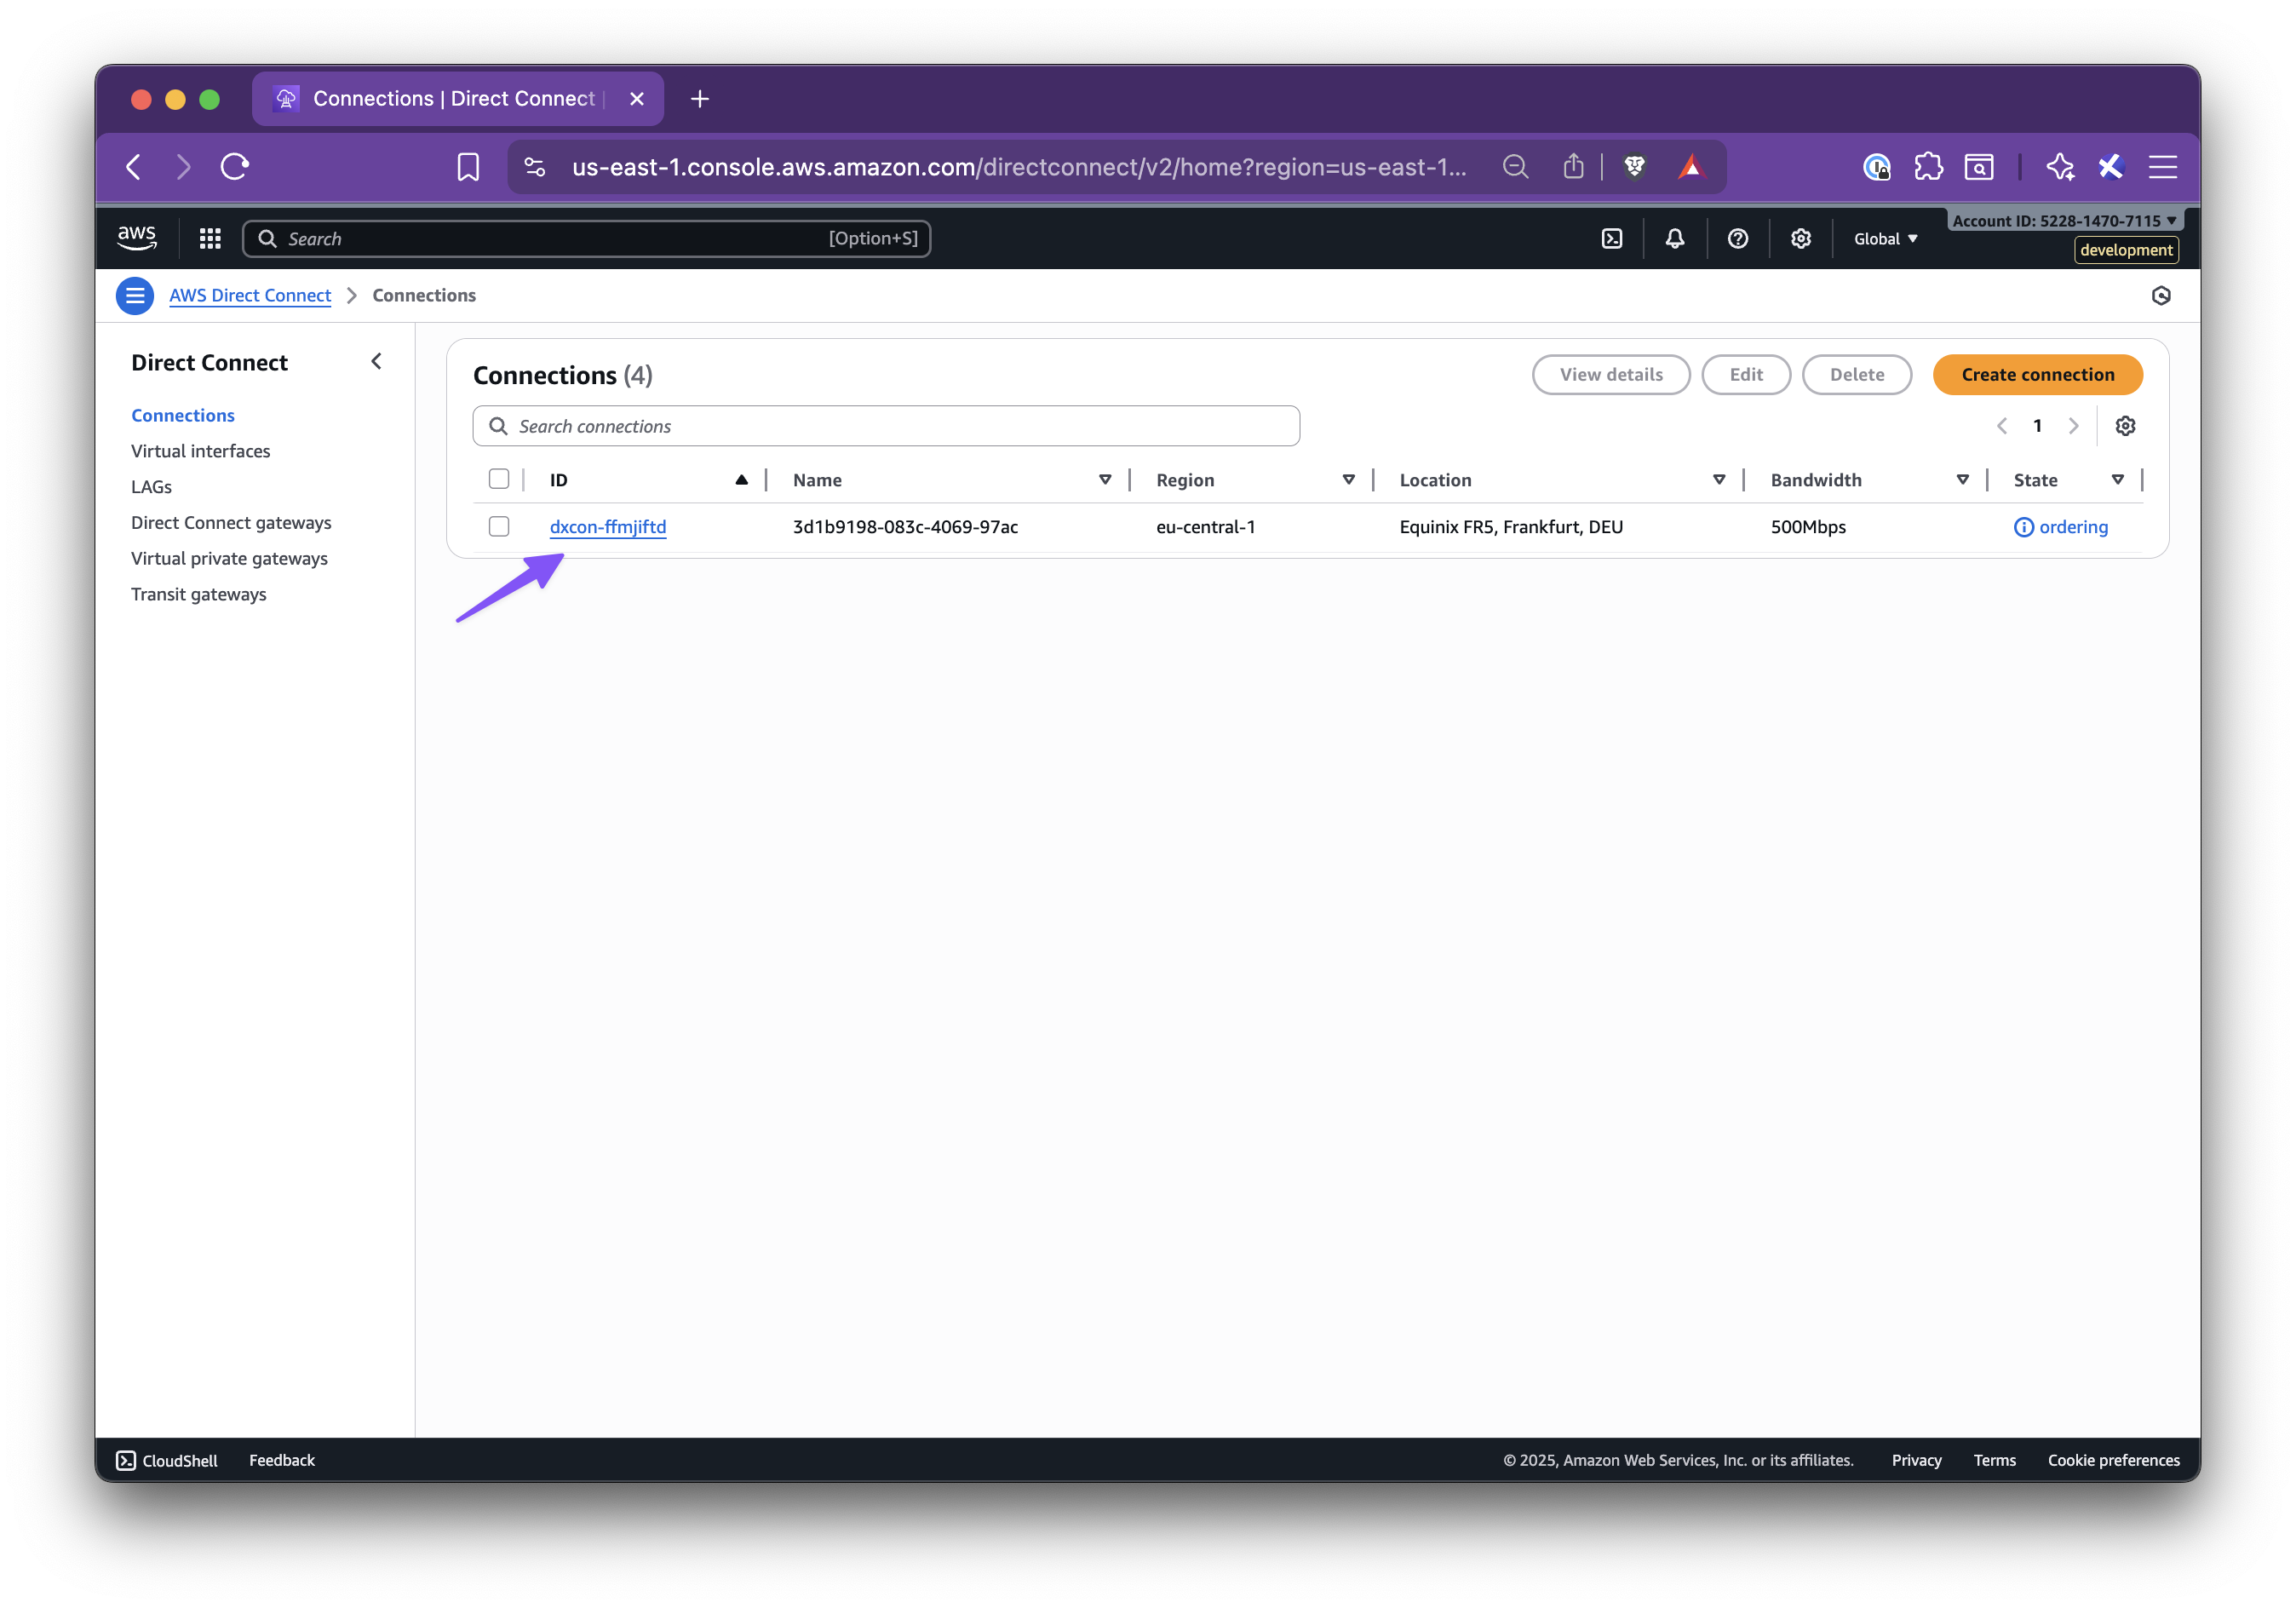
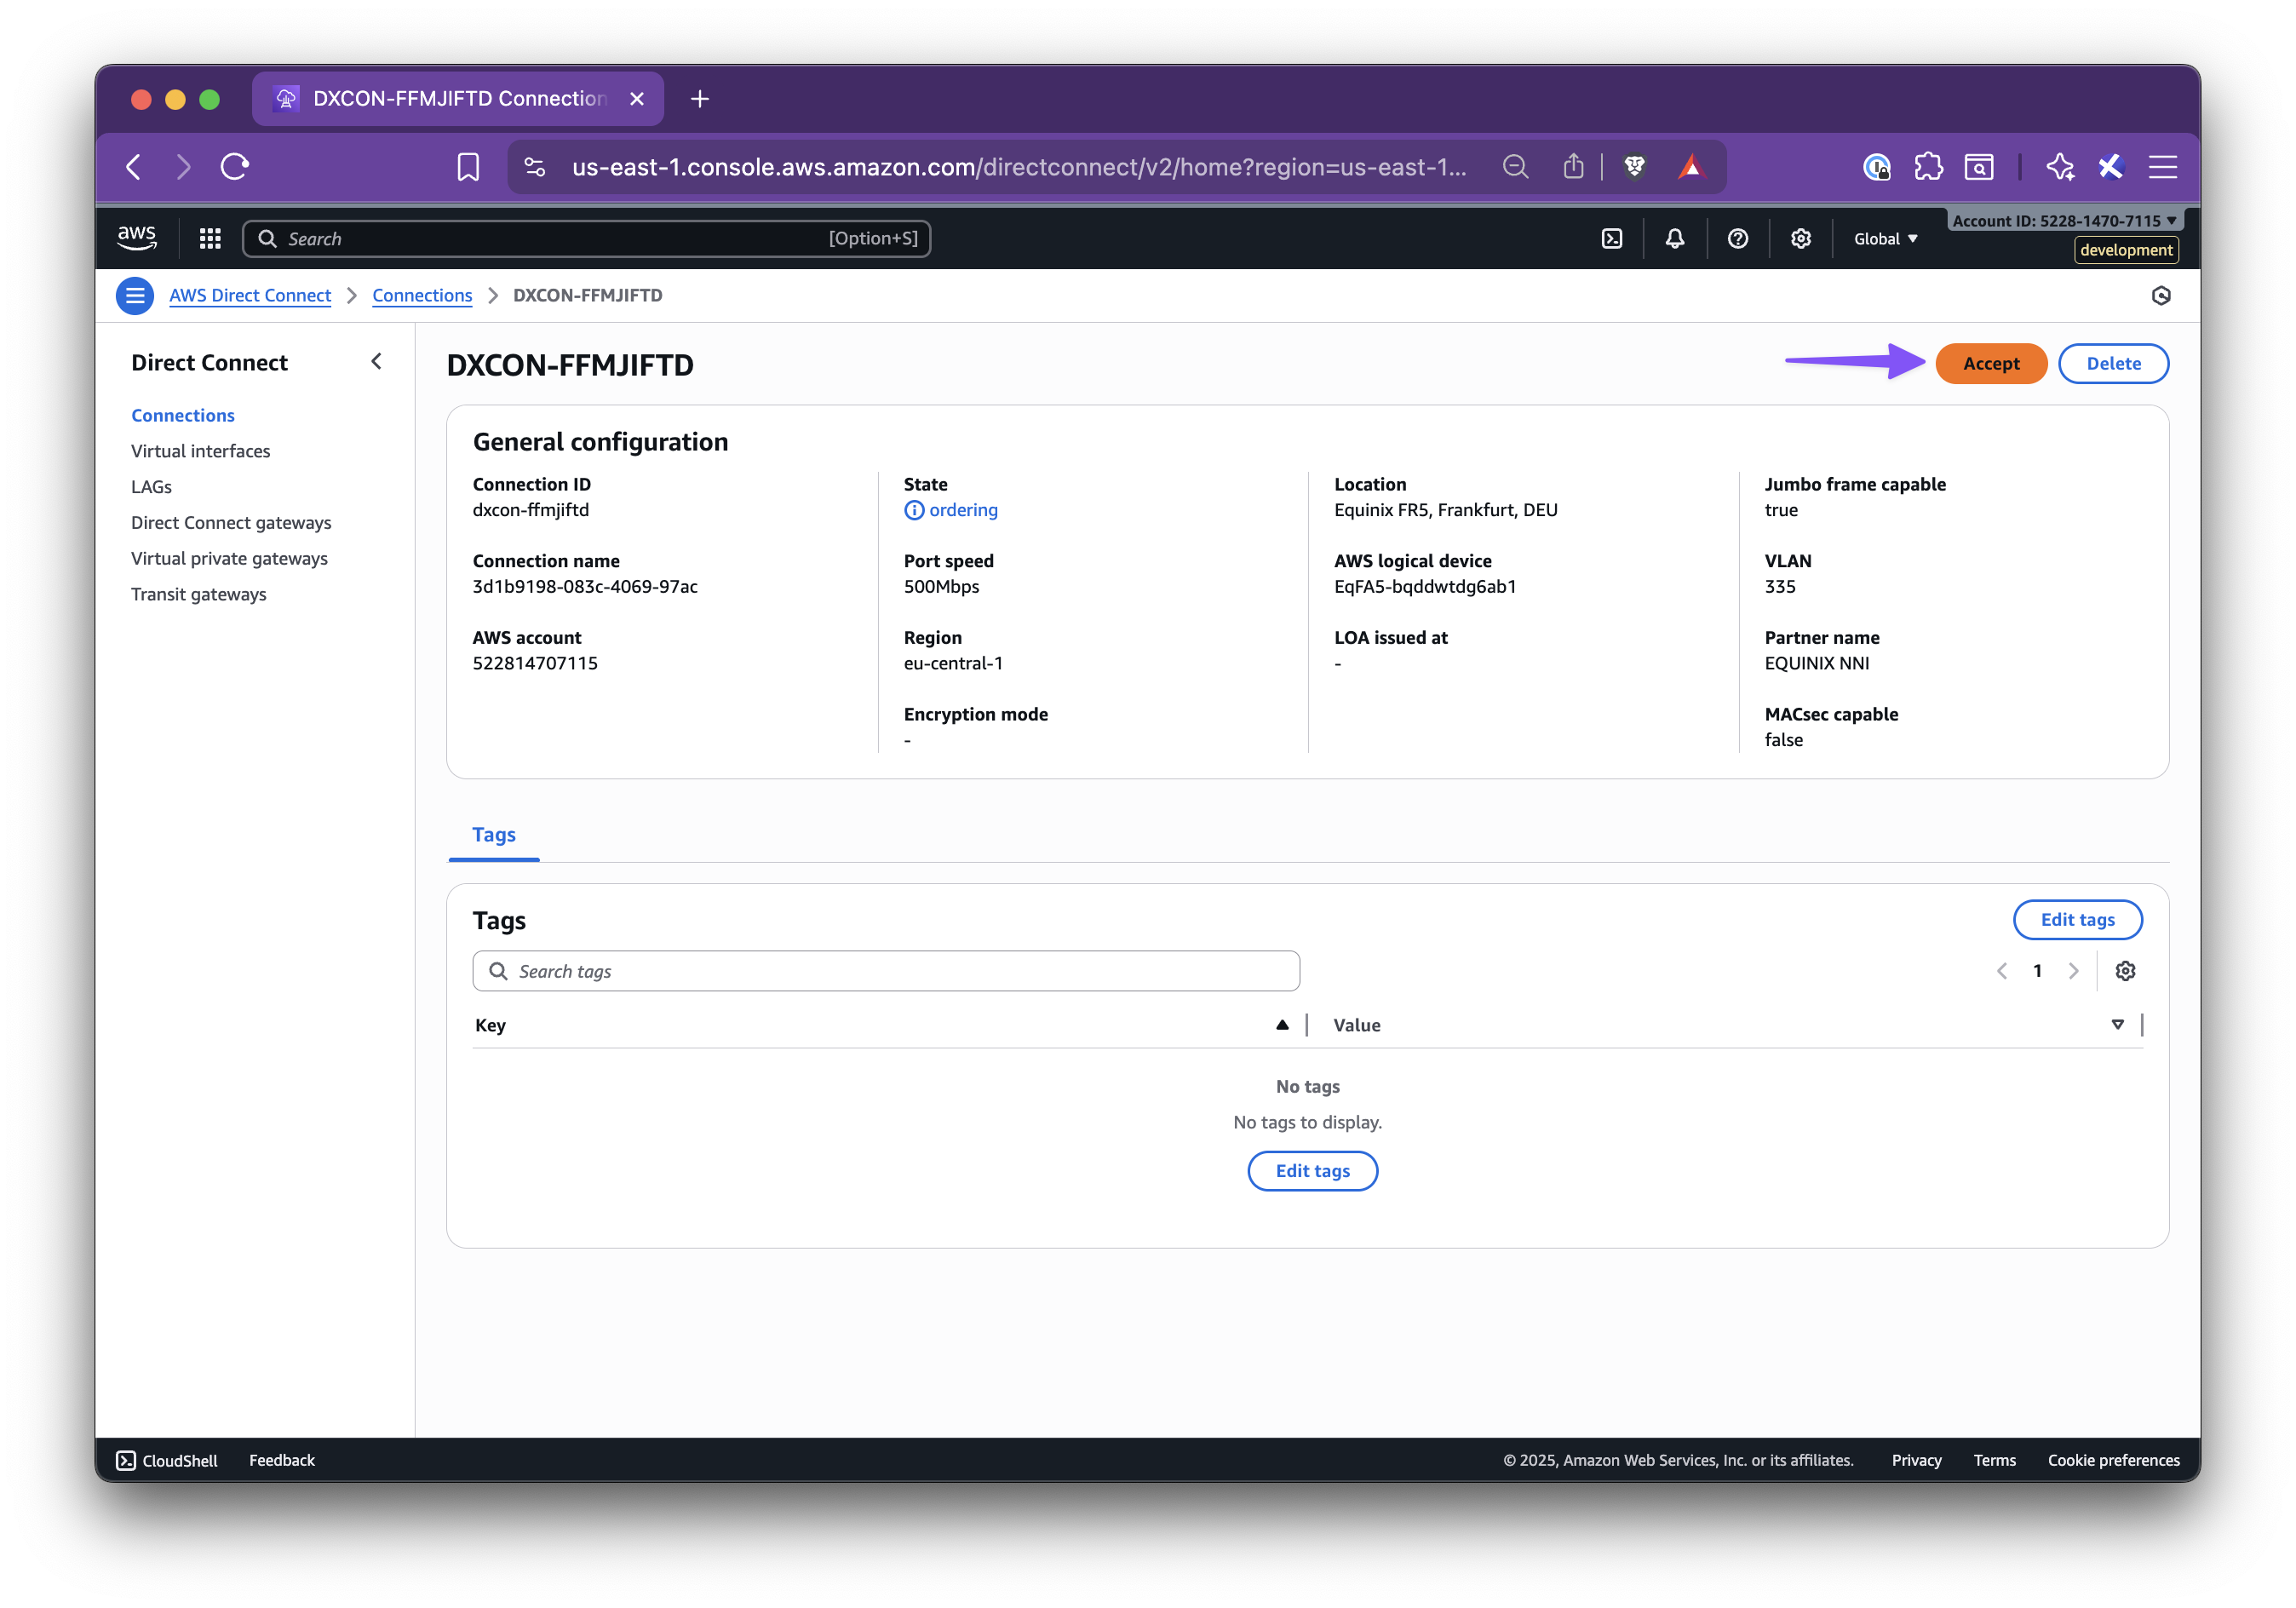
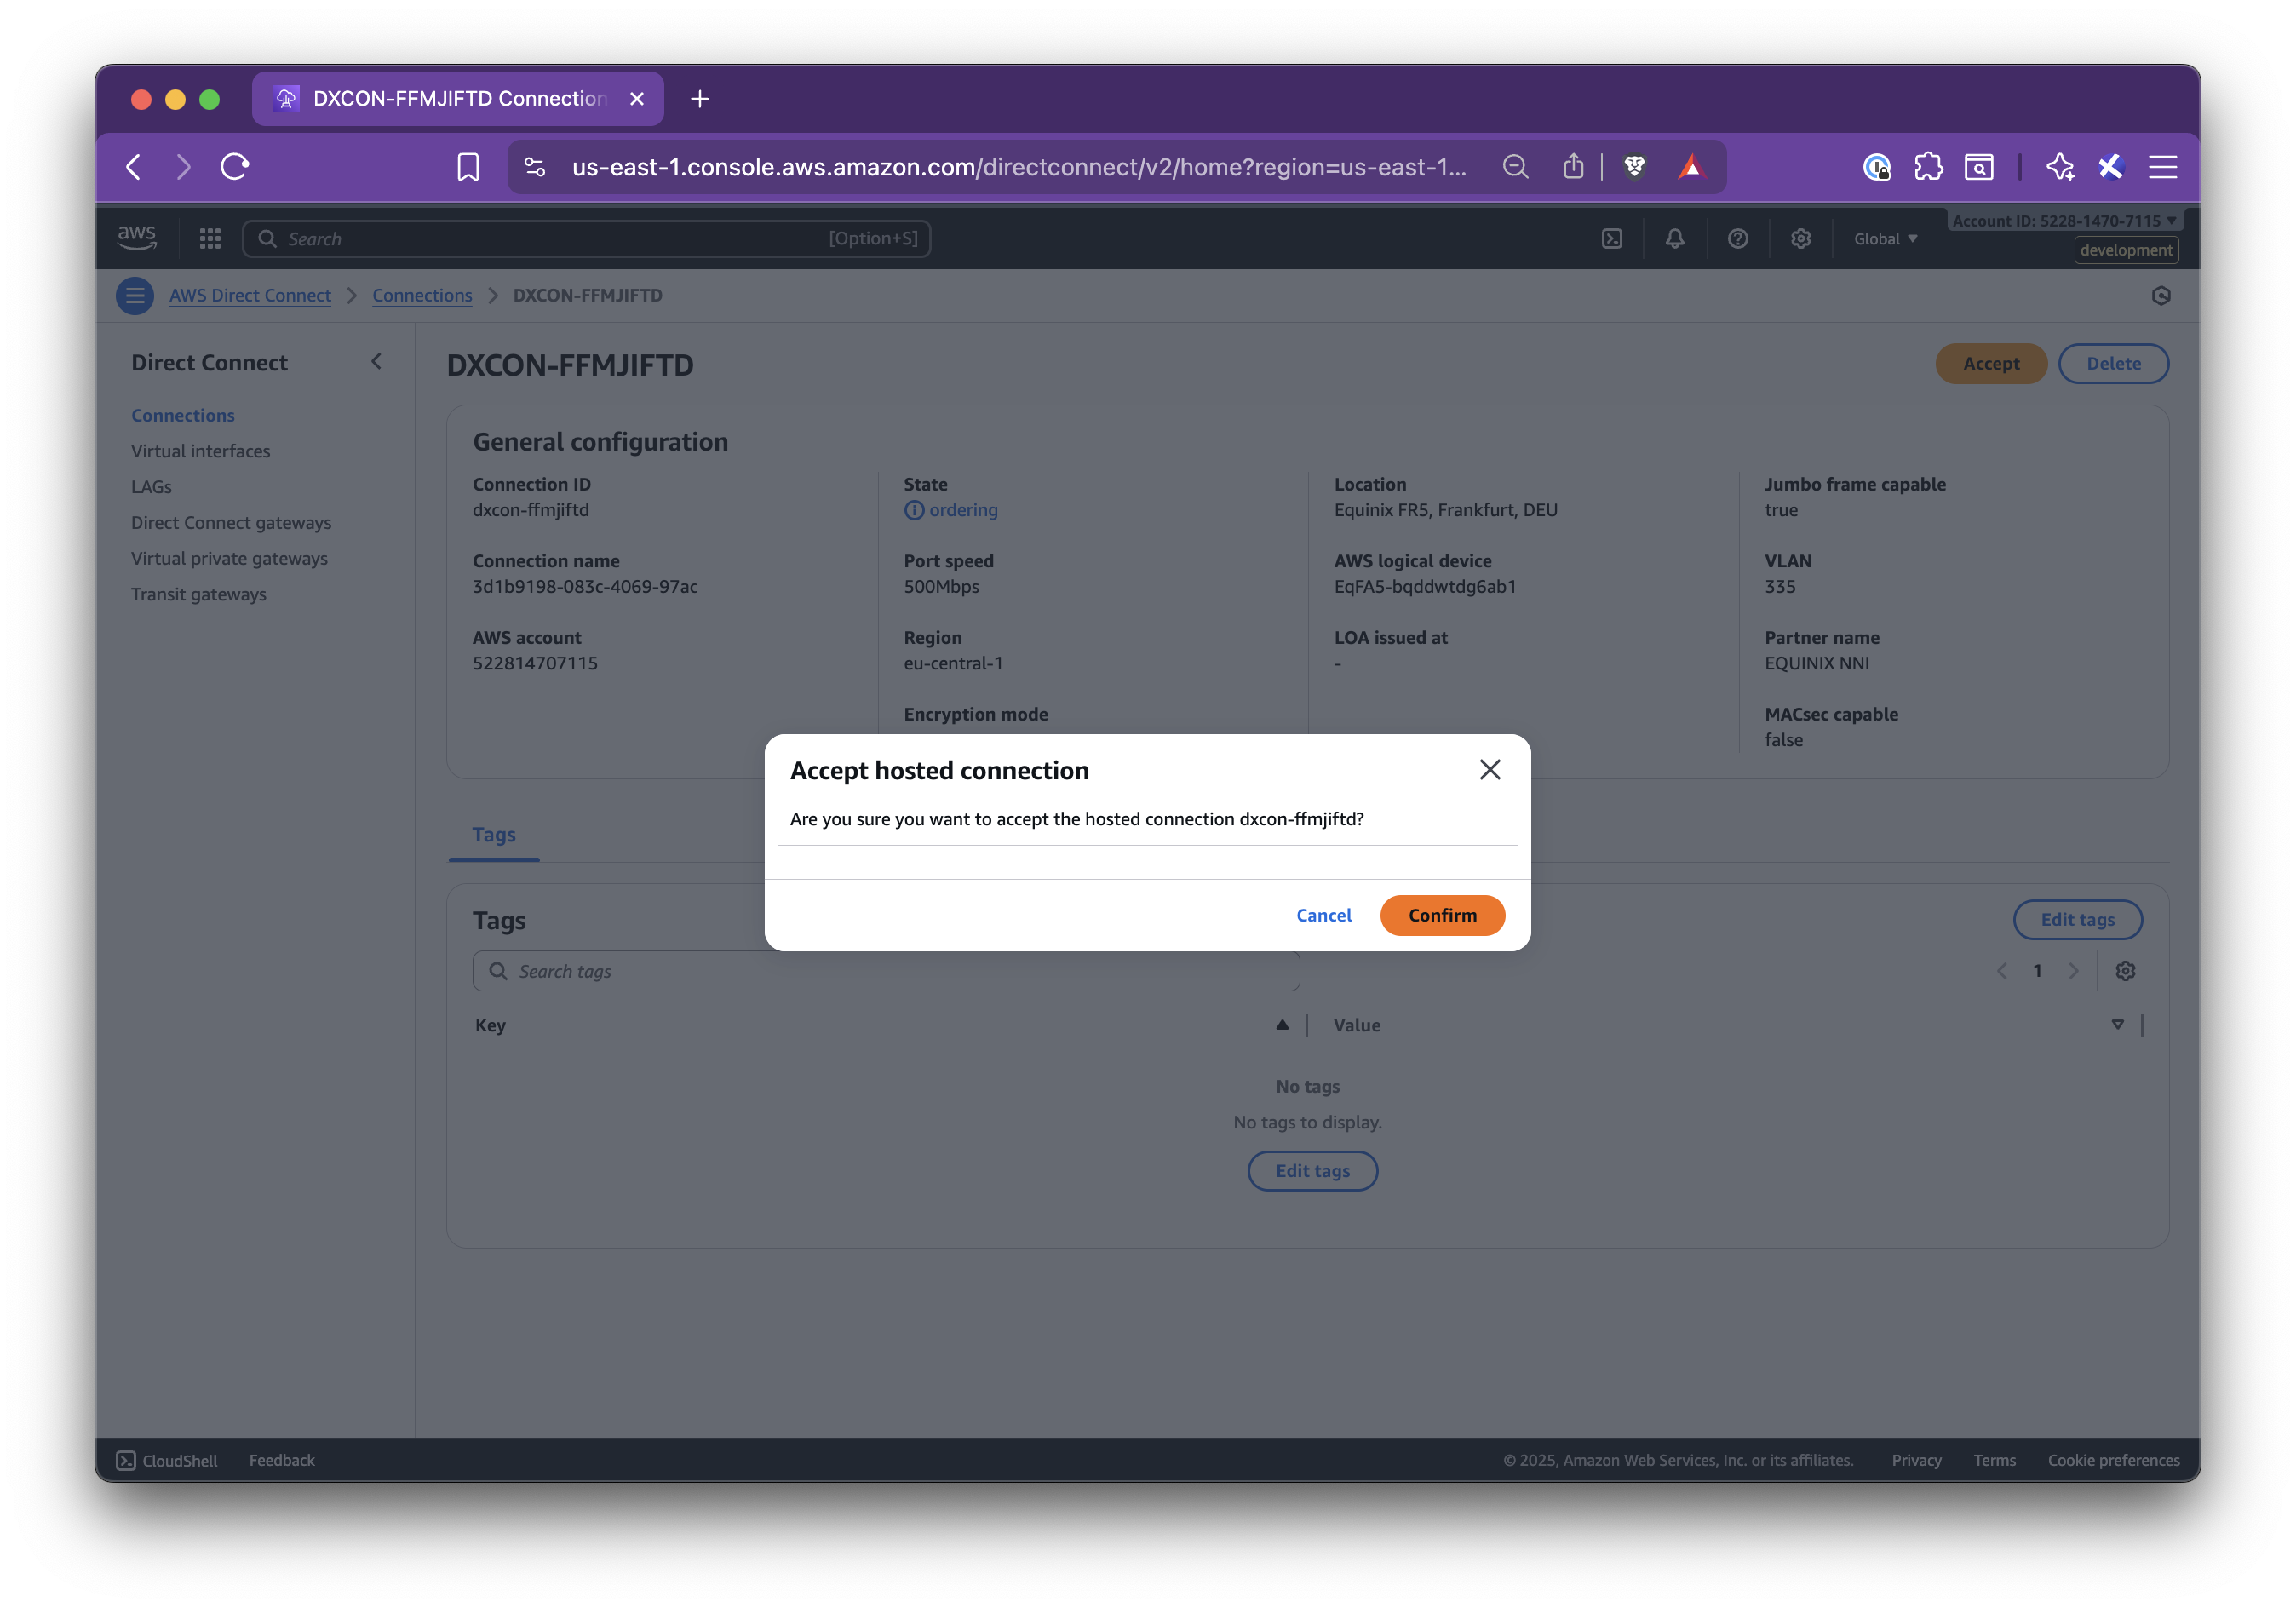
Step 4.1: Accept the connection in AWS Direct Connect
Section titled “Step 4.1: Accept the connection in AWS Direct Connect”- Open the AWS Direct Connect console
- Go to Connections
- Find the pending connection with the name shown in the Setup panel
- Accept and confirm
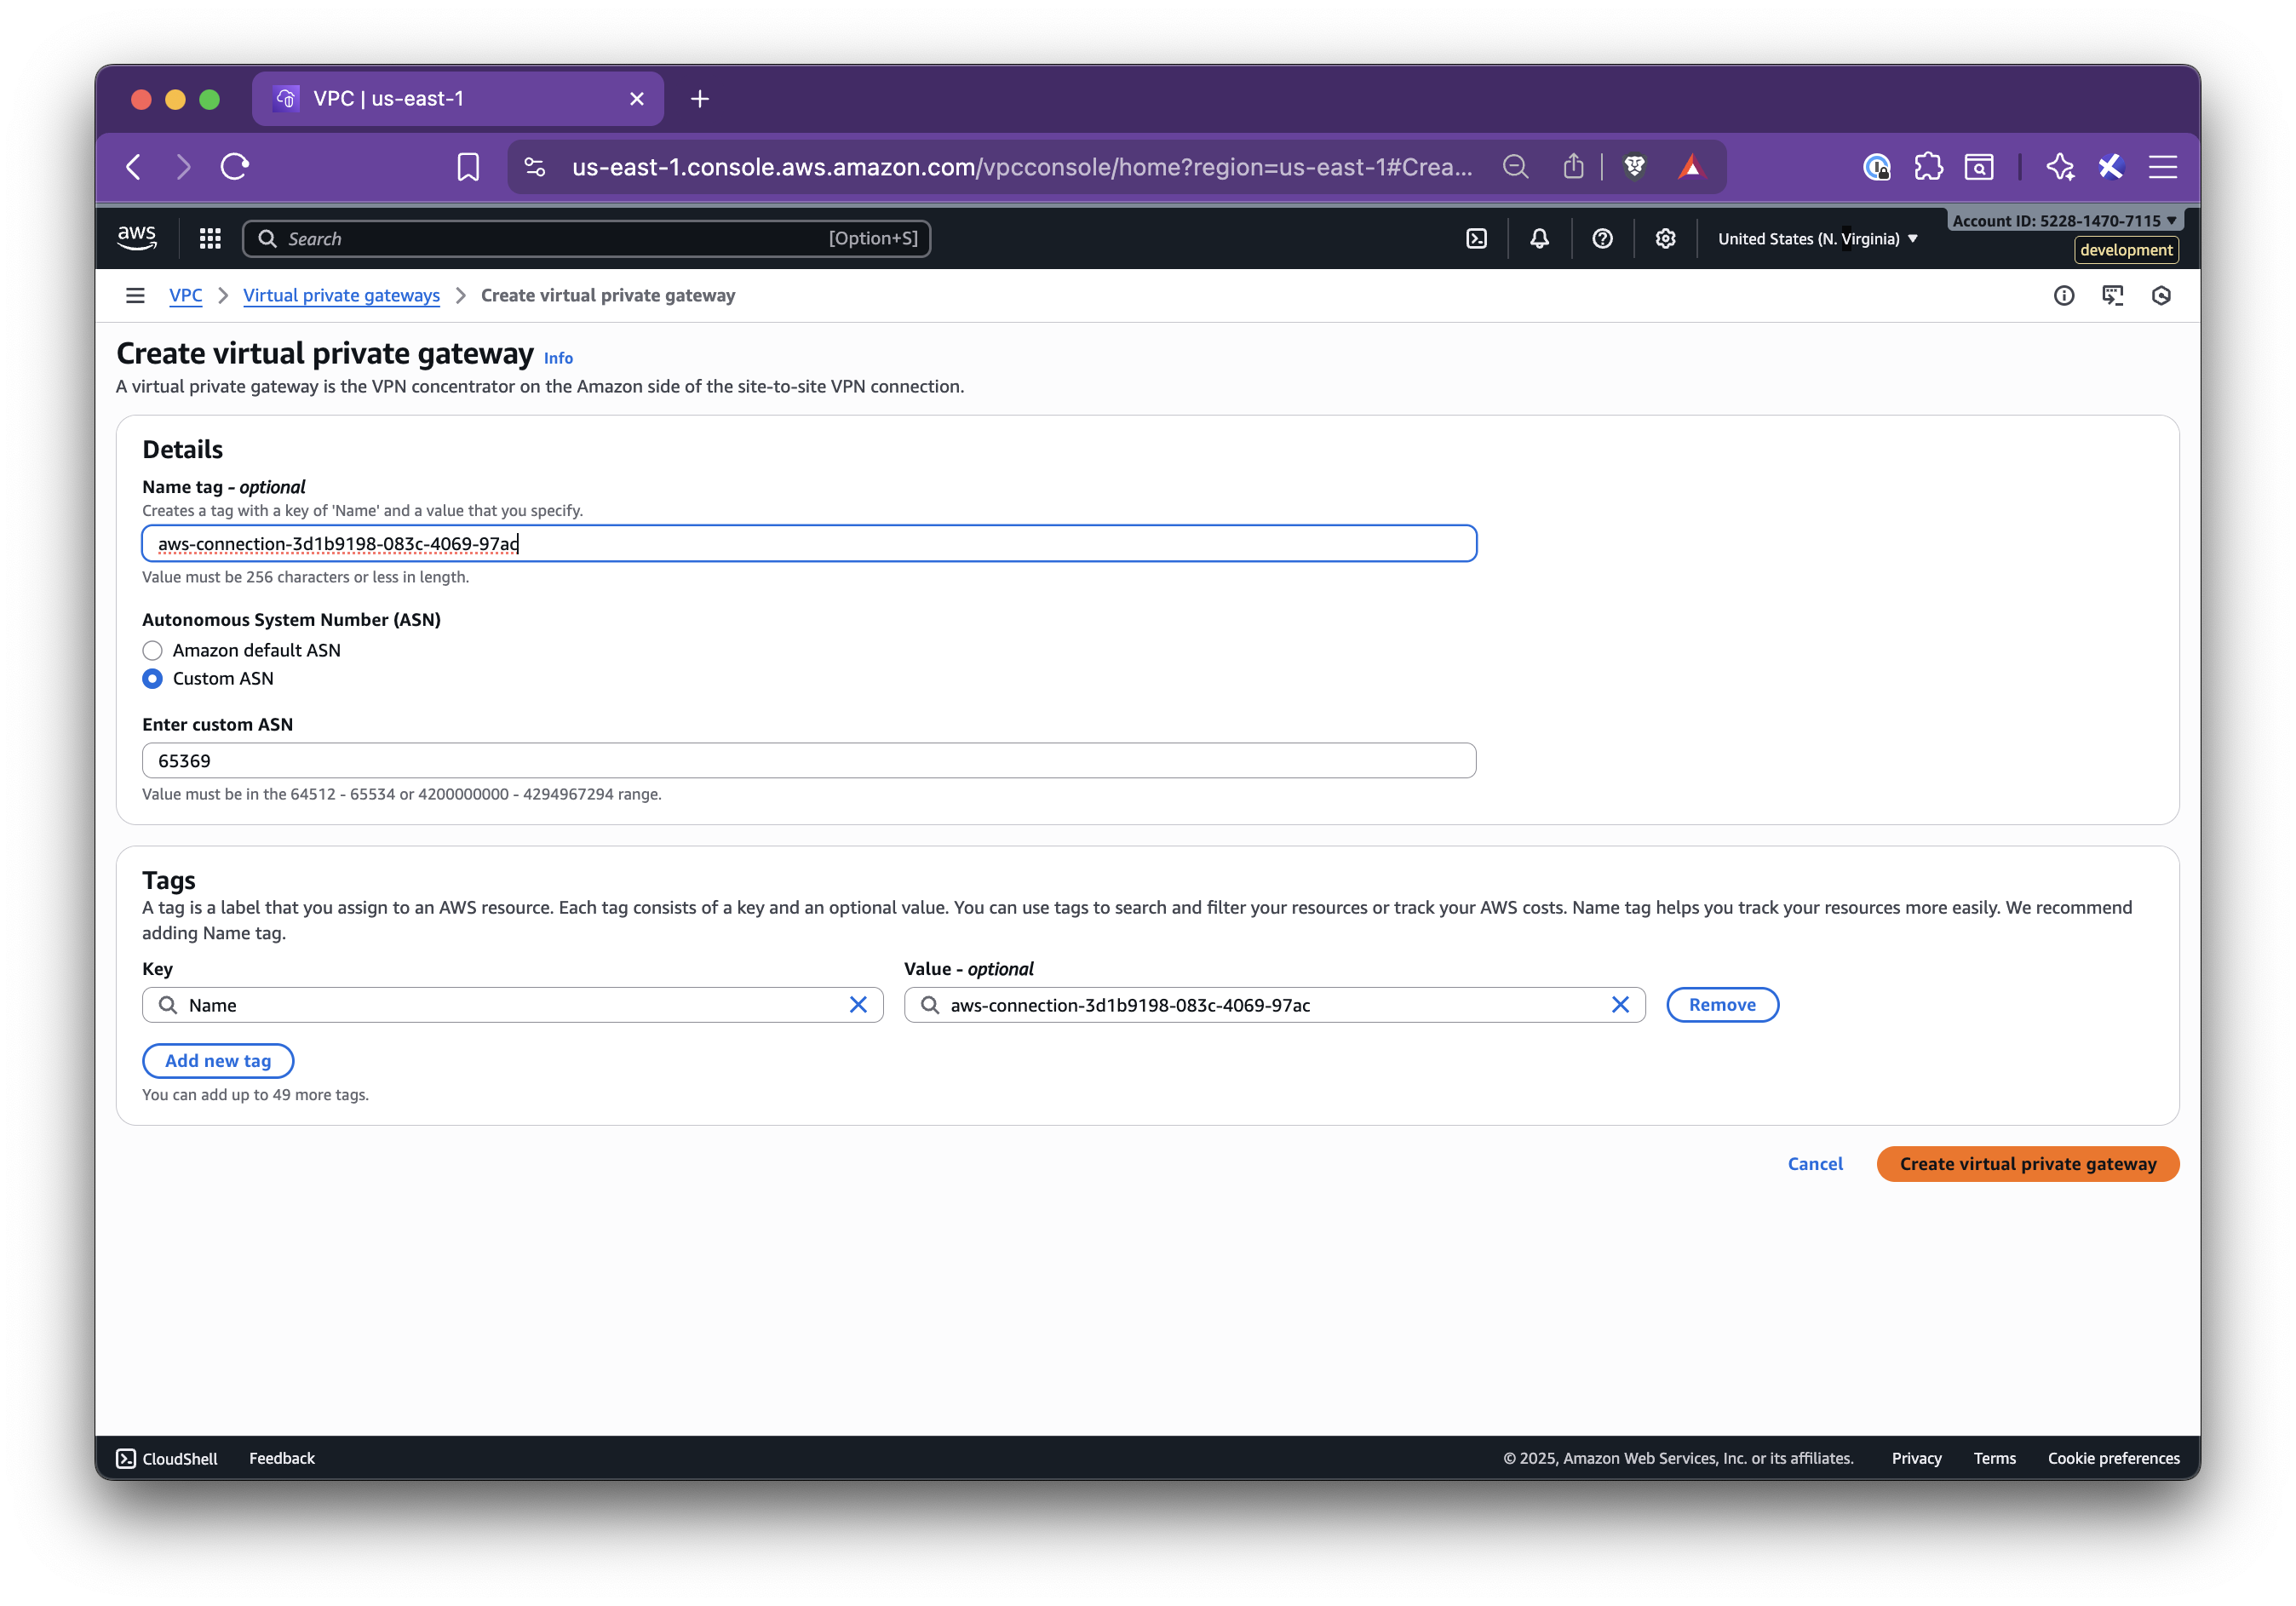
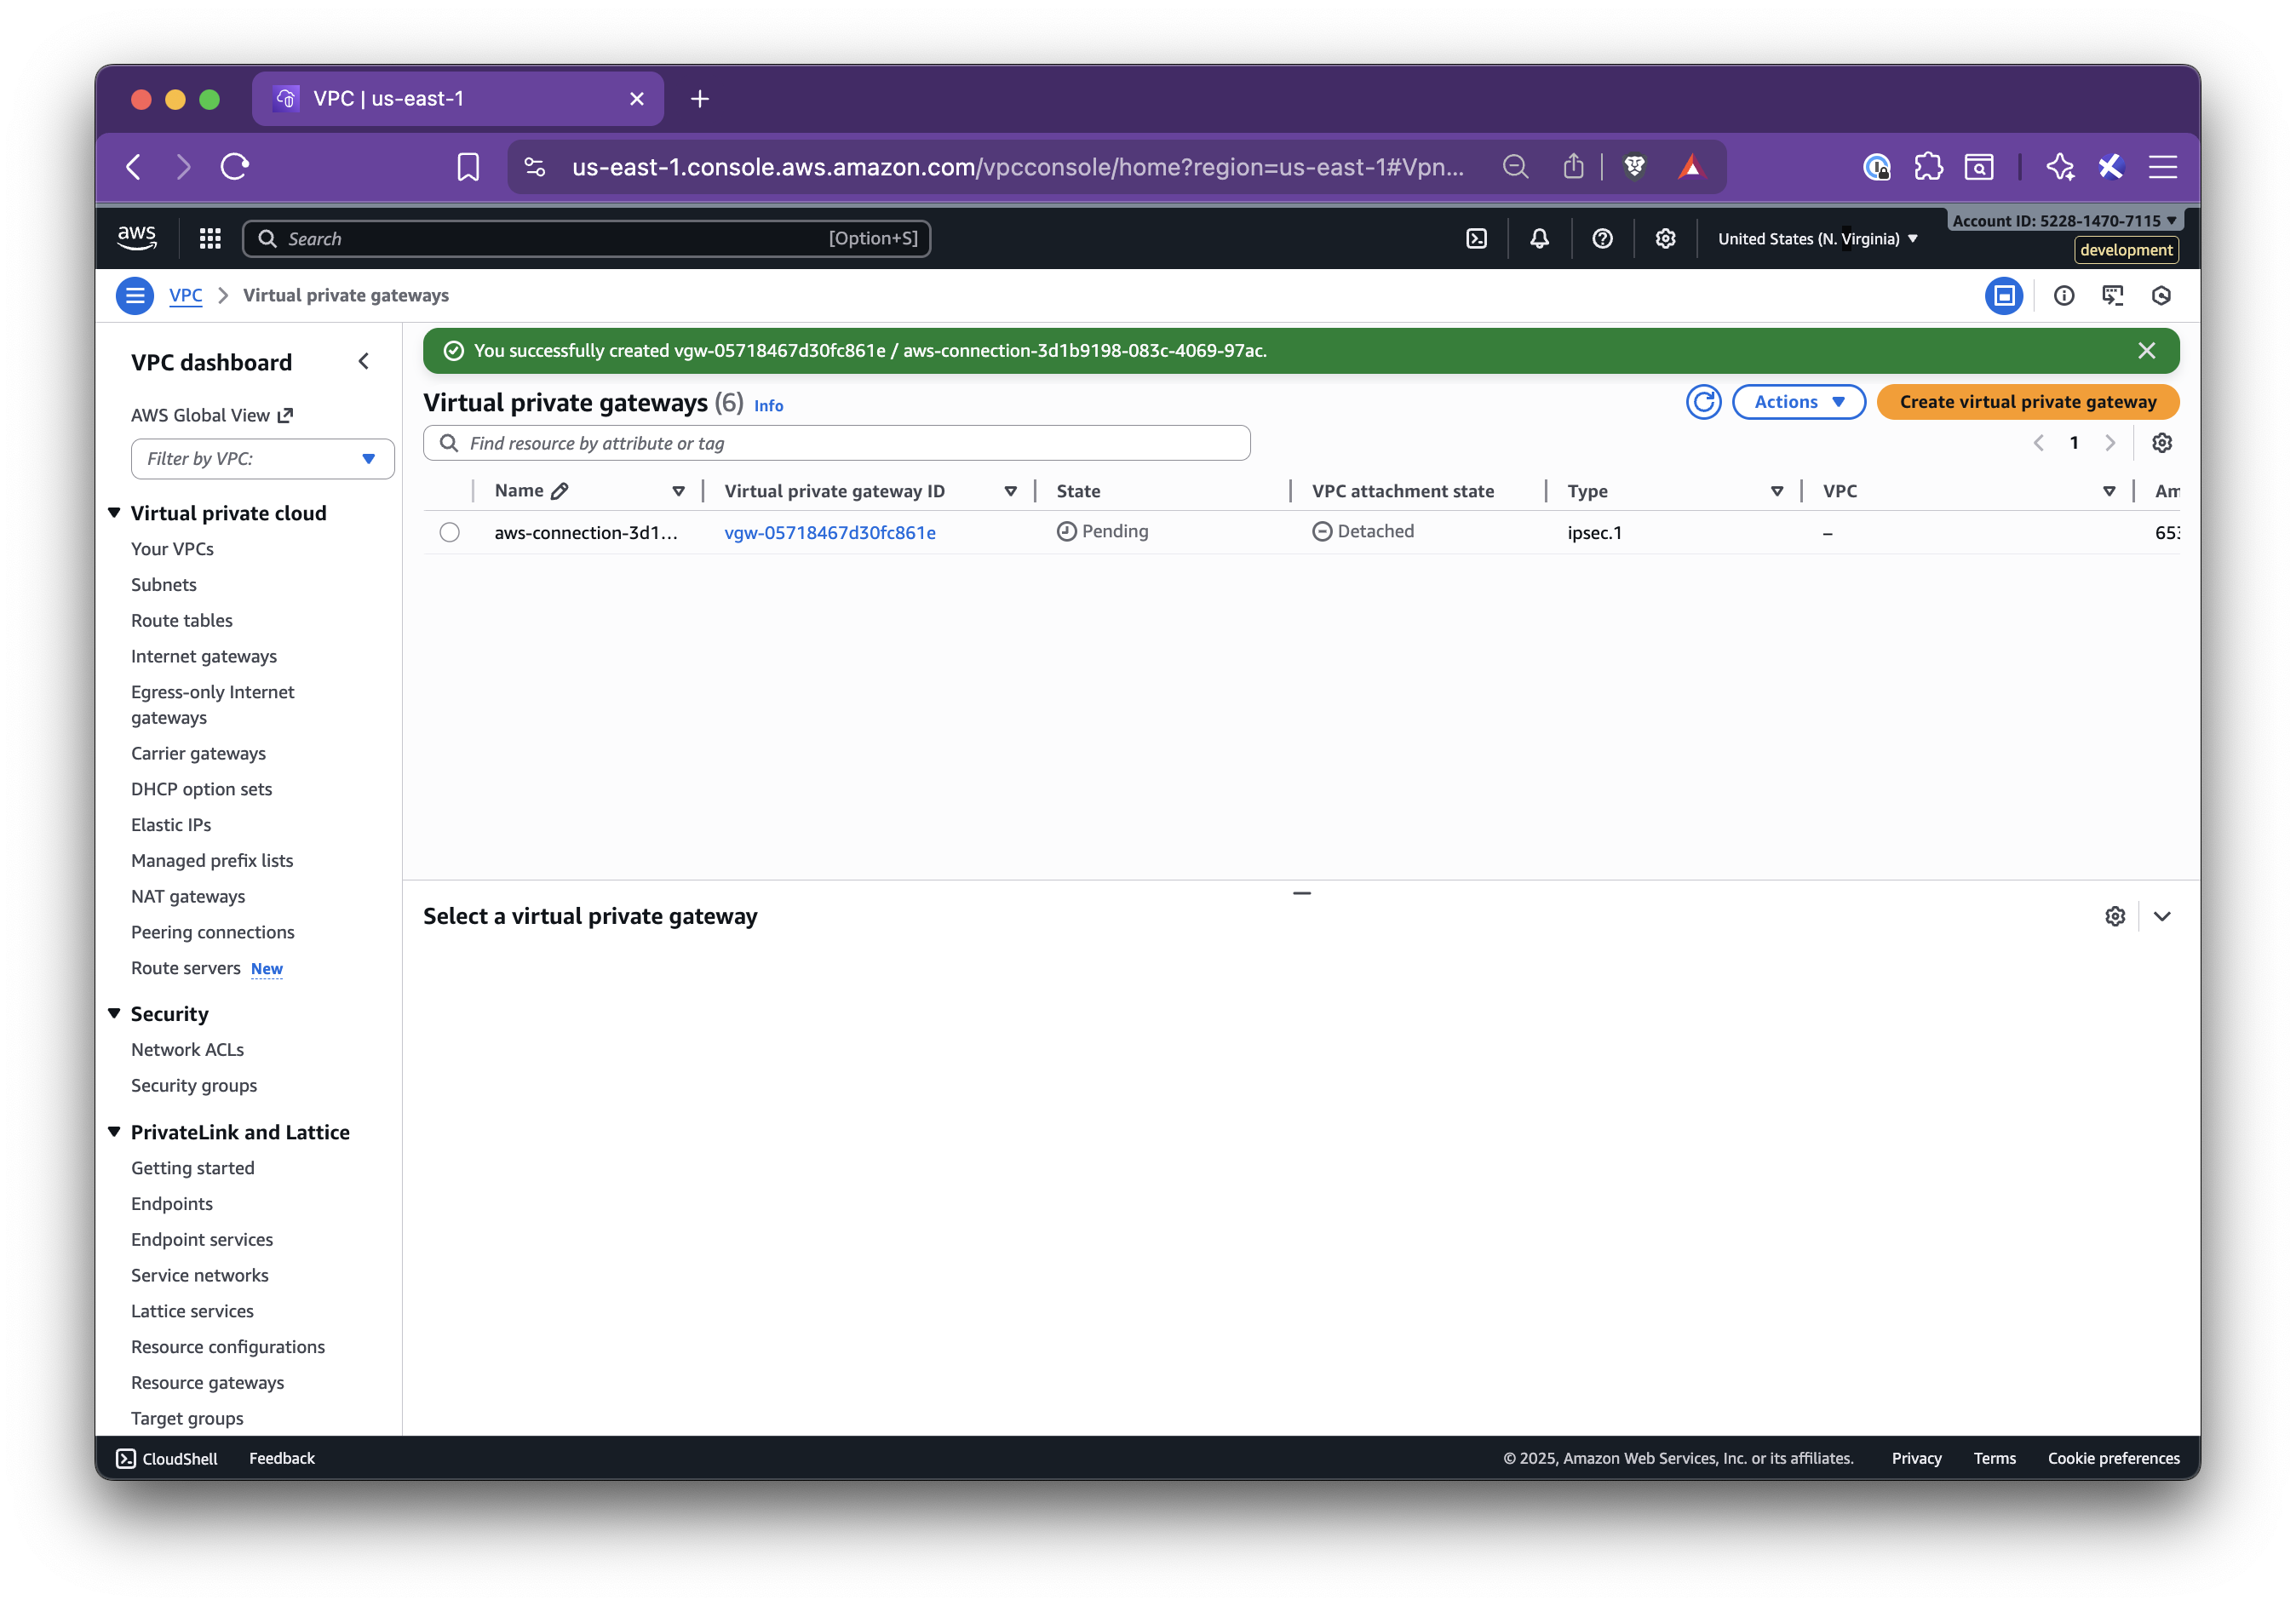
Step 4.2: Create a Virtual Private Gateway (VGW)
Section titled “Step 4.2: Create a Virtual Private Gateway (VGW)”- Go to AWS VPC → Virtual private gateways
- Create a new VGW with:
- Name tag: suggested name from the panel
- ASN: the AWS-side ASN shown in the panel
- Click Create virtual private gateway
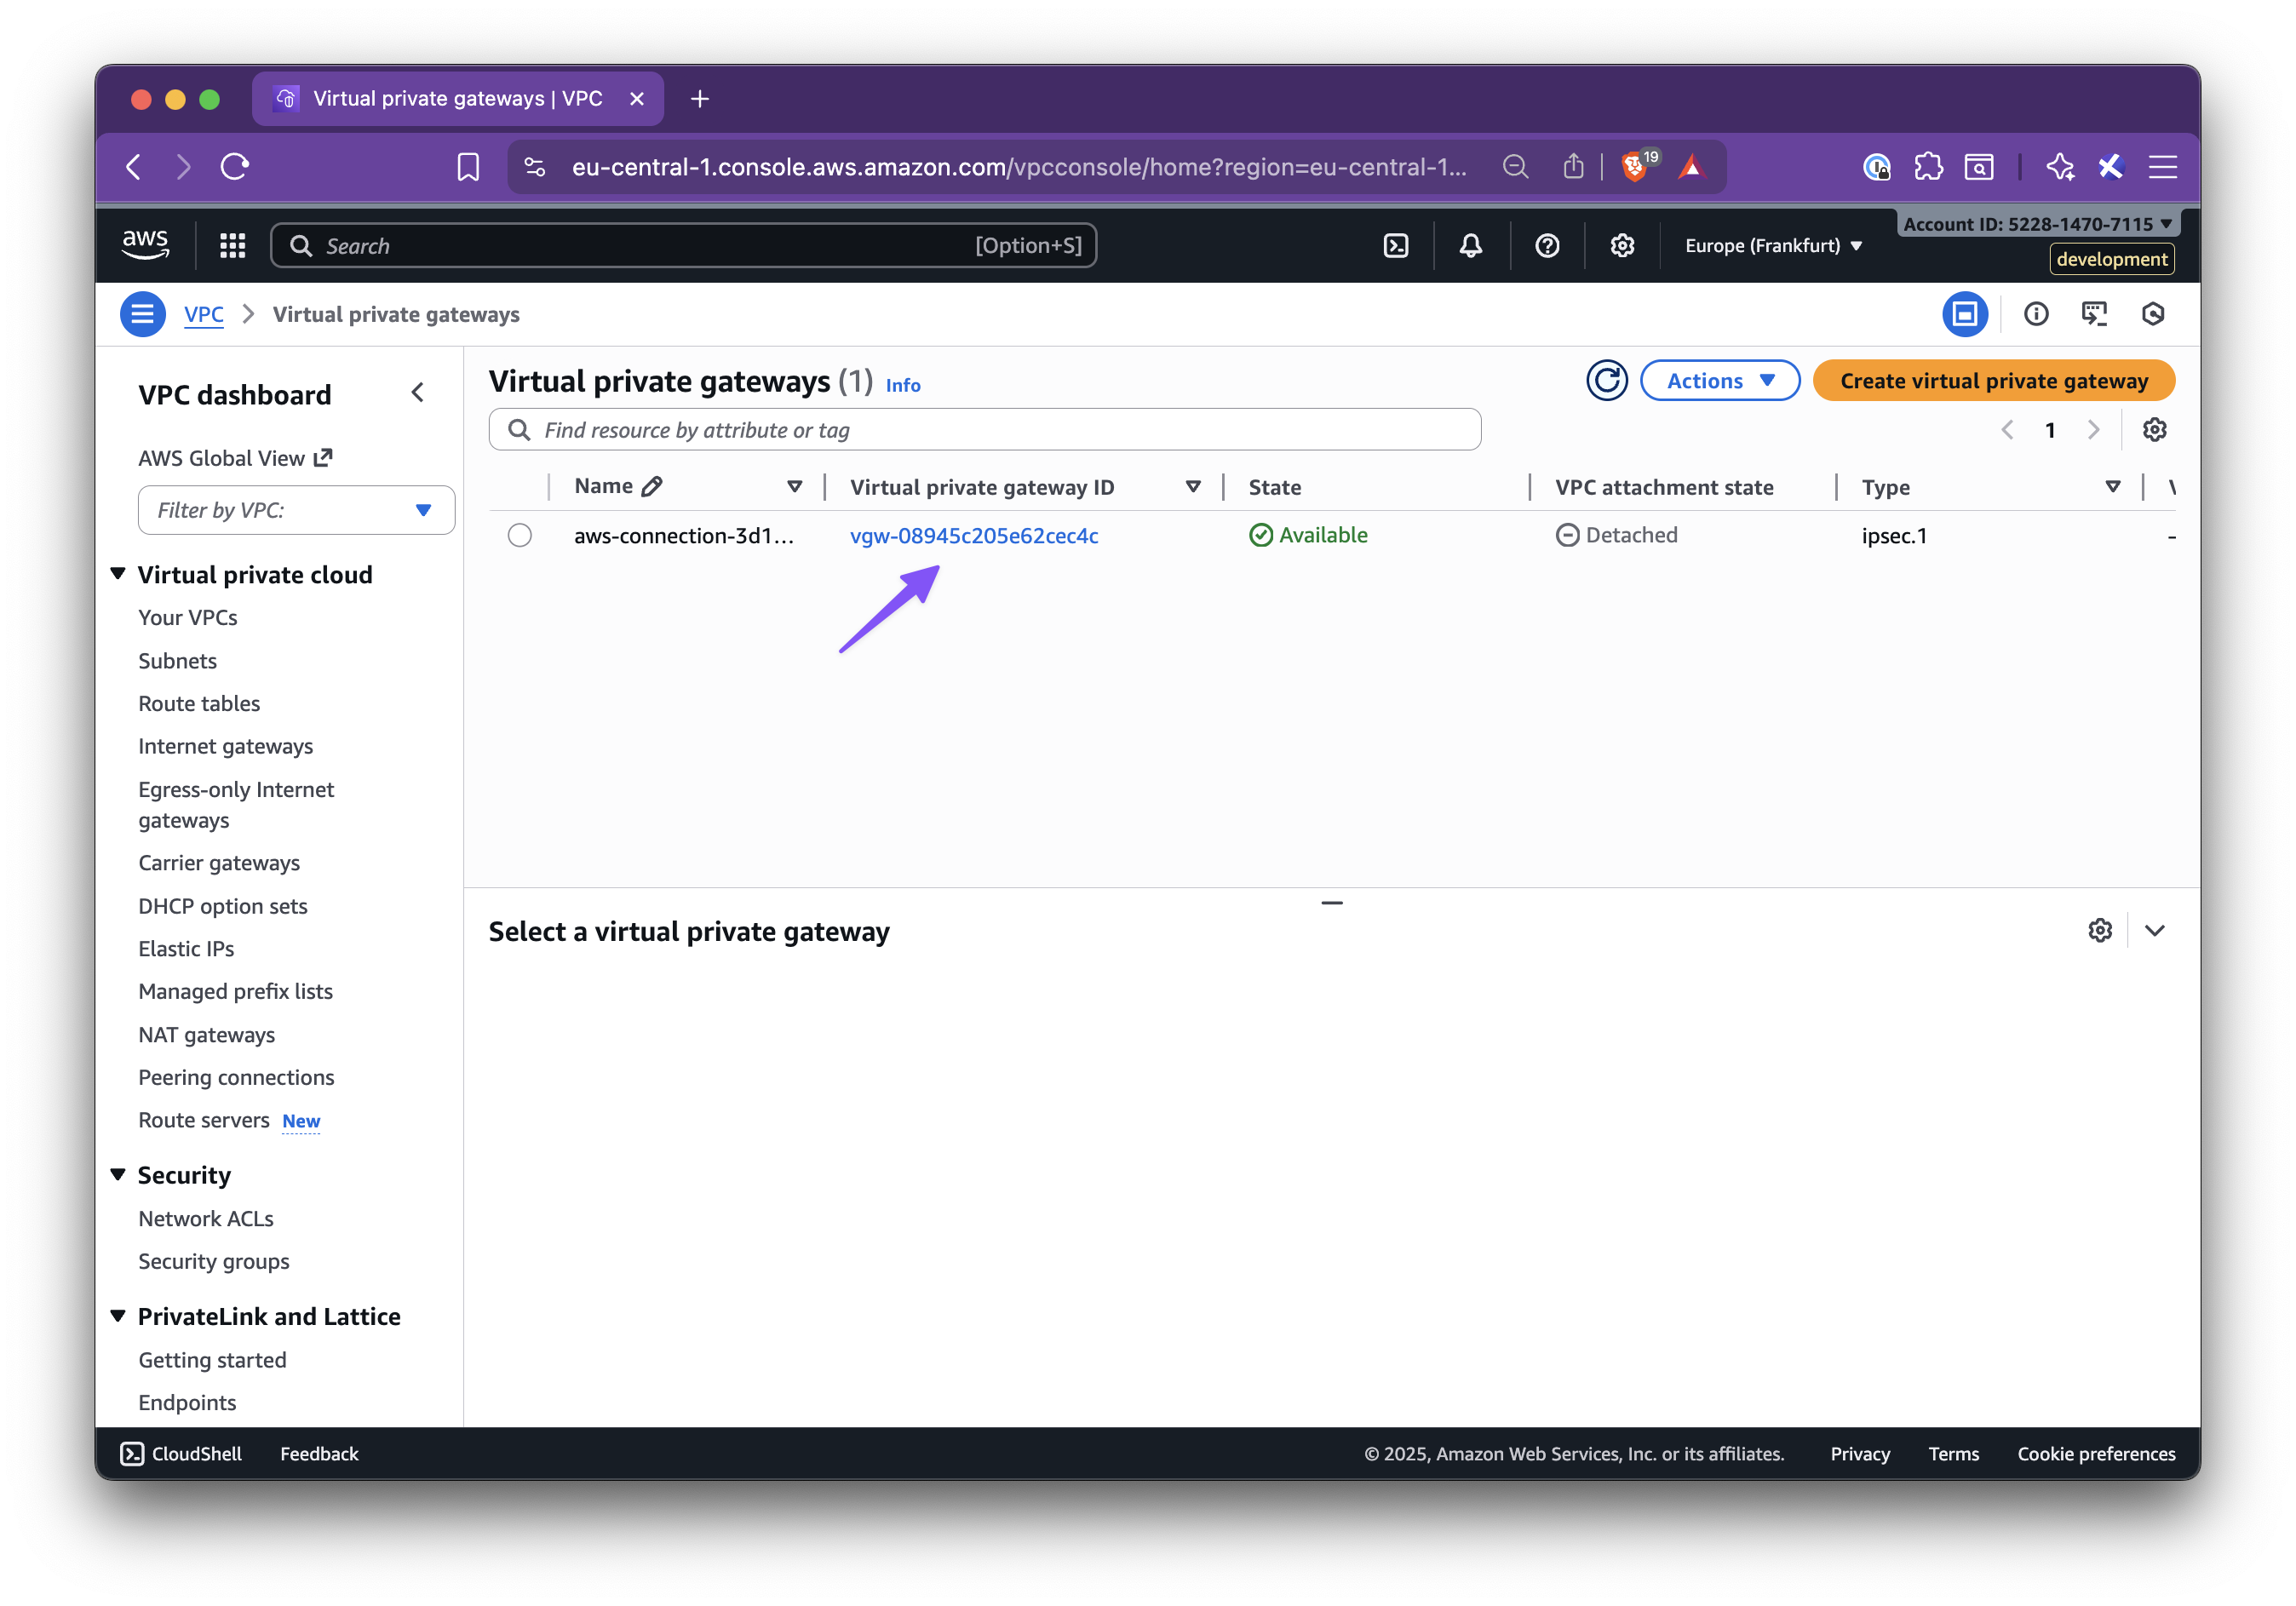
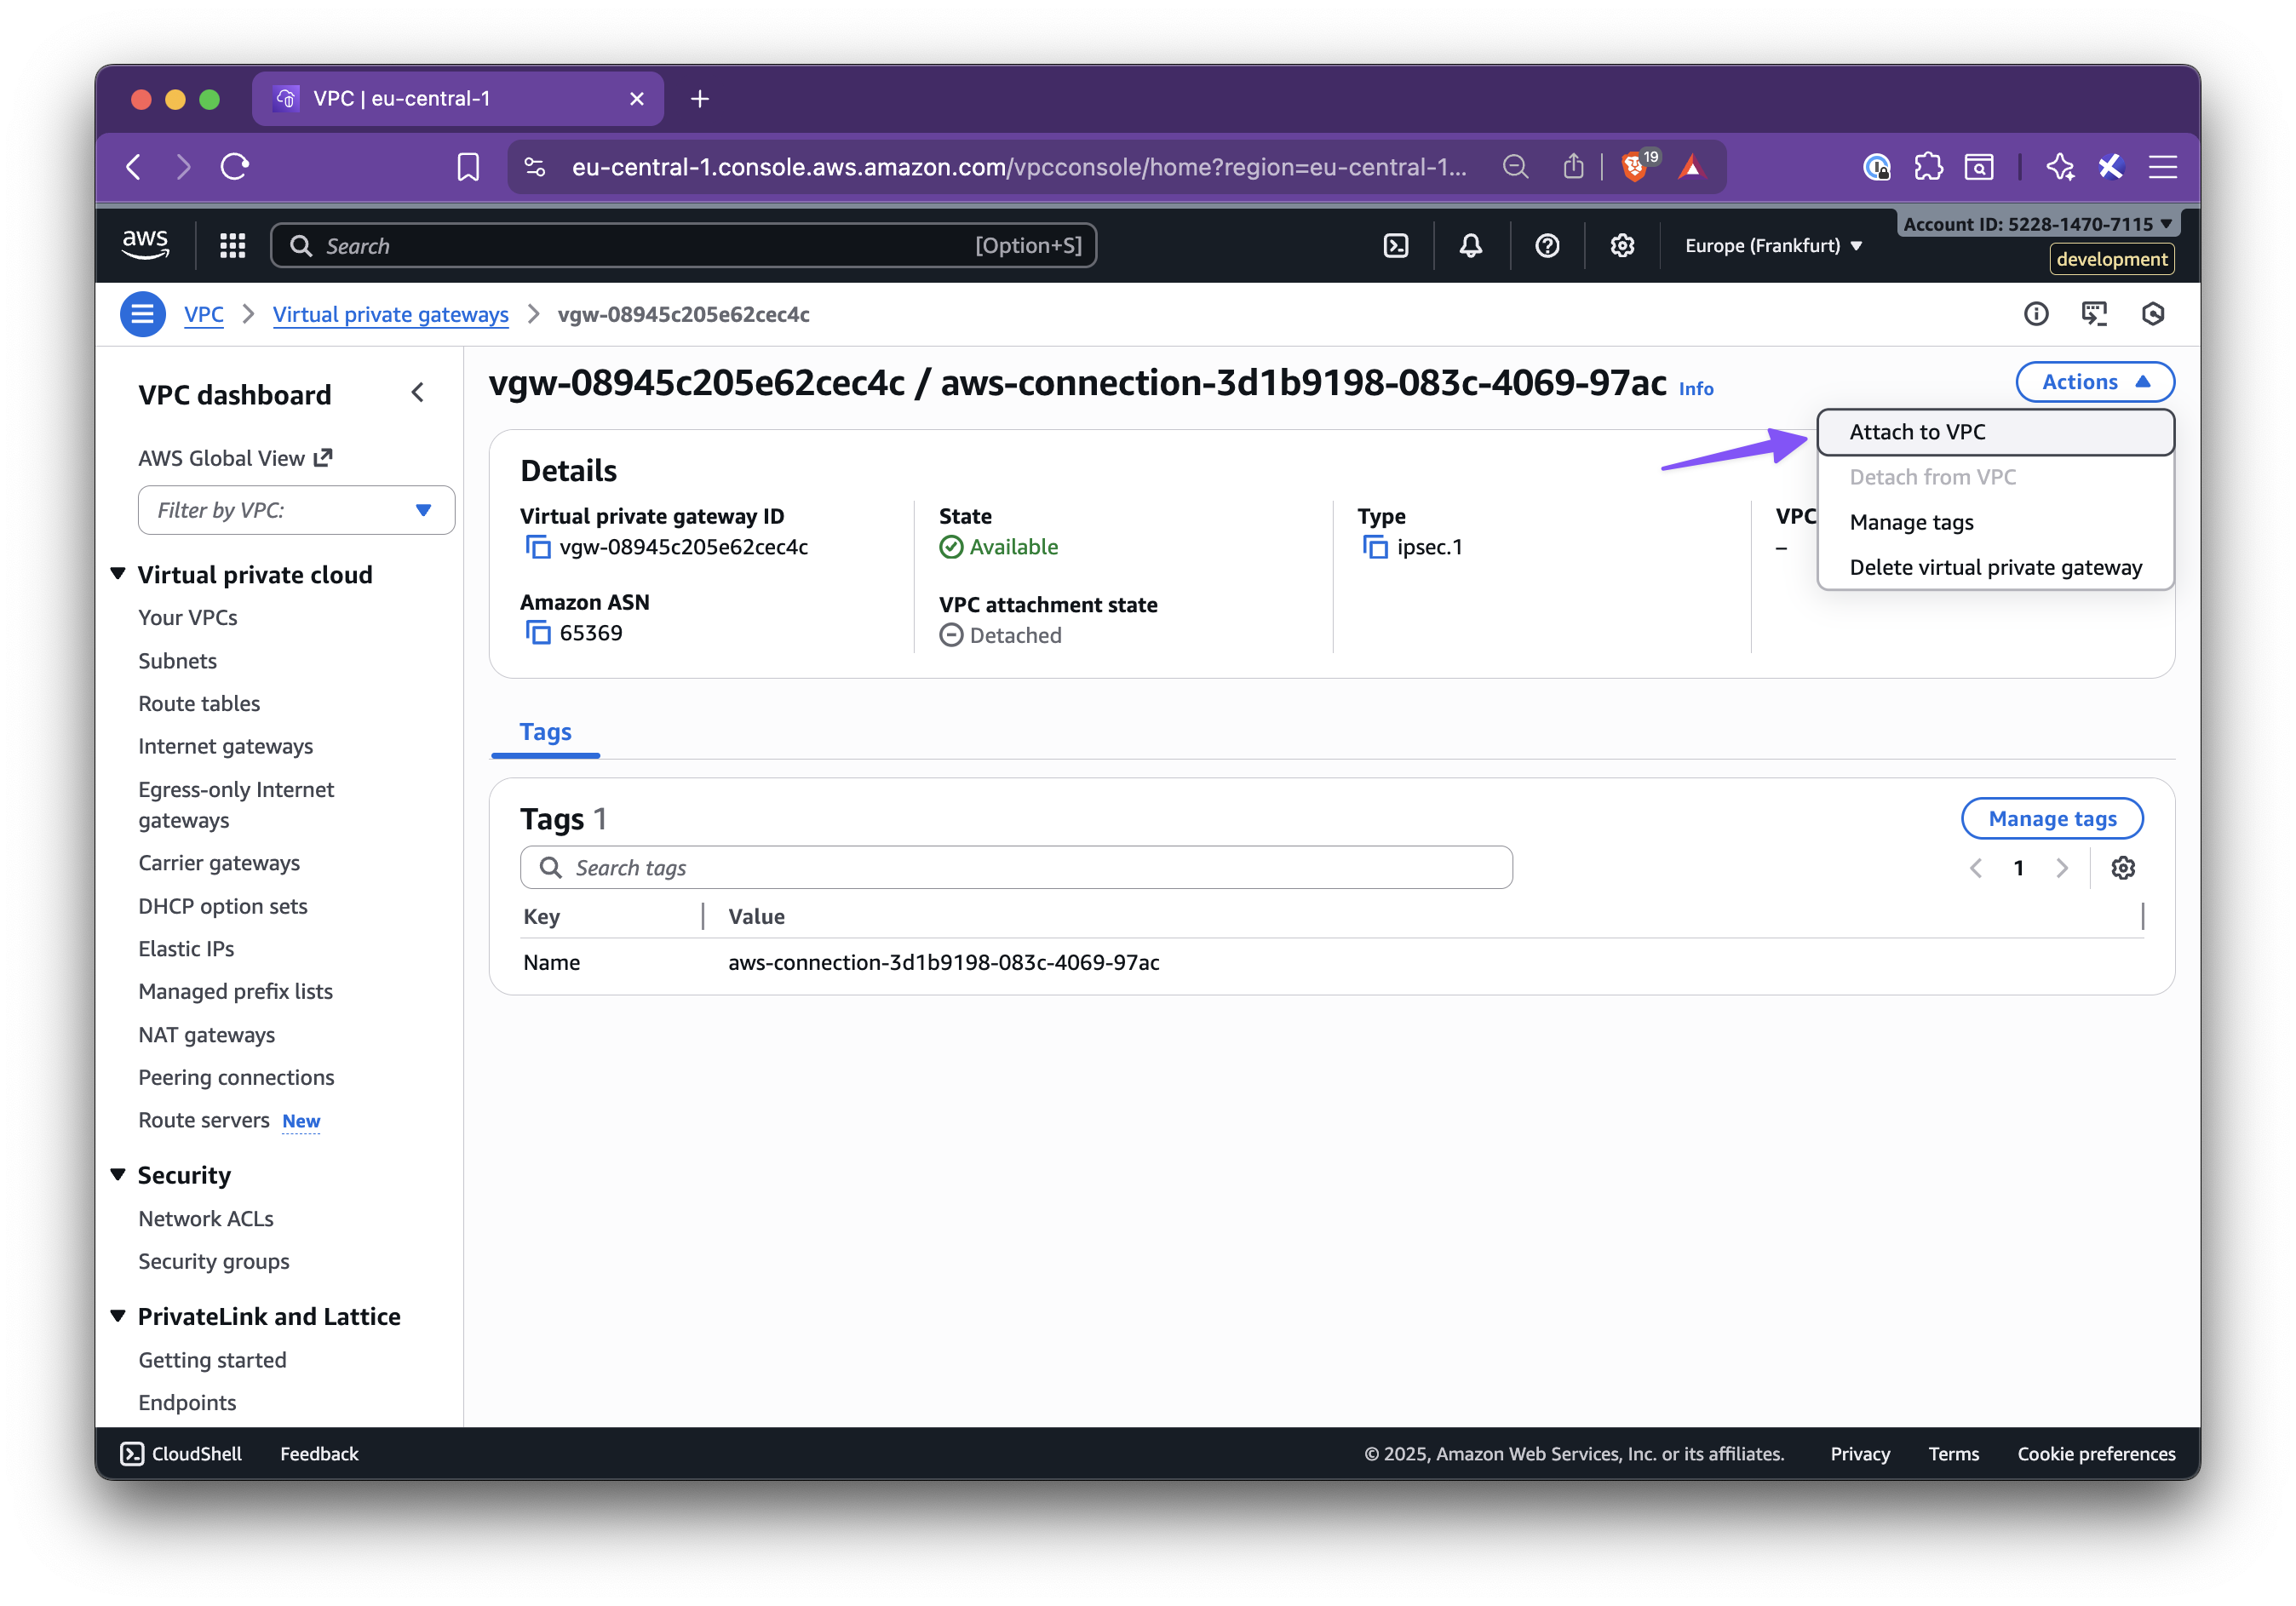
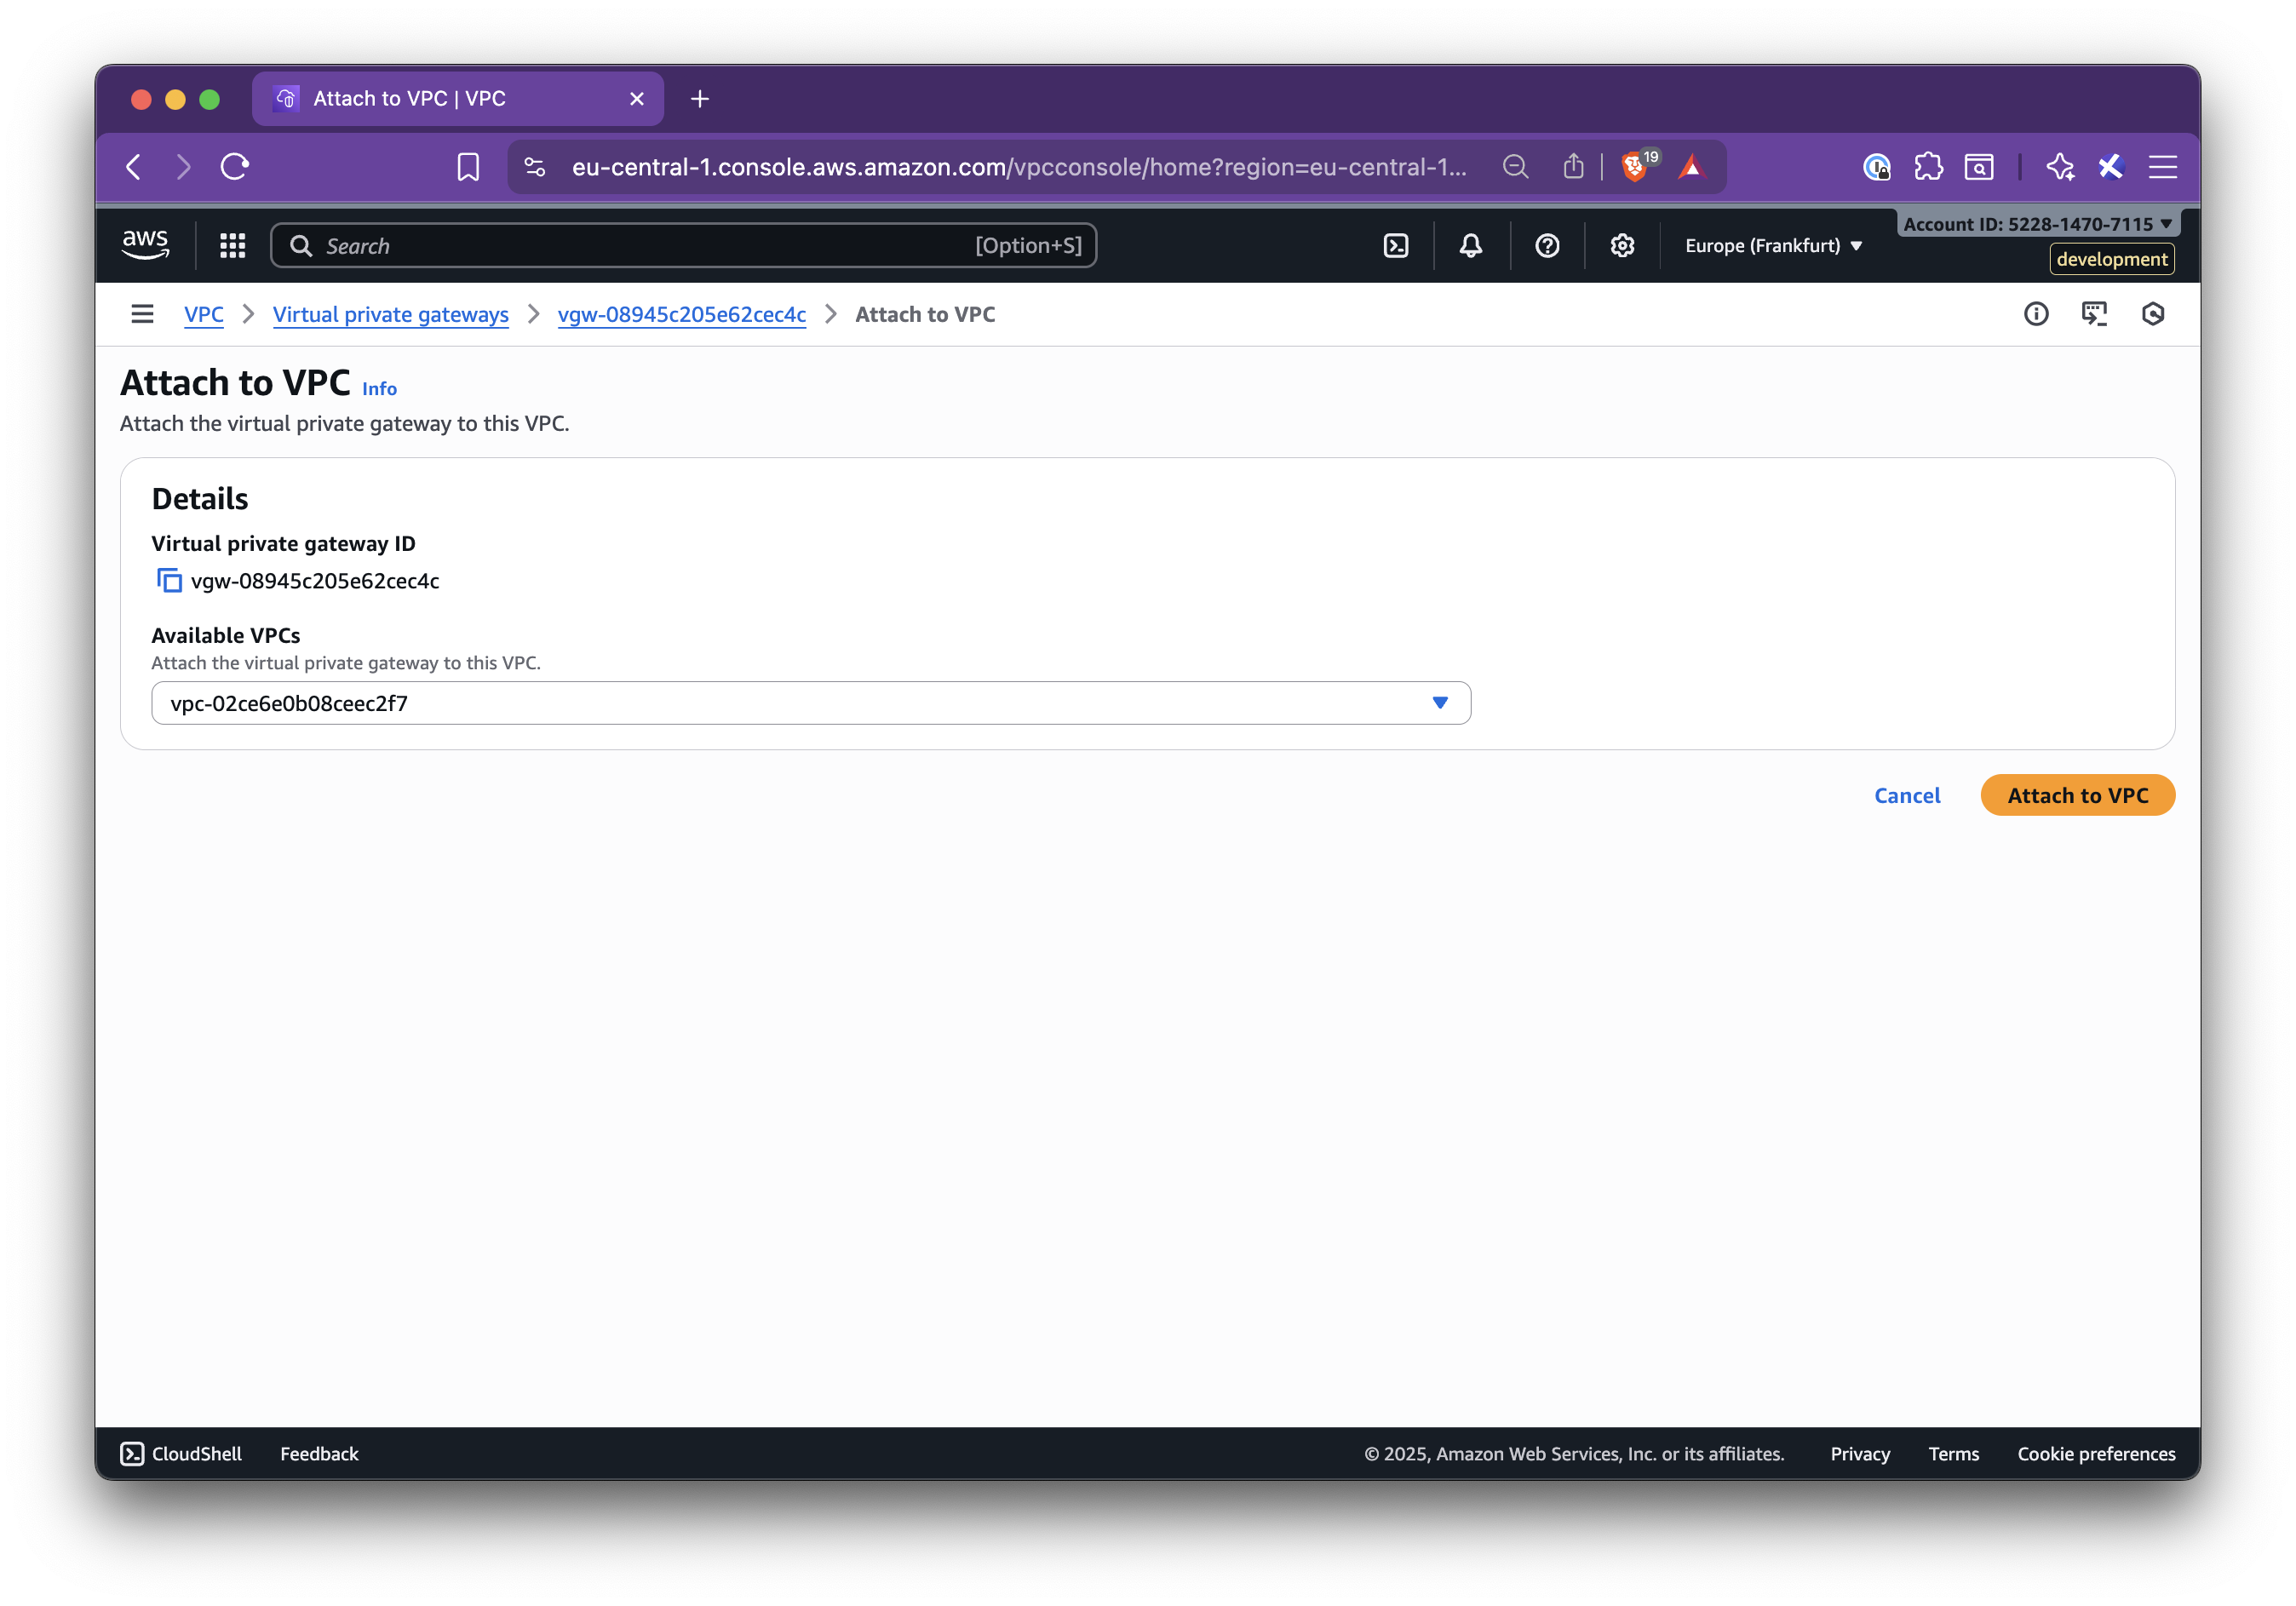
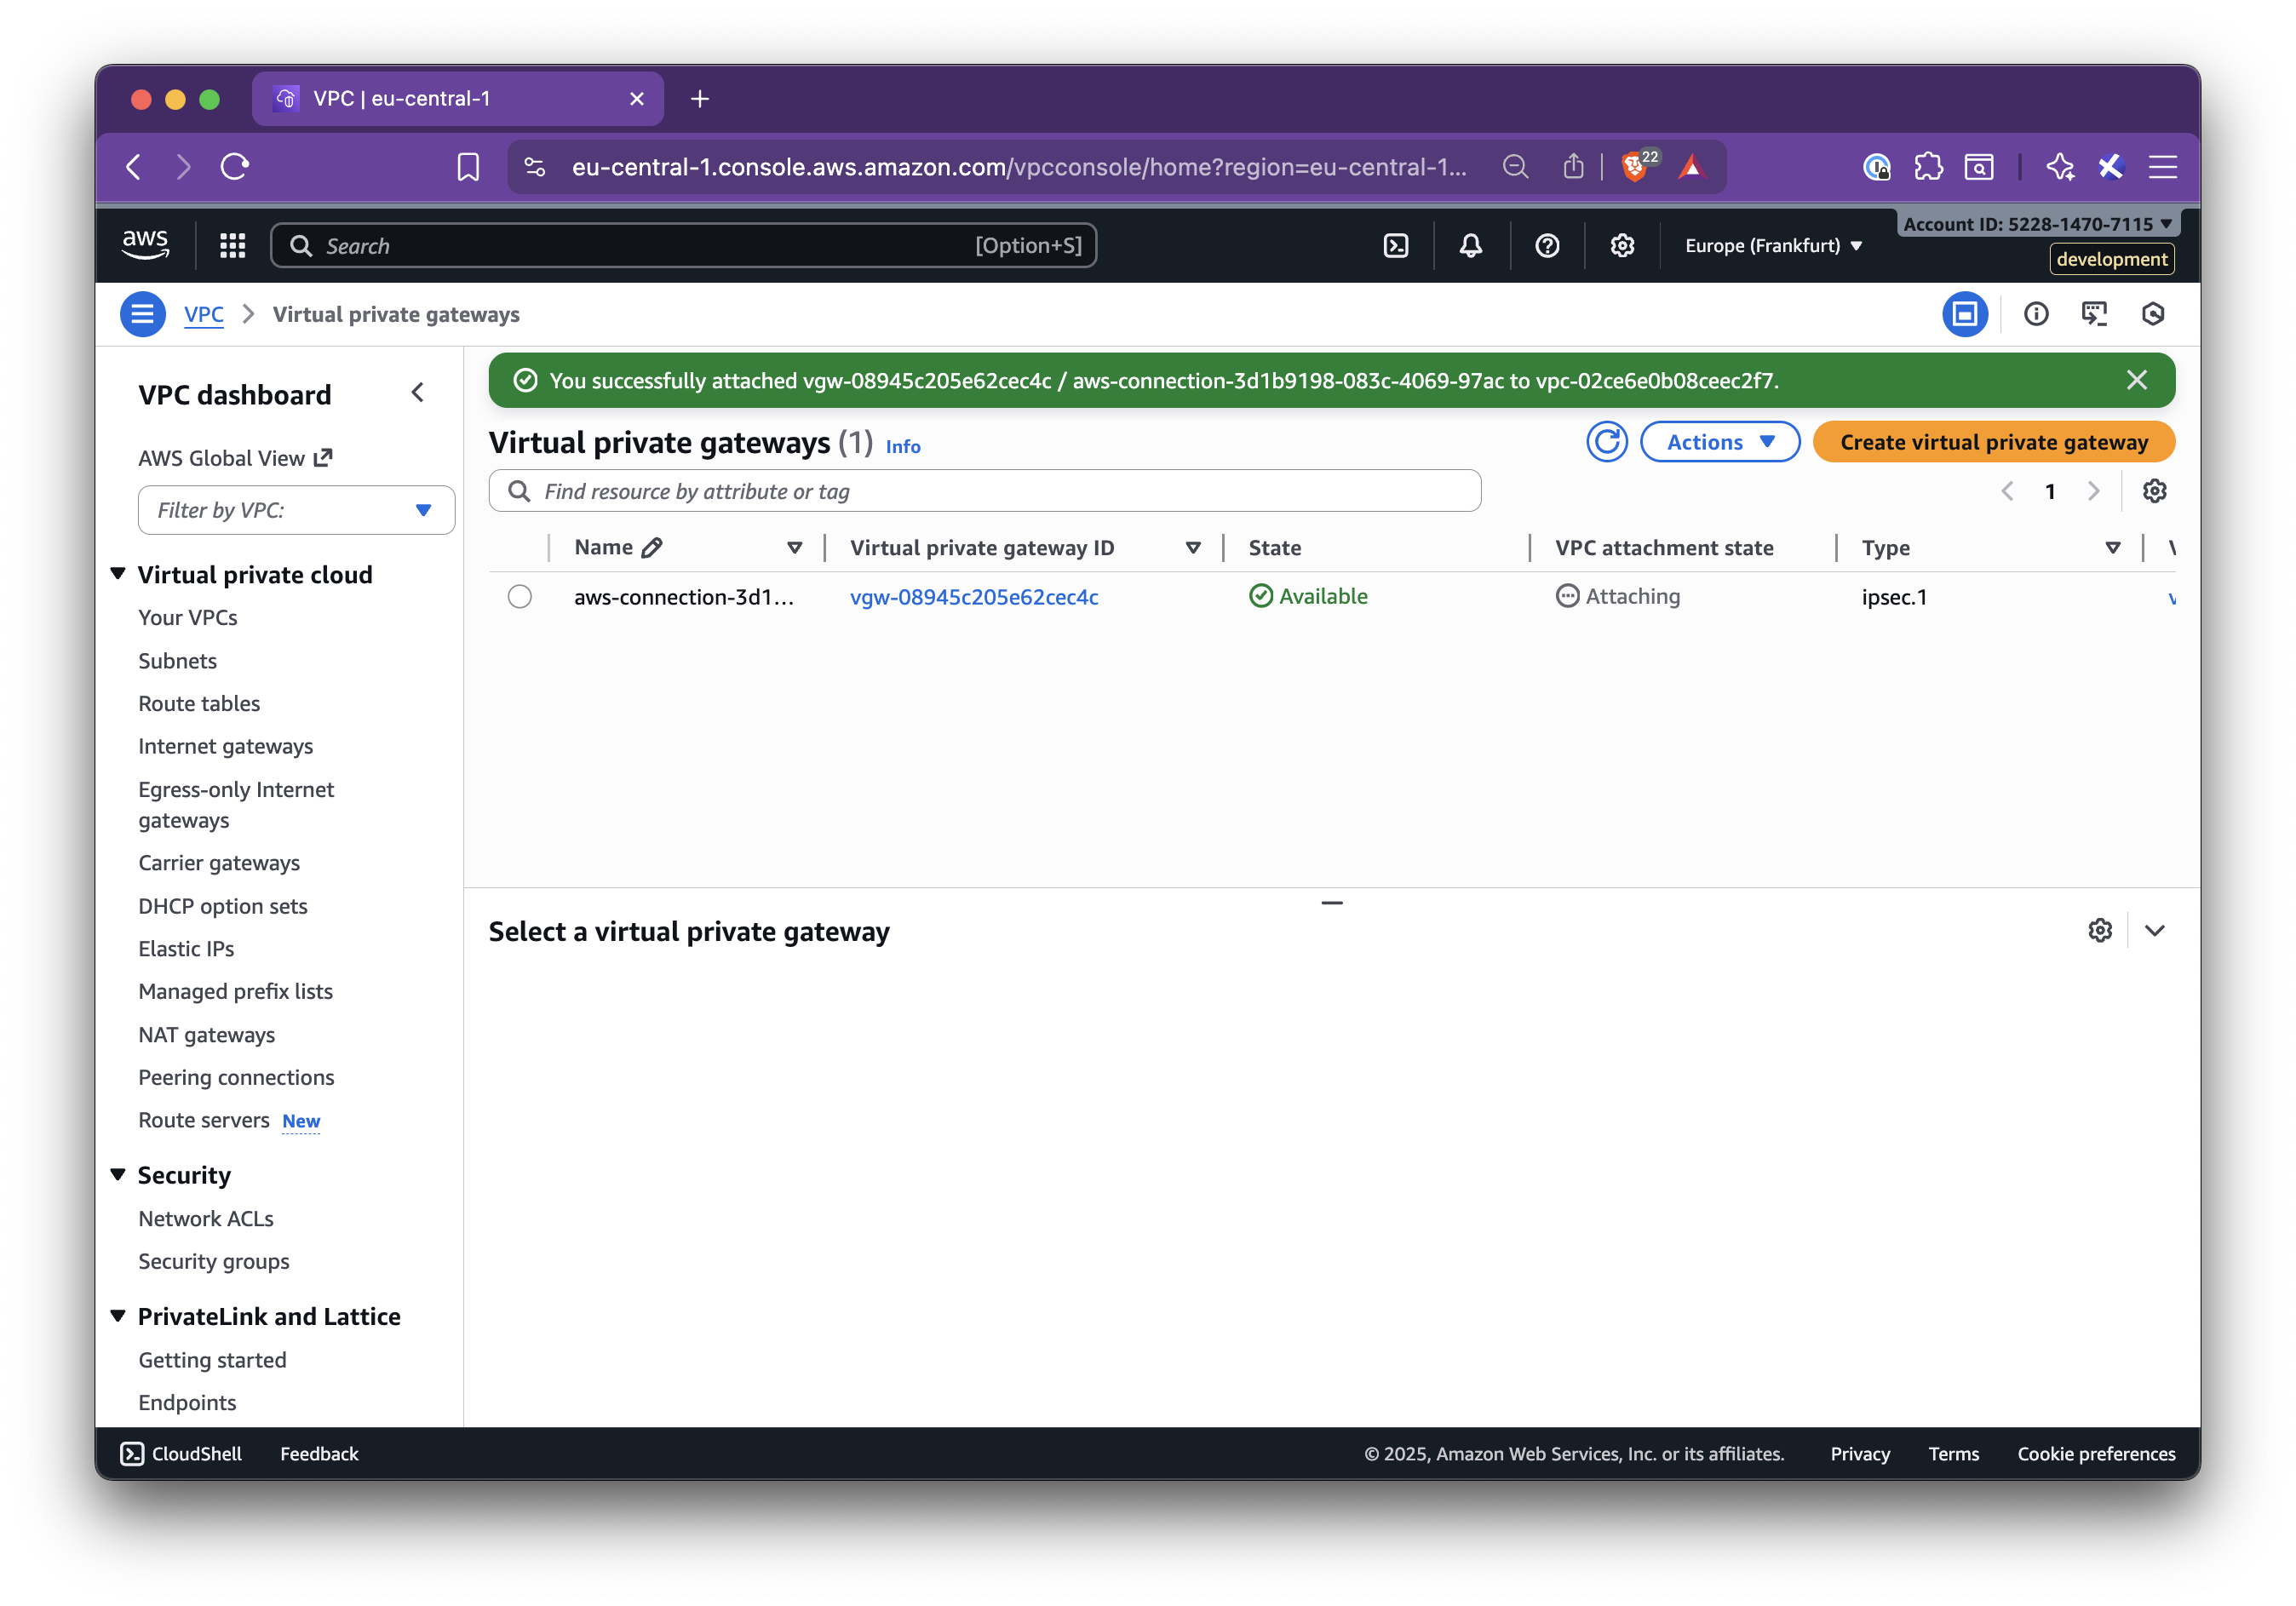
Step 4.3: Attach the VGW to your VPC
Section titled “Step 4.3: Attach the VGW to your VPC”- In Virtual private gateways, select the new VGW
- Click Actions → Attach to VPC
- Select your target VPC and attach
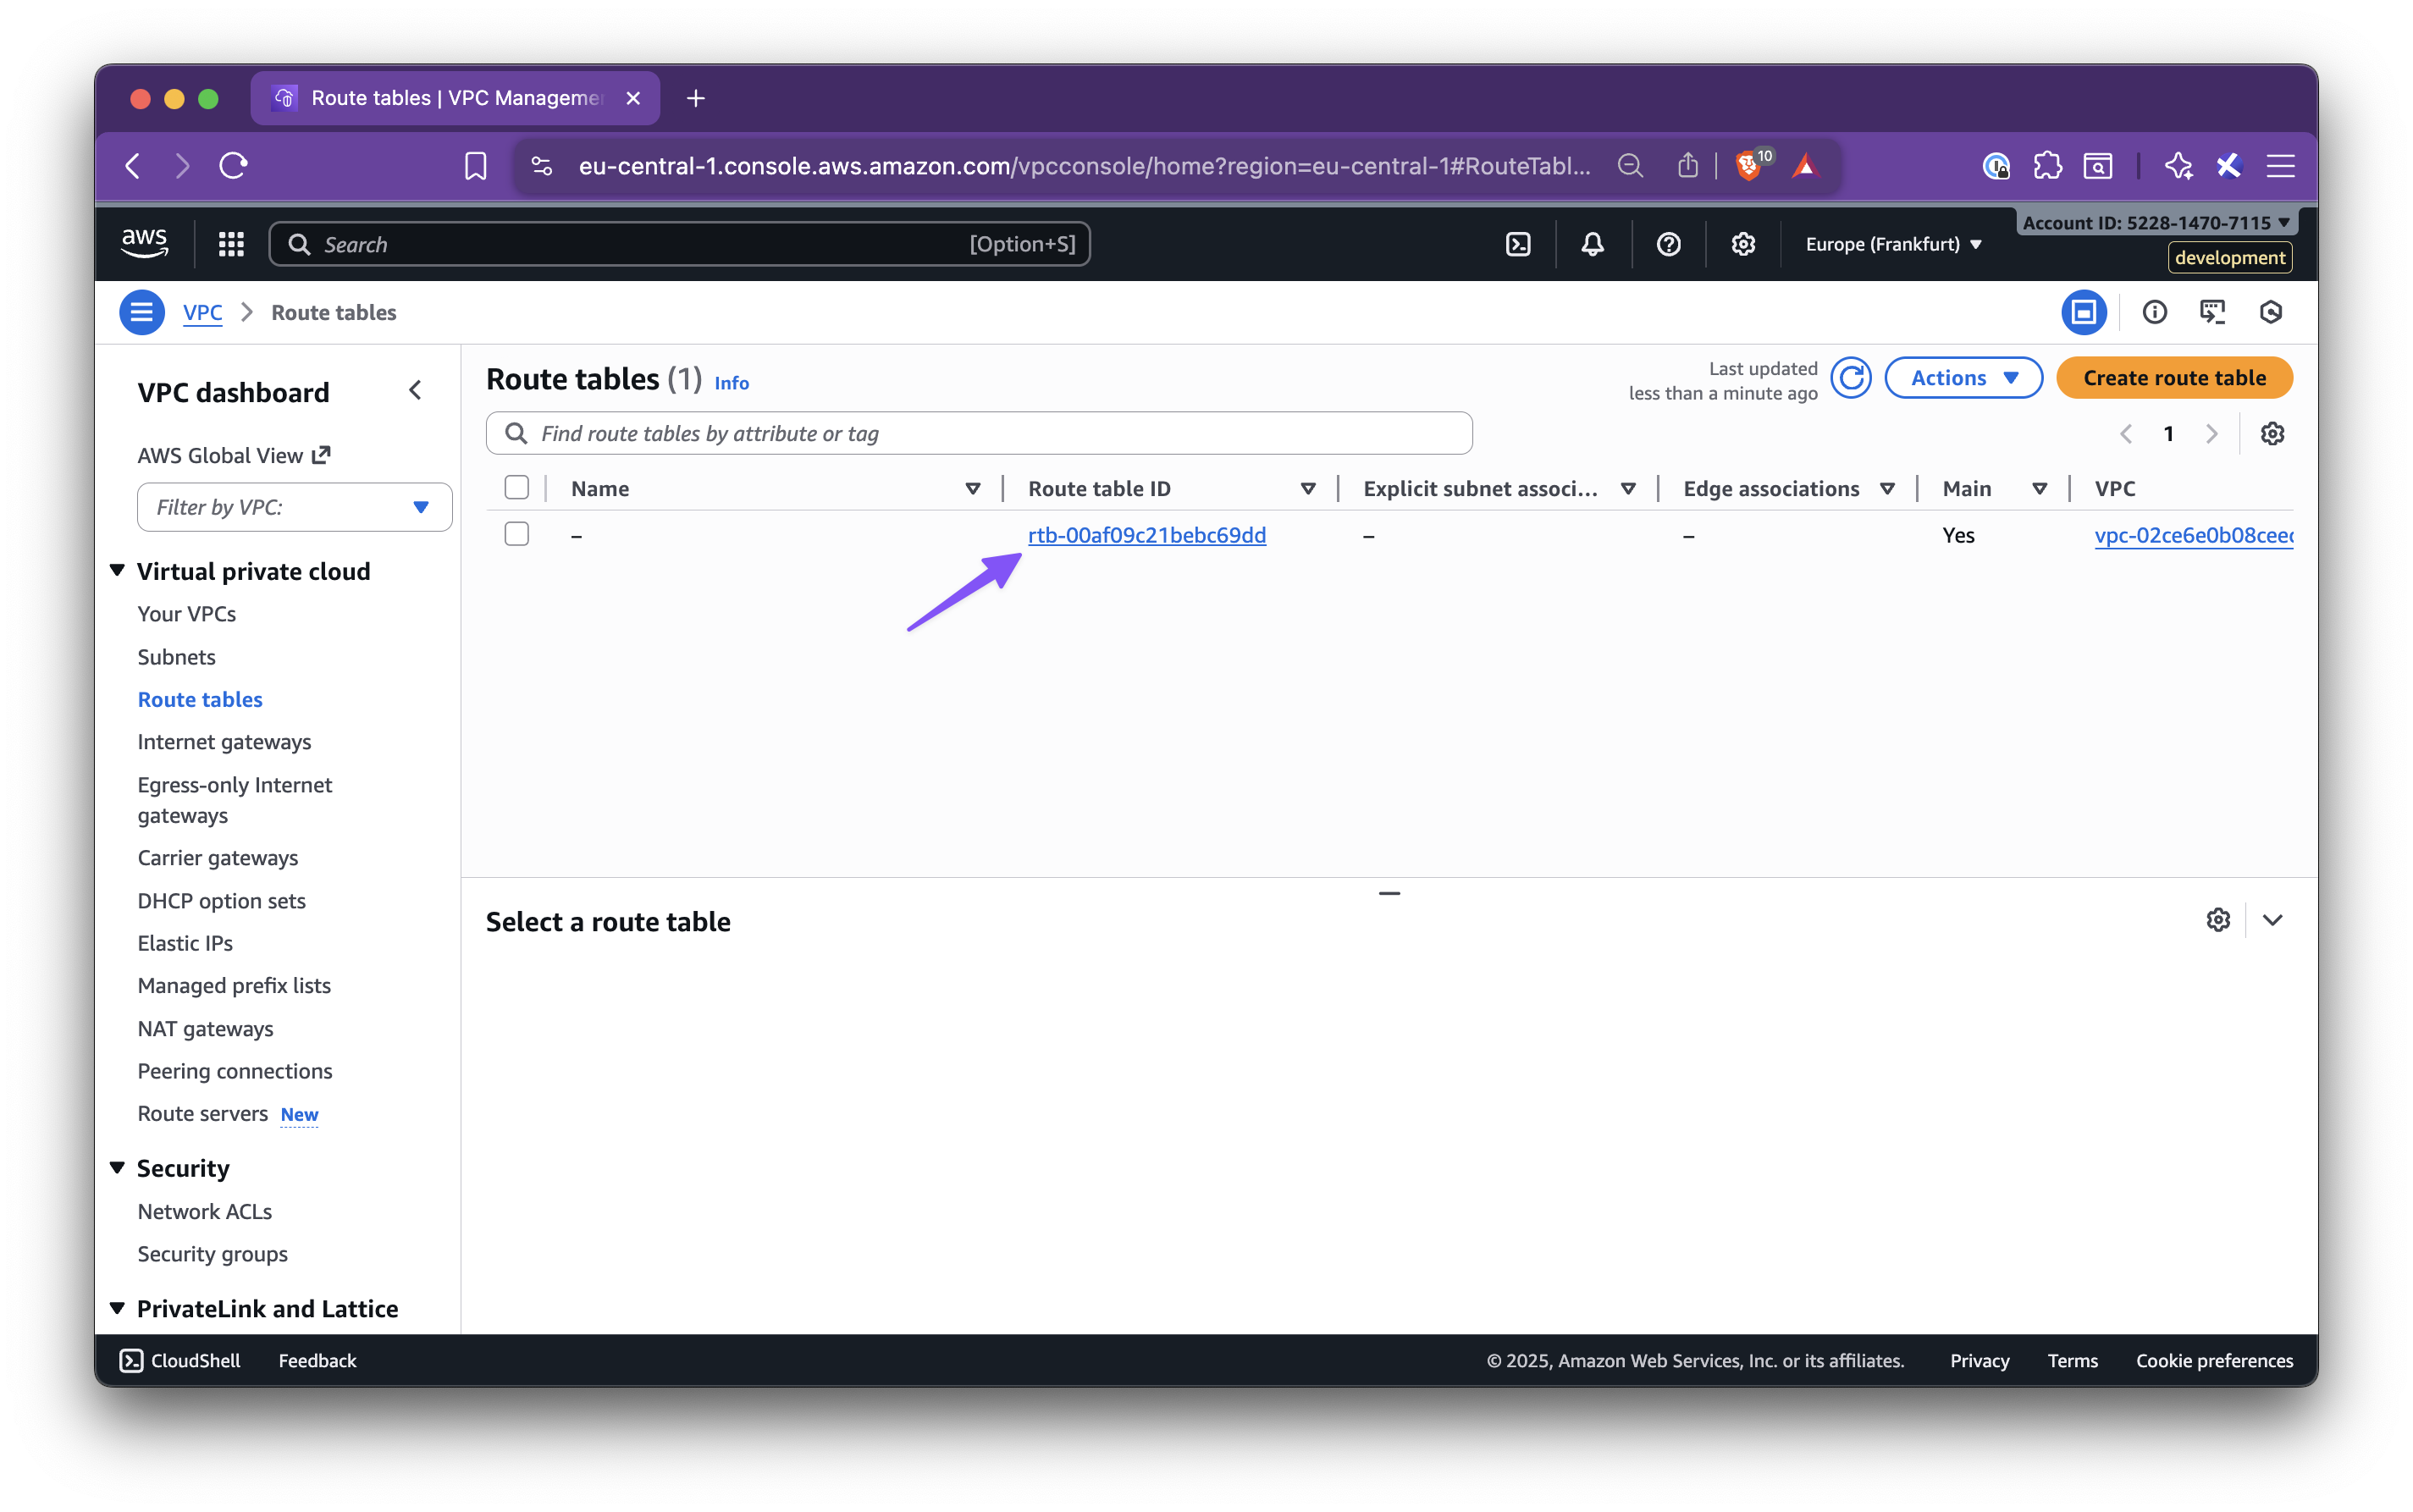
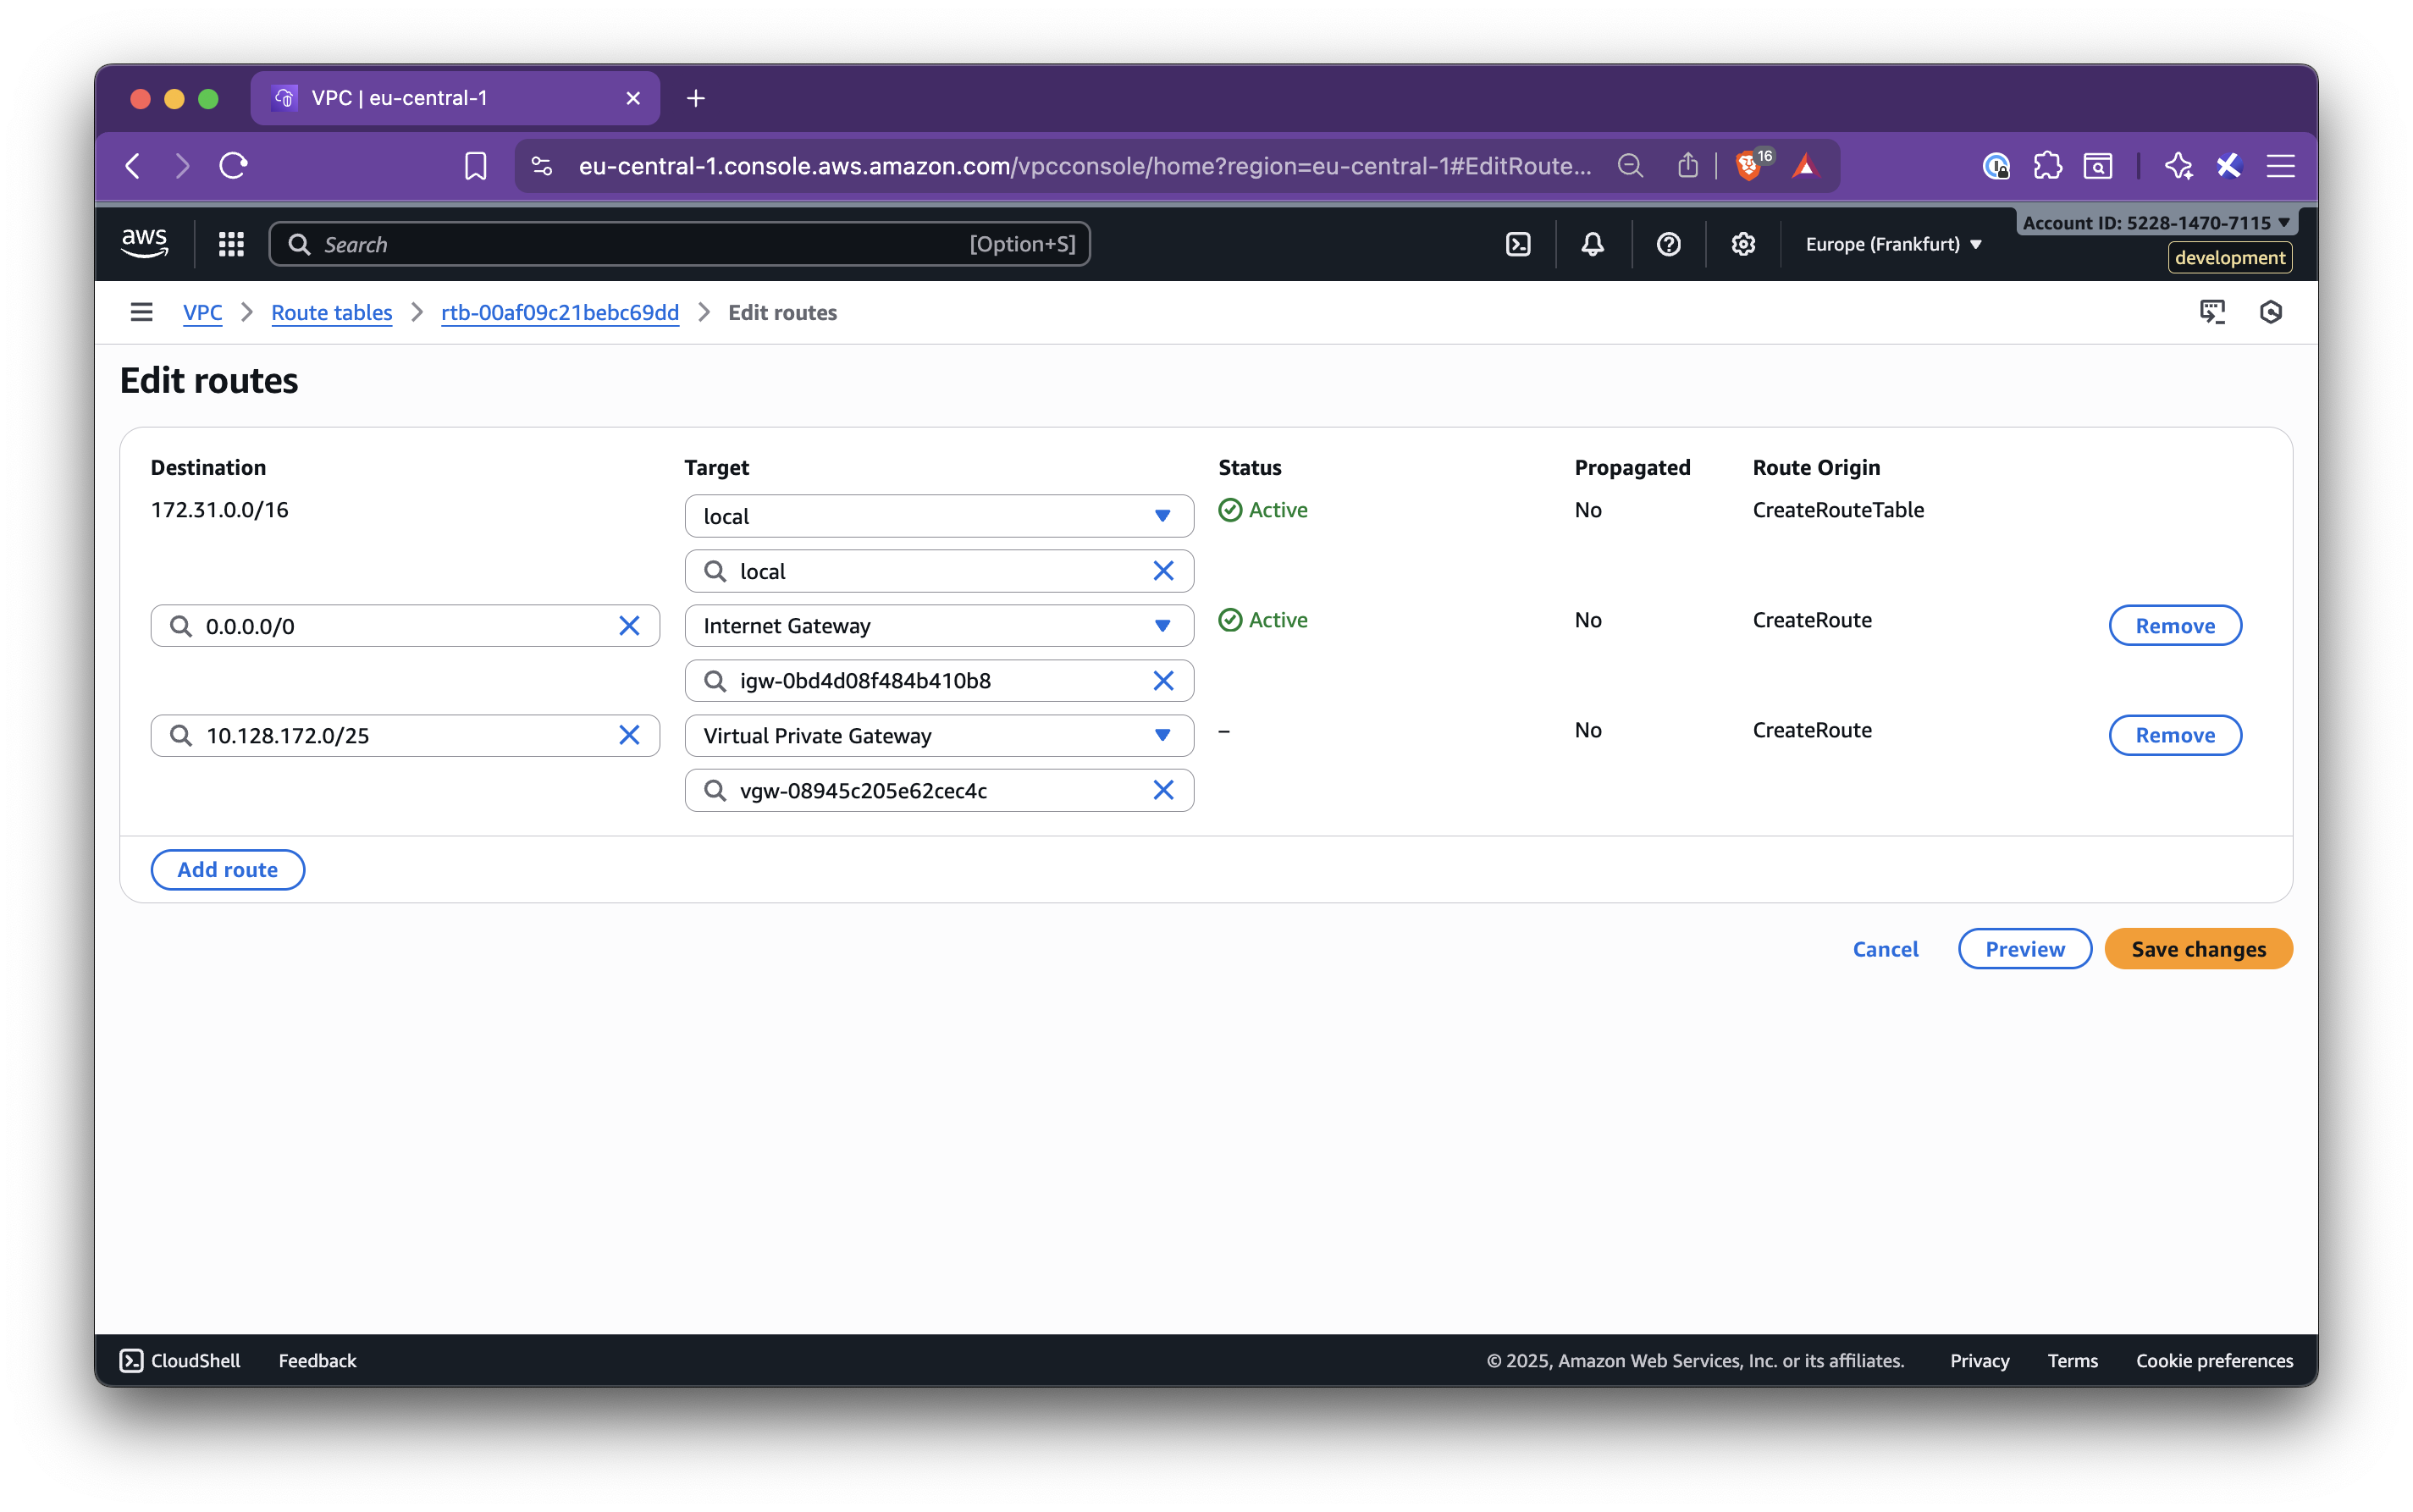
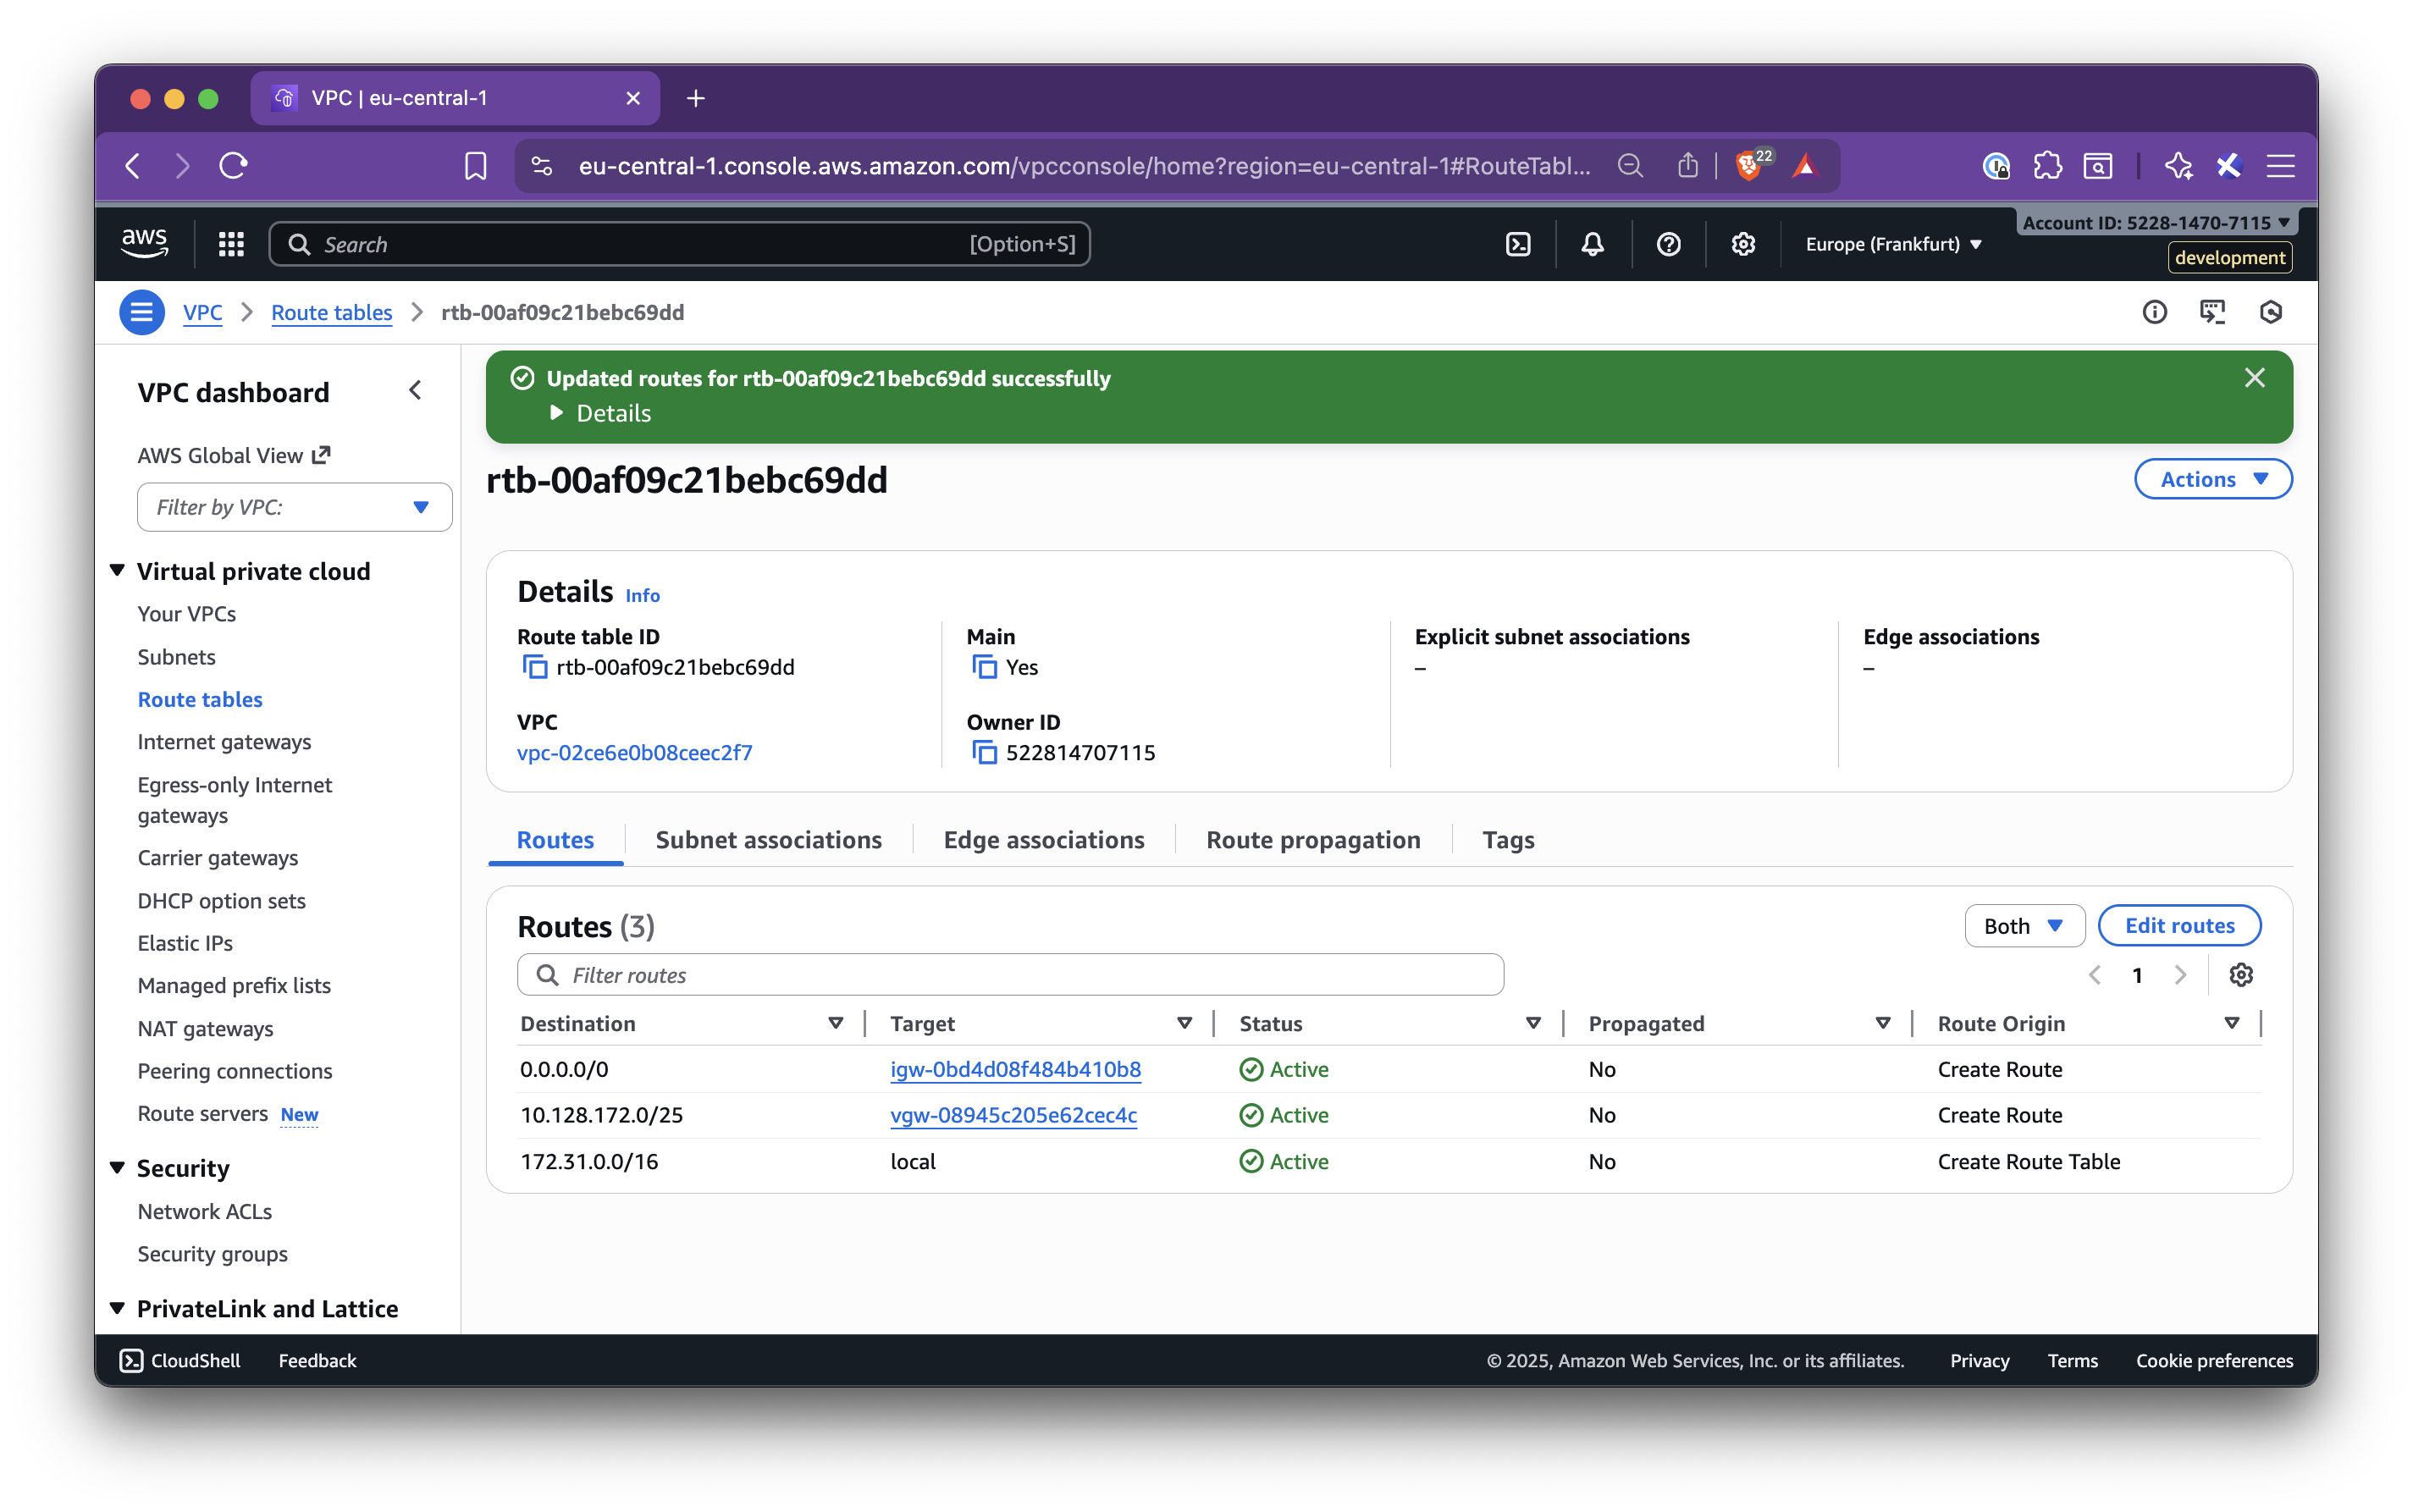
Step 4.4: Add the Nirvana VPC CIDR to the AWS route table
Section titled “Step 4.4: Add the Nirvana VPC CIDR to the AWS route table”- Go to AWS VPC → Route tables
- Select the route table for the target VPC
- Click Edit routes → Add route:
- Destination: Nirvana VPC CIDR
- Target: the VGW from Step 4.2
- Save changes
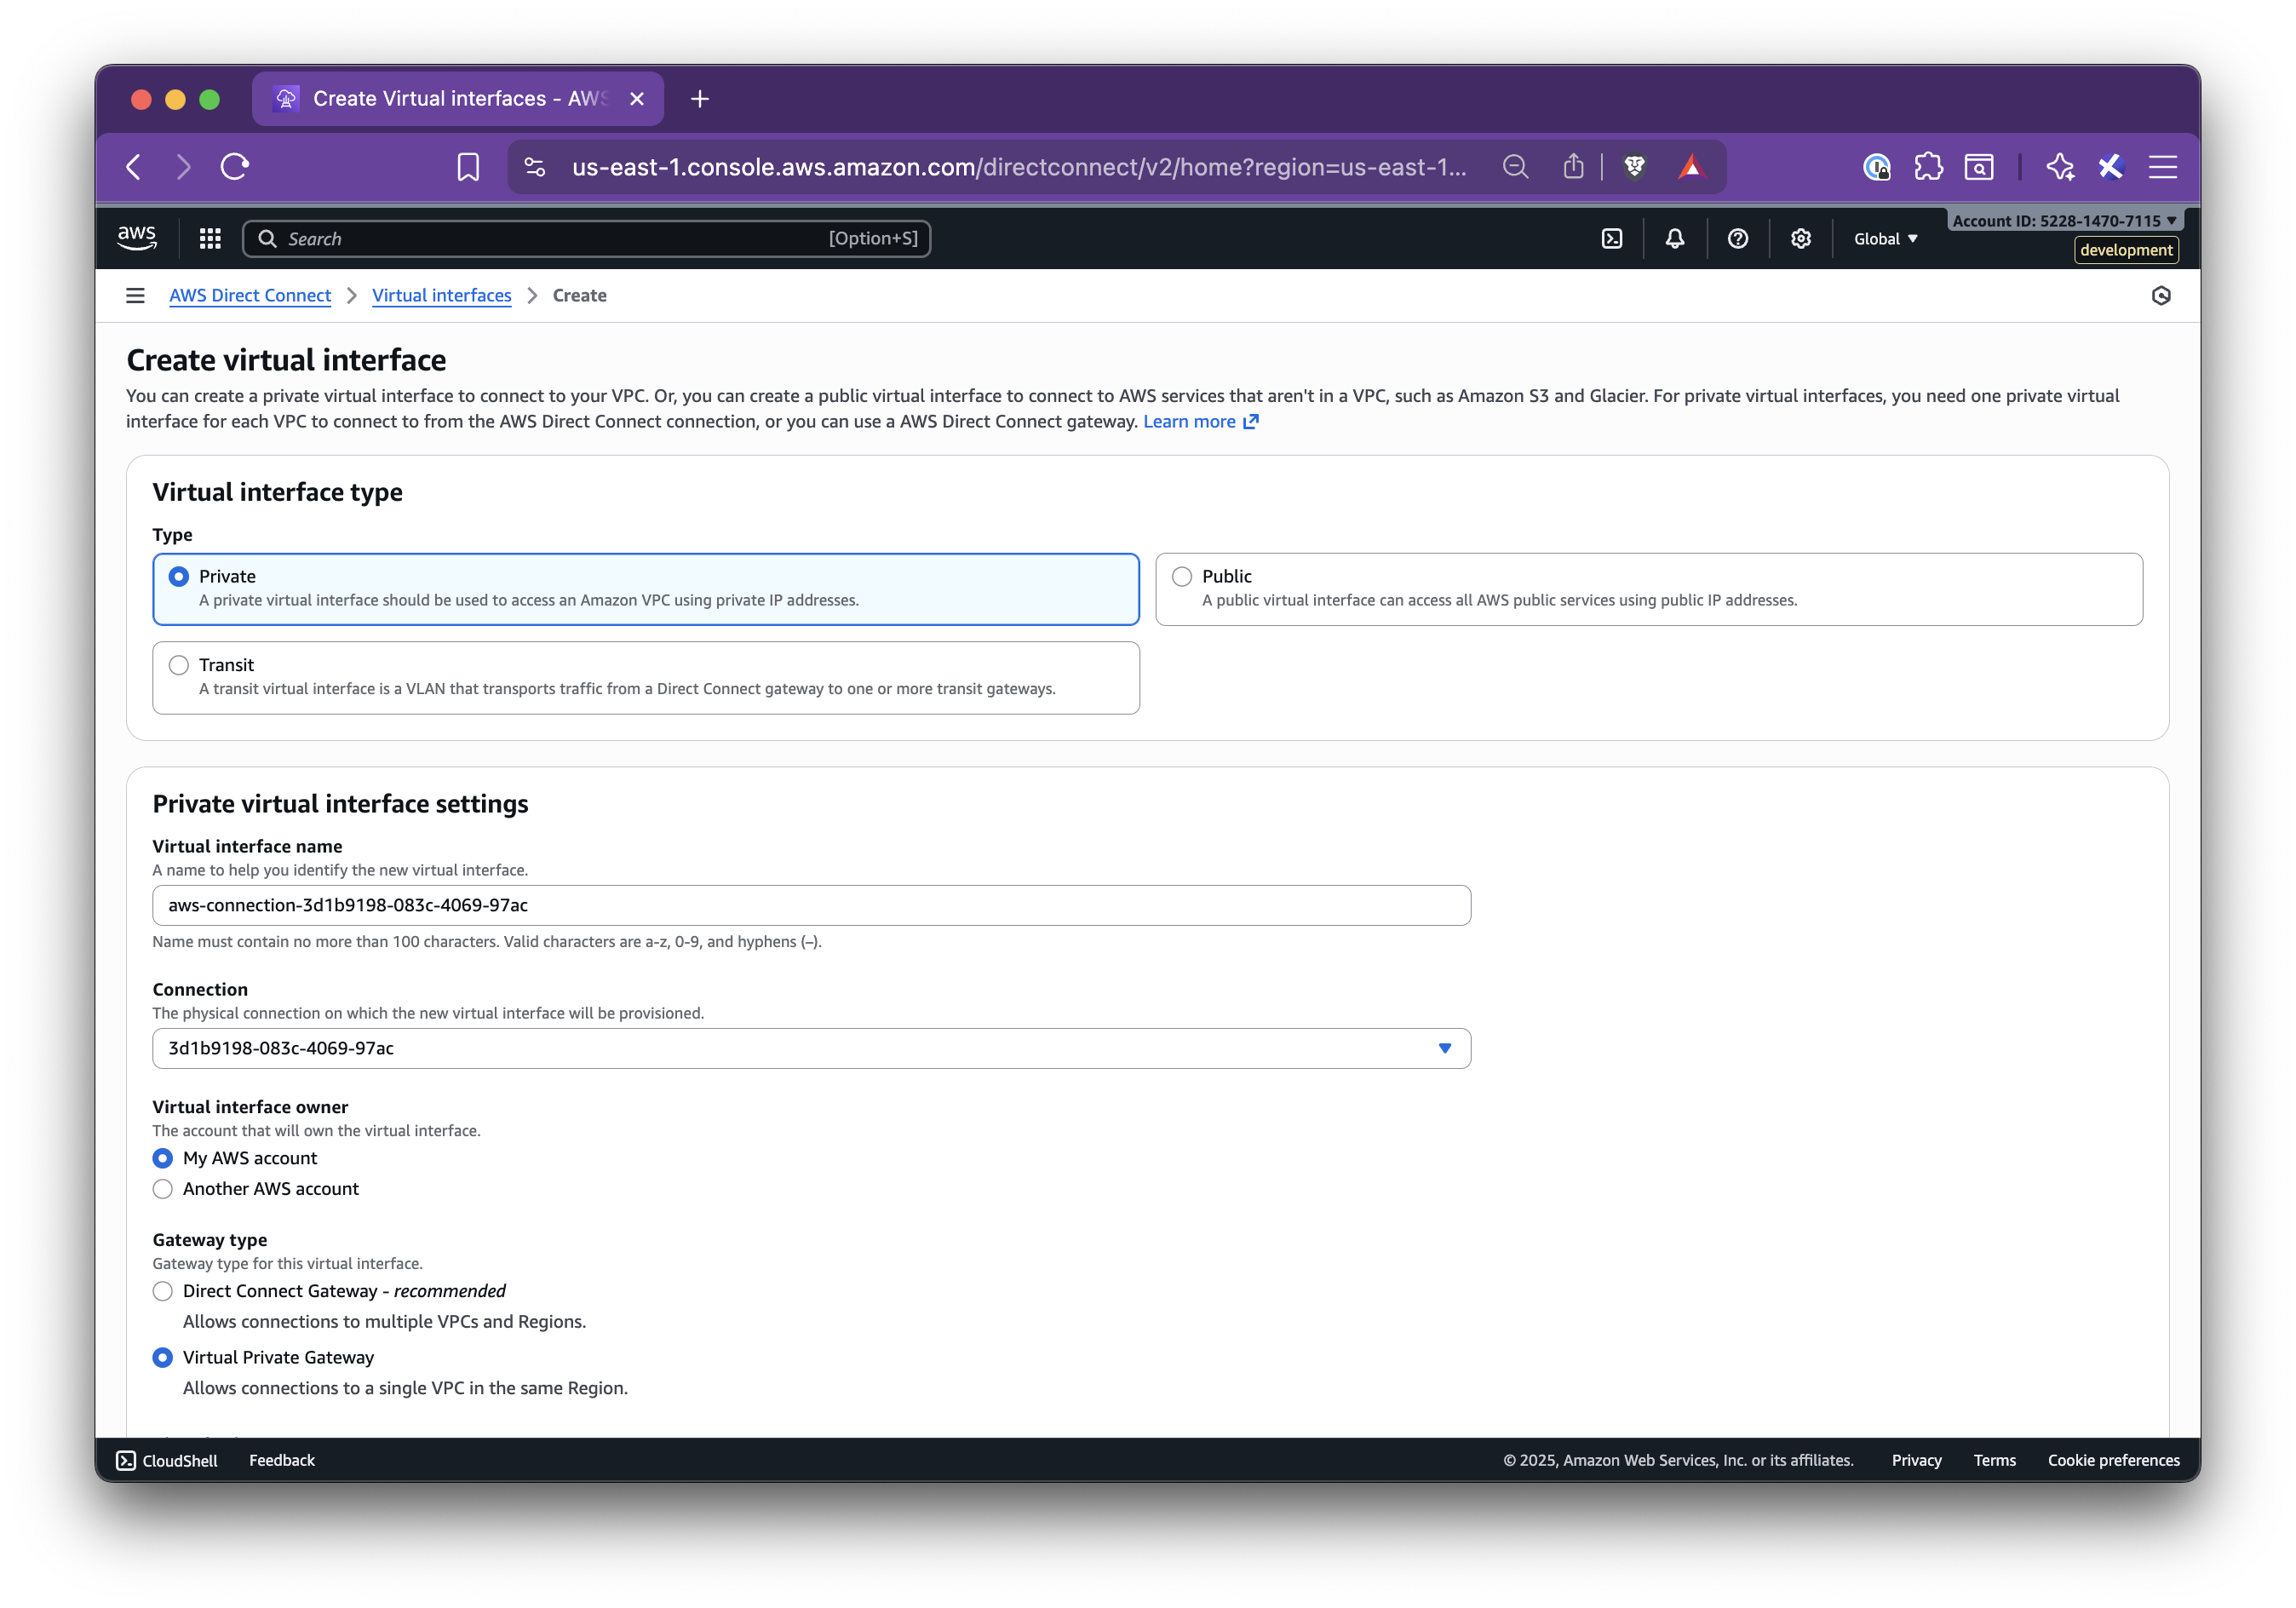
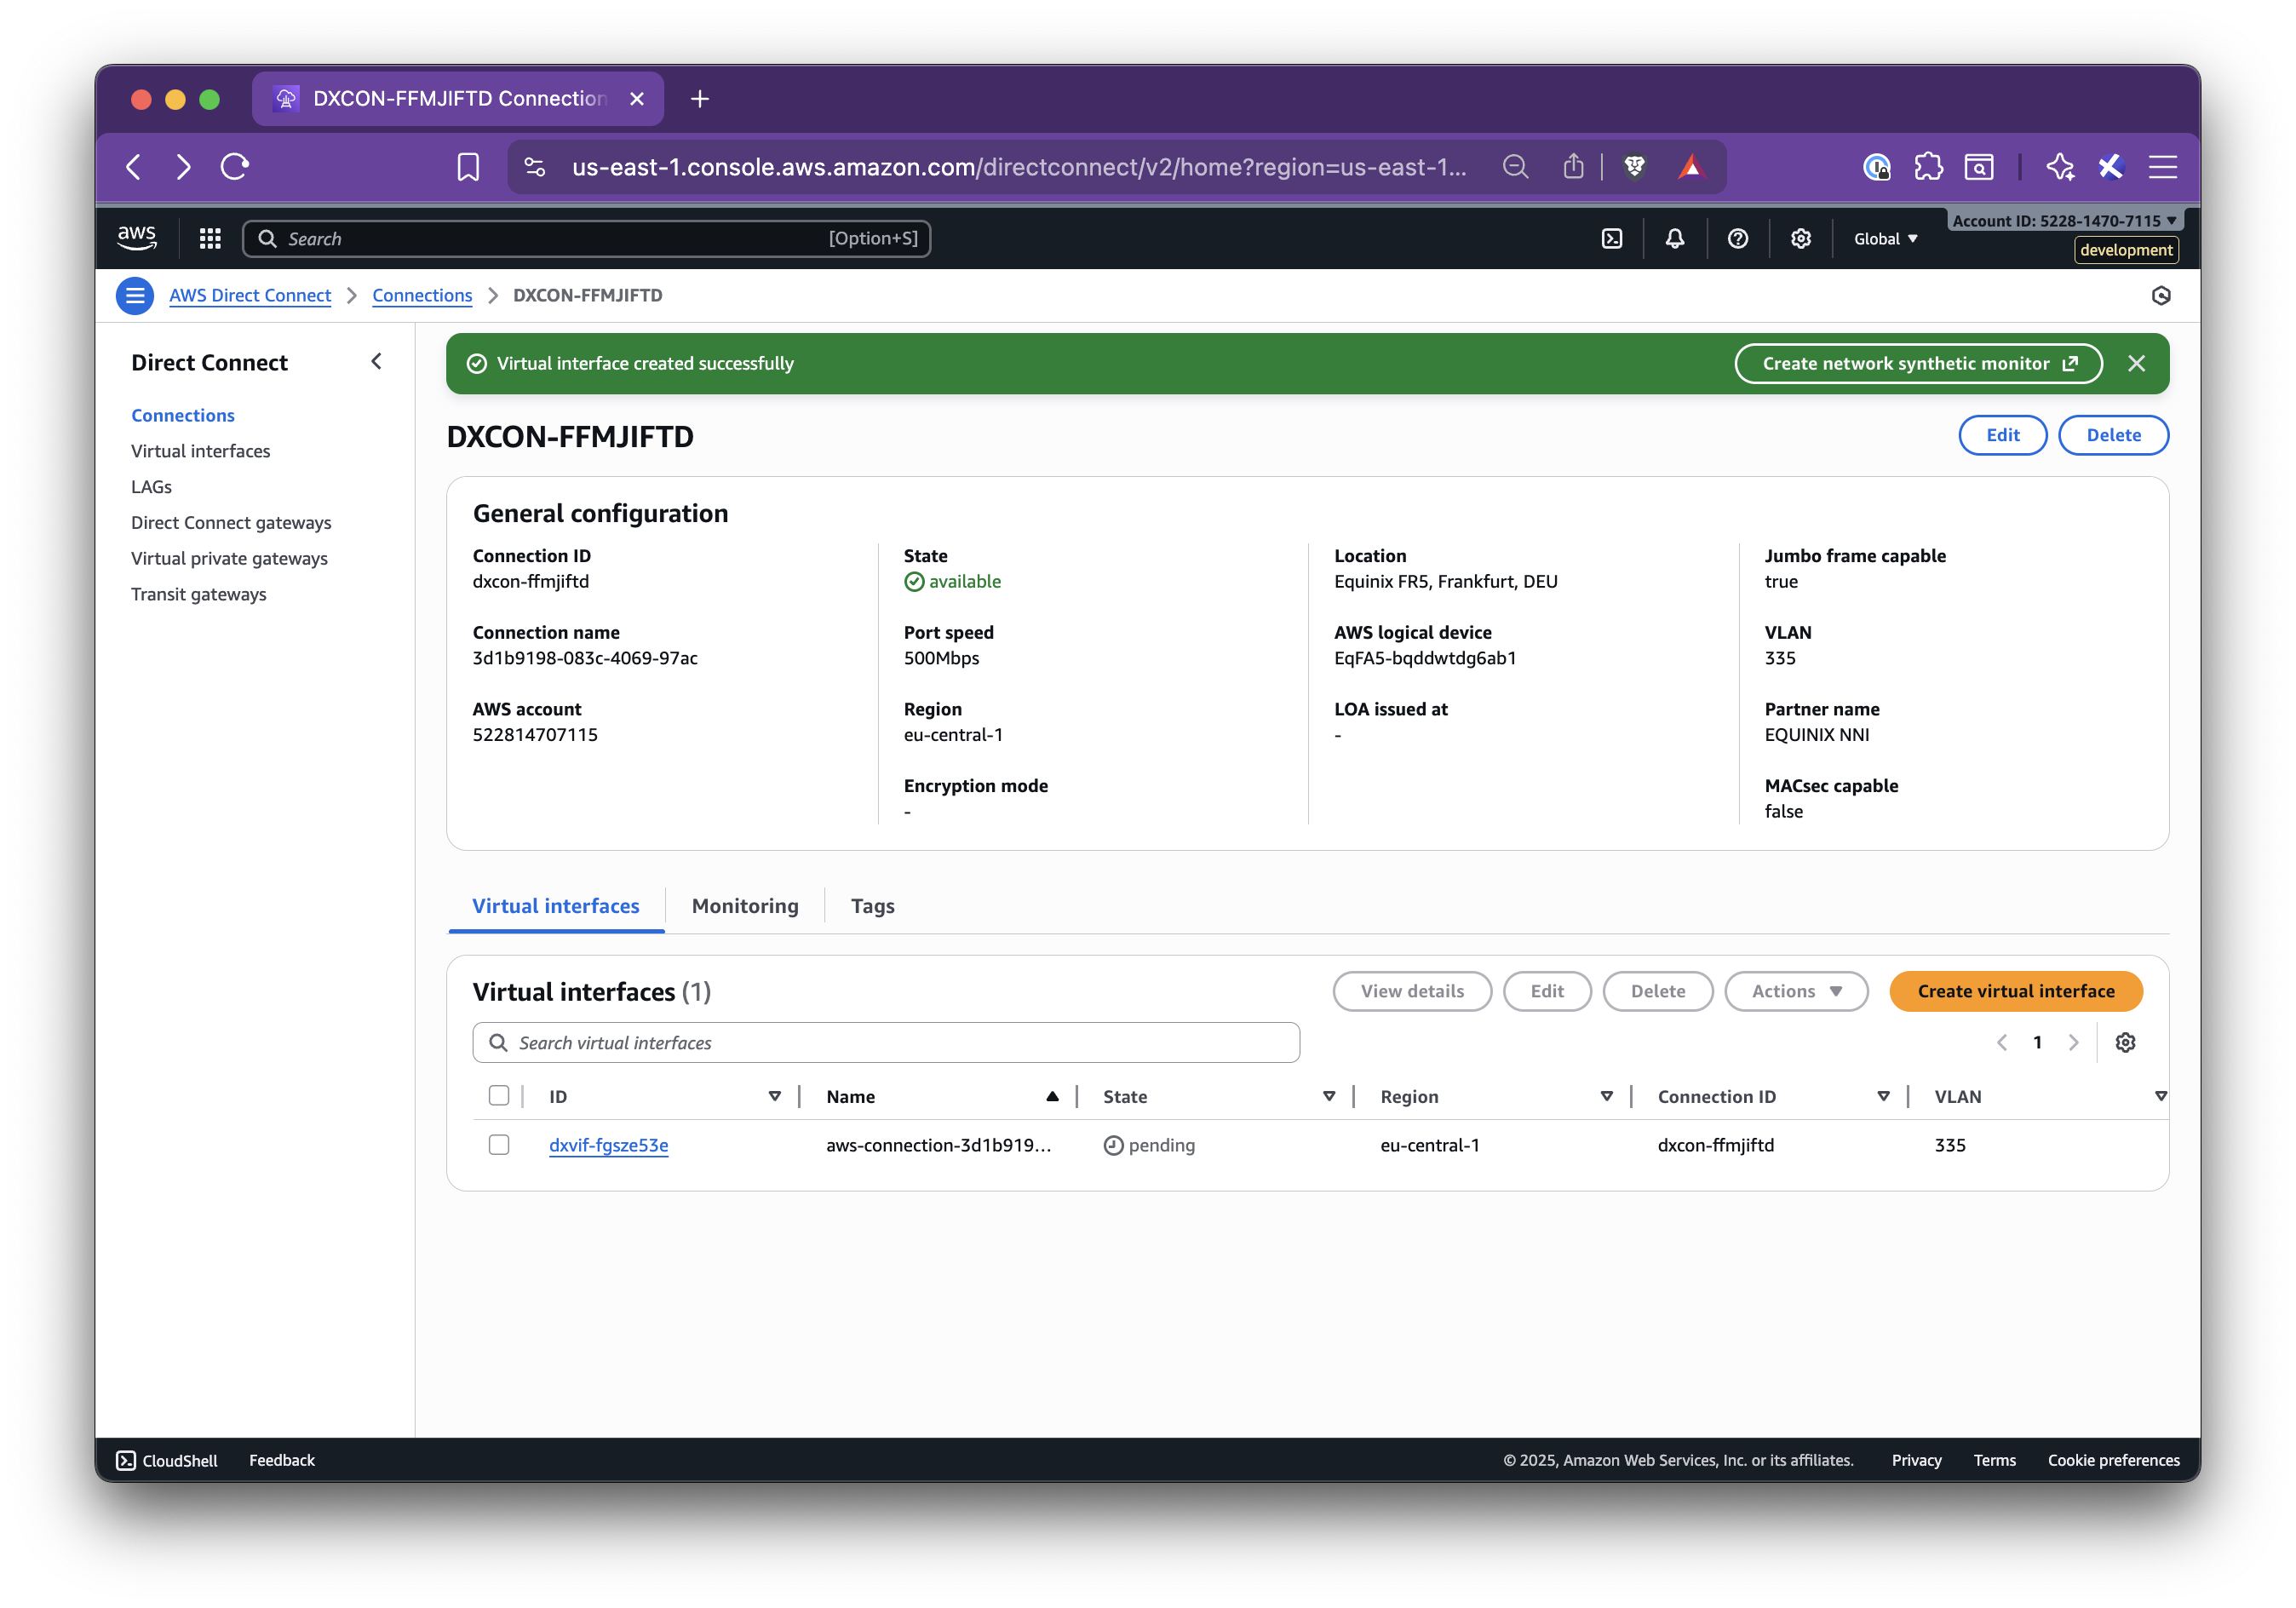
Step 4.5: Create a Private Virtual Interface (VIF)
Section titled “Step 4.5: Create a Private Virtual Interface (VIF)”- Go to AWS Direct Connect → Connections
- Select the connection and click Create virtual interface
- Configure the interface:
- Type: Private
- Gateway type: Virtual Private Gateway
- Virtual interface name: suggested from the panel
- Virtual interface owner: My AWS Account
- Virtual Private Gateway: the VGW attached
- BGP ASN: from the panel
- Peer IPs and BGP Auth Key: exactly as shown in the panel
- Click Create interface


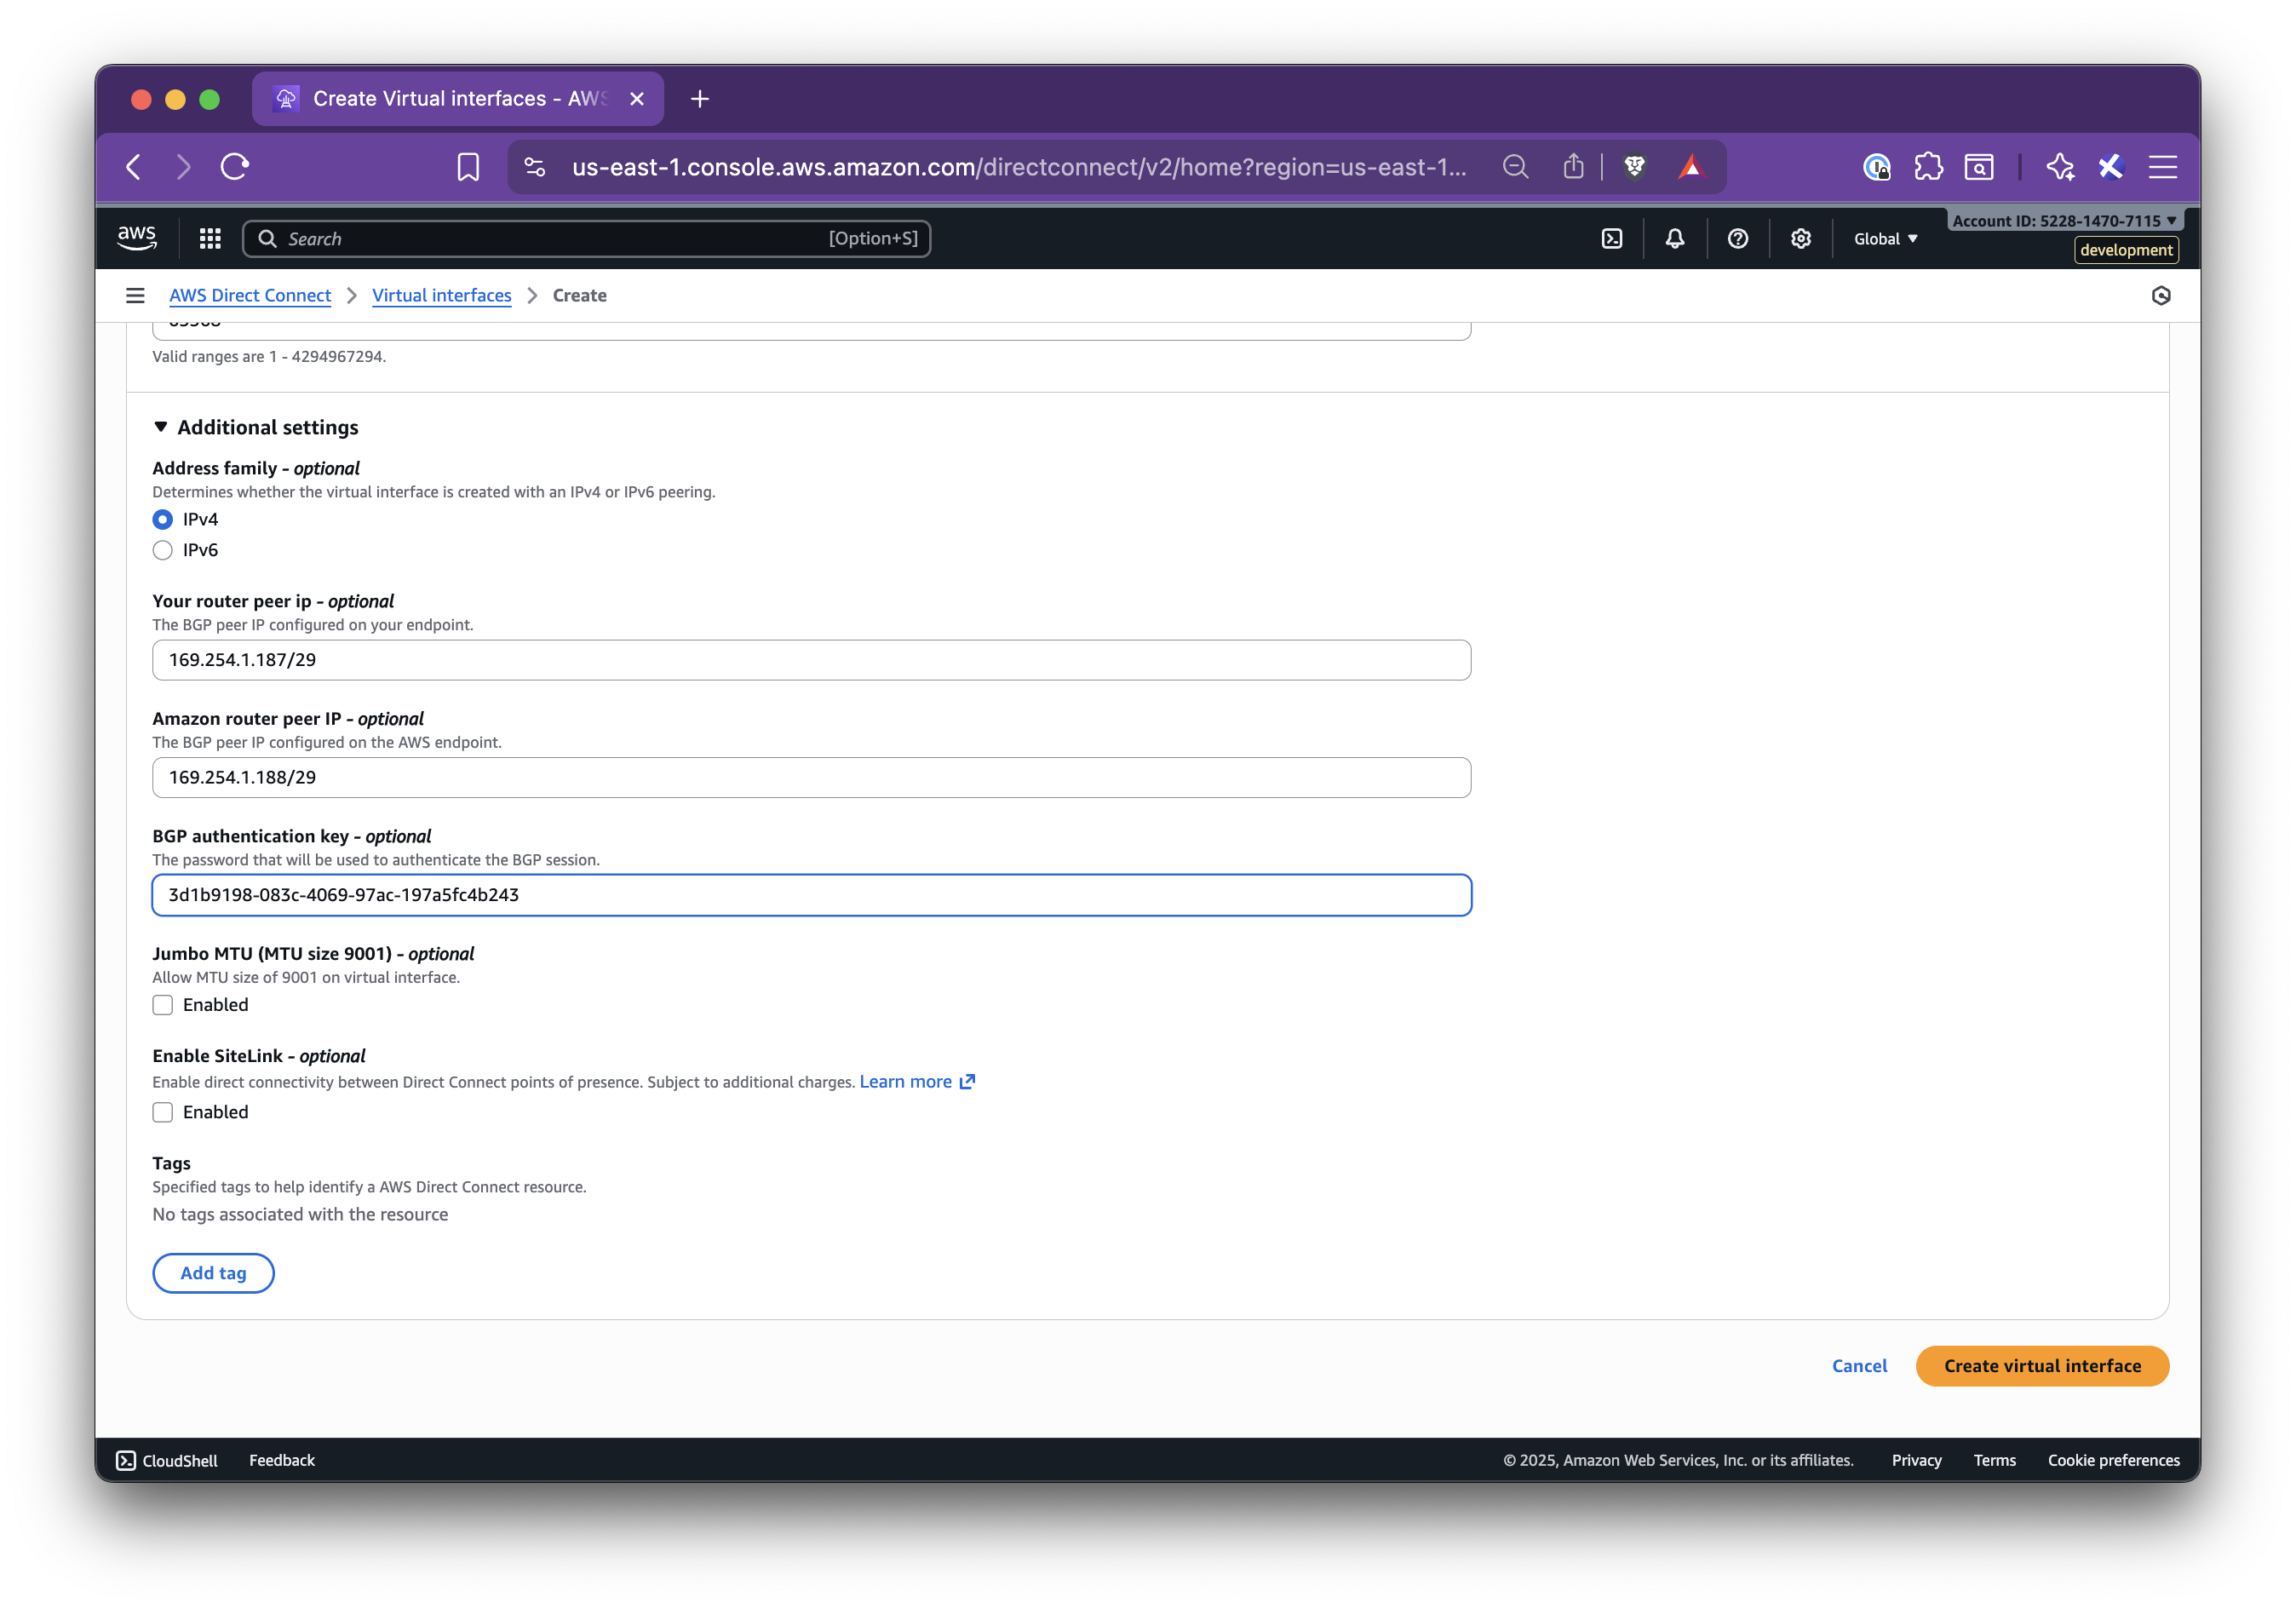
When the VIF is up, BGP will be established and the private link will be active.
Step 5: Validate Connectivity
Section titled “Step 5: Validate Connectivity”- From an EC2 instance in the AWS VPC, test connectivity to resources in your Nirvana VPC CIDR (for example, by pinging or curling a private service)
- From a Nirvana VM or Pod, test connectivity back to AWS resources
If connectivity fails, check:
- Route table entries (Nirvana CIDR to VGW)
- VIF status (BGP should be up)
- Security groups and NACLs on both sides
- Router IPs, ASNs, and BGP keys
Once traffic flows in both directions, your private connection between Nirvana and AWS is fully established! For additional support or troubleshooting, you can reach out to our support team.
Troubleshooting
Section titled “Troubleshooting”- VIF Down: Check for incorrect BGP keys, mismatched ASNs, or reversed IP addresses
- No Connectivity: Confirm route table entries, security group rules, and that CIDRs are not overlapping
- Stuck in Creating: Open connection details and verify all values. Check VIF state in AWS
- Edit: Use the menu to edit Provider CIDRs or reopen the Setup steps if needed